Linux Locate Command
Linux provides several tools that help you find or locate files. One of them is the find command. While the find command does a commendable job in locating files, it’s quite sluggish and takes up a lot of your time. A better alternative to the find command is the locate command.
Locate command is blazing fast and helps you find your files or search patterns without delays. It refers to a database called the updatedb database for searching the files instead of probing the entire filesystem, which is pretty much what the find command does and up a lot of time. This explains why the locate command is super-fast.
Let’s dive in and explore the Linux locate command and check out its example usages.
Basic Syntax
The syntax for using locate command is quite simple:
$ locate [options] [pattern]
Search for a file with a specific name
The basic form of the locate command is to locate a single file as shown.
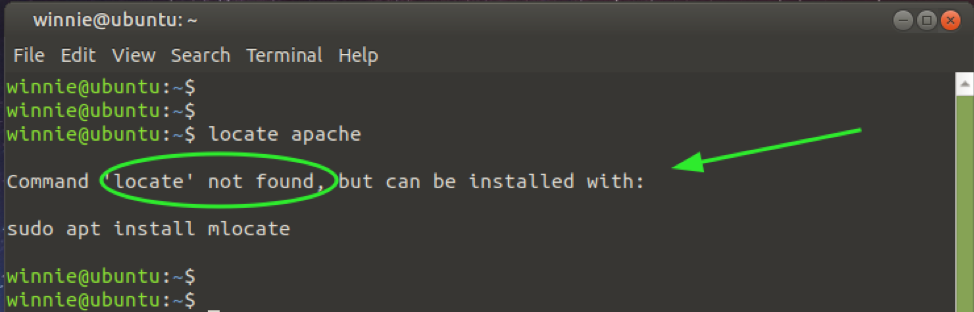
For some systems, locate command is not available, and you will encounter the following error – ‘ command ‘locate’ not found.’
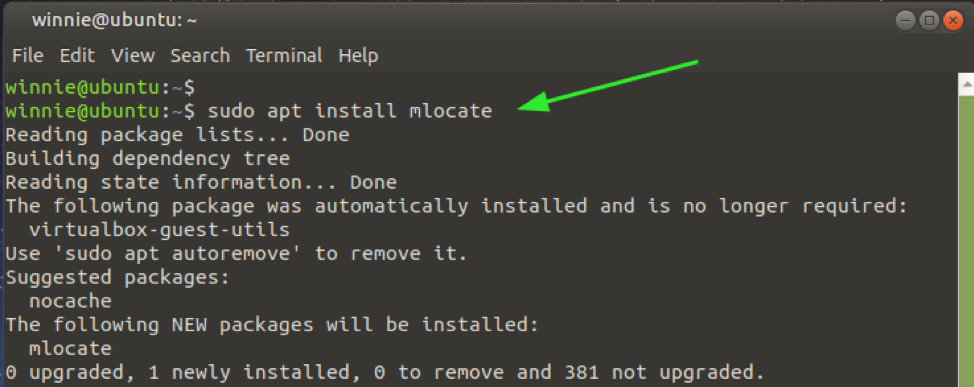
To resolve this issue, you need to install locate command as advised by the prompt on your terminal. For my case, I’m using Ubuntu 20.04, and I will install locate as follows:
$ sudo apt install mlocate
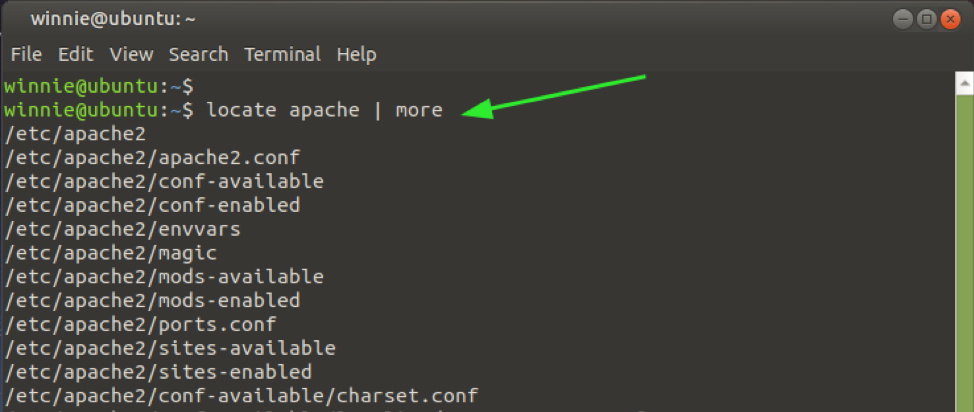
Once the installation is complete, you can start finding files as shown. For example, to locate a file(s) containing the string, apache runs the command. This will display all the files with the search pattern
Where the output is so long, consider piping the output to more commands for easier scrolling.
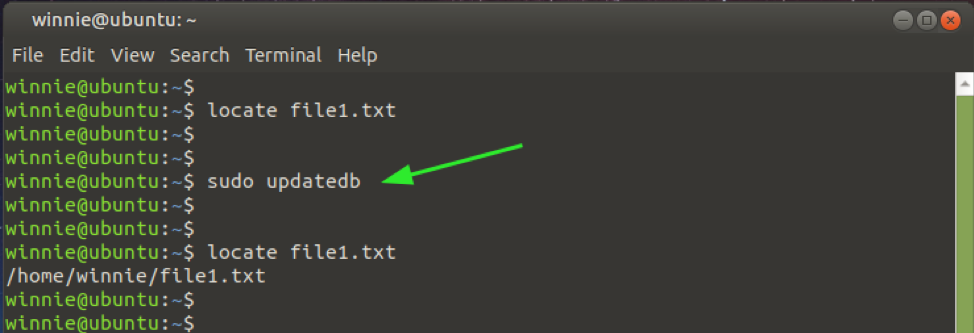
NOTE: If you have just created a new file, you need to update the locate database as shown before searching for the file.
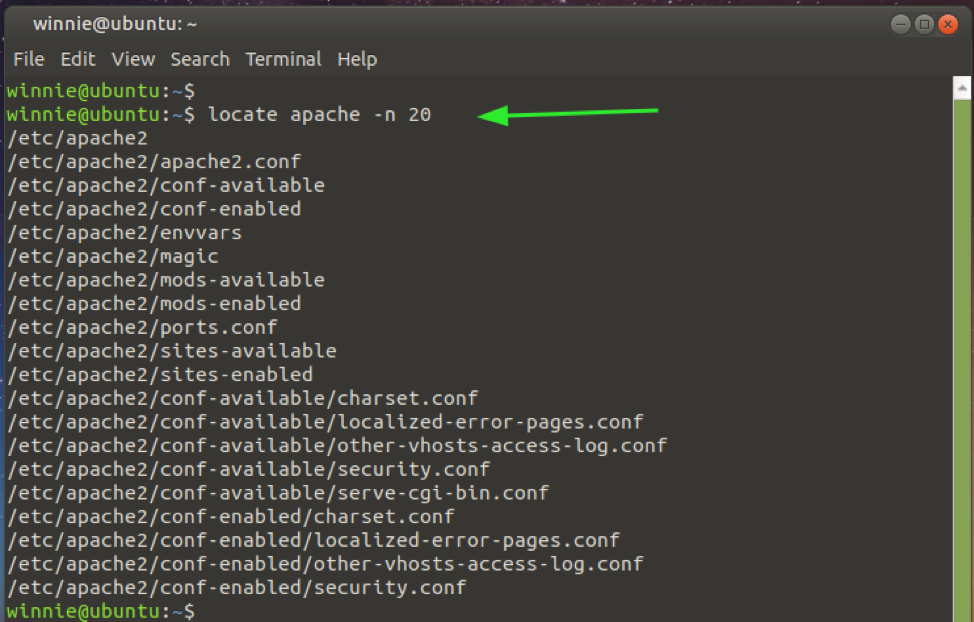
Limit the output to a specific number
If the output is a little overwhelming and perhaps you want to view the first N search queries, then execute the command below. Here, we have limited the output to only 20 search results.
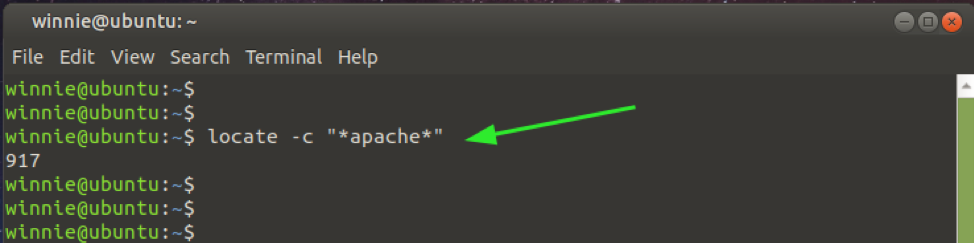
Display the number of file occurrences
To count the number of occurrences of a file name or search pattern using the locate command, invoke the -c option as shown.
$ locate -c “*apache*.”
The output shows that the command found 917 occurrences of the search pattern apache.
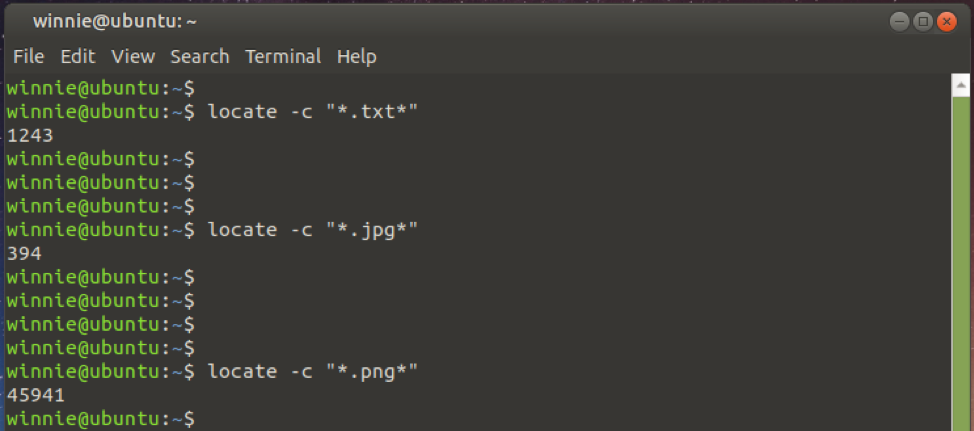
Display certain file types
Additionally, you can search for or count specific file types. For instance, to count the number of text files (.txt) or JPEG files (.jg) in the system, provide the file extension as shown.
$ locate -c “*.txt*”
$ locate -c “*.jpg*”
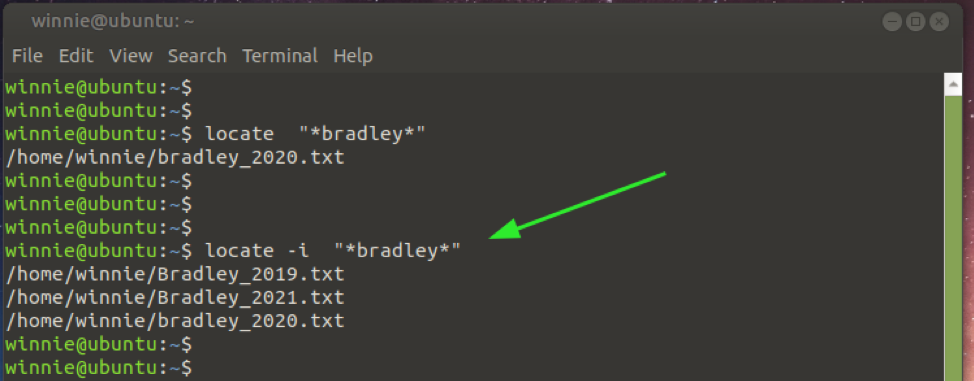
Ignore case sensitivity
The locate command, by default, is case-sensitive. This implies that the file apple.txt will not be treated equally as Apple.txt.
Thankfully, you can use the -i option to ignore case sensitivity. Here, we have 3 text files that start with the name Bradley. Of the three files, one starts with a lowercase letter.
The first command is case sensitive. It only displays the file that starts with a lowercase letter, but the second command ignores case sensitivity and displays all the instances of the string pattern
$ locate “*bradley*.”
$ locate -i “*bradley*.”
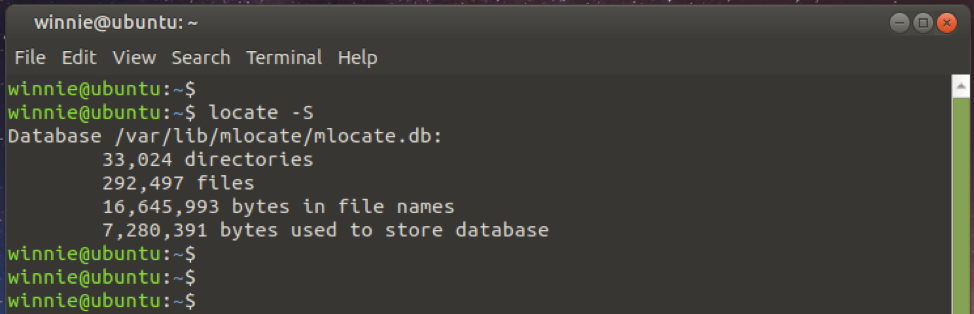
Get more information about locate database
To gather more insights on the locate database – mlocate.db – run the following command:
This prints out the number of files and directories indexed by the database, among other details.
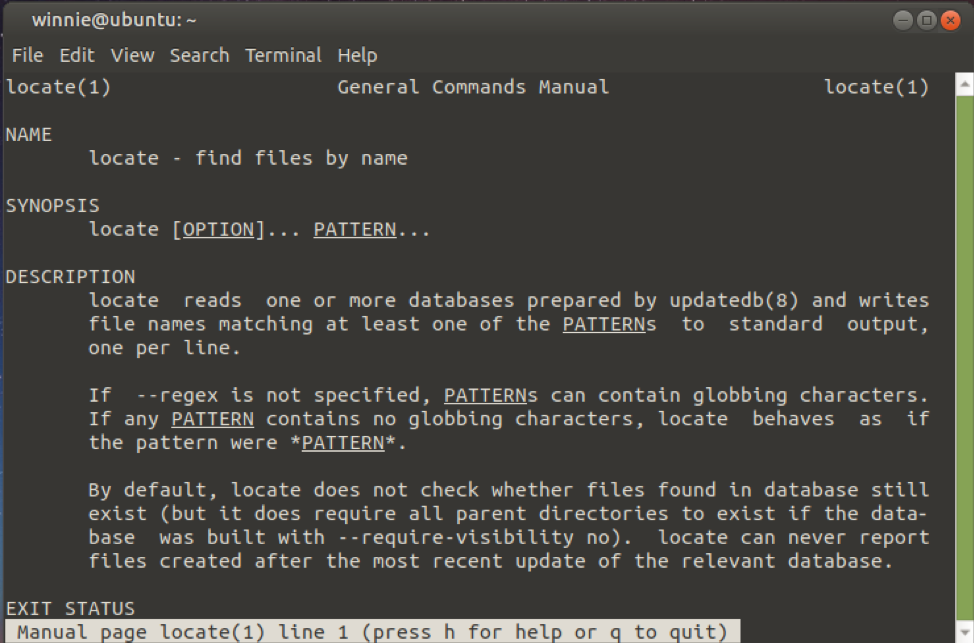
For additional command options, visit the man pages as shown.
Summary
Between find and locate command, the latter comes off as the better option given the speed and efficiency with which it provides the desired results. The only drawback with locate command is that you need to update its database every time you create or delete files on your system. Other than that, it comes off as a handy tool for searching a variety of files on the Linux system.

Leave a Reply