Linux Mint is arguably one of the easiest and most user-friendly Linux-based operating systems to come by in the Linux world, and while it might be second to Ubuntu in popularity, it remains the favorite of a large majority of Linux users around the globe.
Why? It’s easy; Linux Mint is essential “Ubuntu done right”. While the latter might not be bad in its own right, it is no news that the stability and flexibility the former offers are unmatched by Ubuntu.
Linux Mint developers have taken the Ubuntu code, refined and made it into what is one of the world’s most reliable systems. And with every new iteration of Linux Mint is a much more refined software that continues to trump over Ubuntu.
While some Ubuntu devotees will argue that Linux Mint is no better than the varying distributions based on Ubuntu it is worth noting that Mint is one of the very first to take the Ubuntu codebase and refine it for better usability and stability.
Mint is available in quite a few flavors which include Cinnamon, KDE, and Xfce with LMDE (Linux Mint Debian Edition) using an entirely different Debian base.
However, we’ll be walking you through the installation process of the Cinnamon variant on the latest Mint release – Linux Mint 20.1 “Ulyssa”.
Installing Linux Mint 20.1 Cinnamon Edition
Head on to the Linux Mint download page and get an image (one that suites your preference) – in this case, we are going with the 64bit Linux Mint Cinnamon variant.
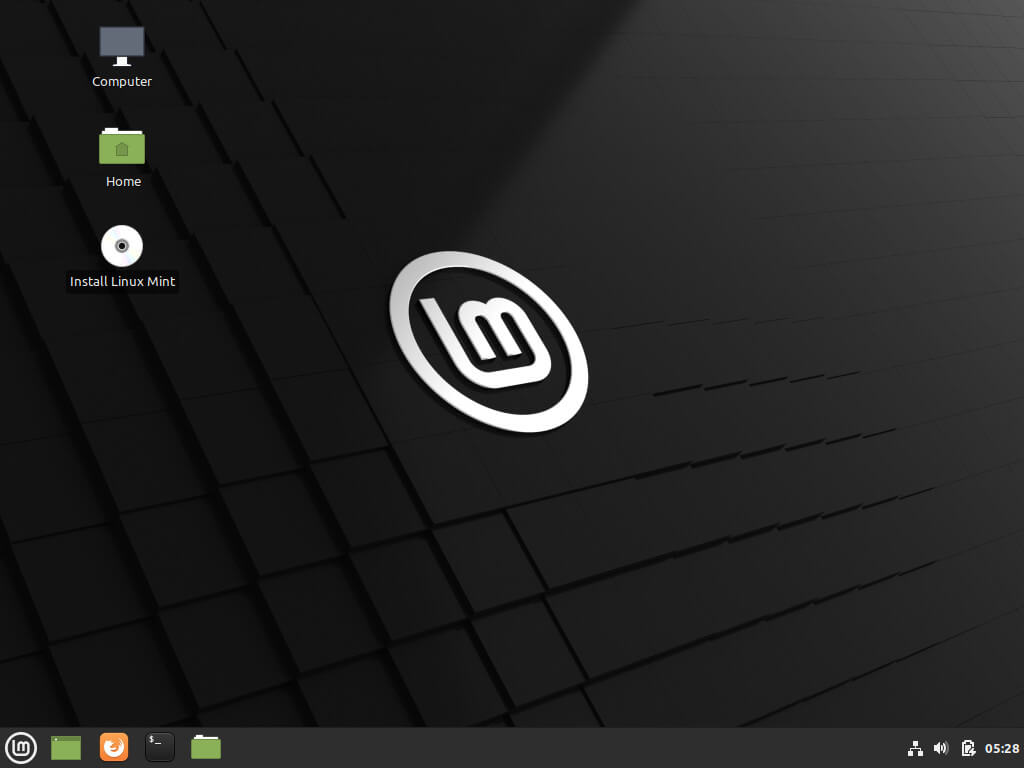
1. Once booted to the desktop, there you’ll find the computer, home and install Linux Mint icons (which you can’t miss).
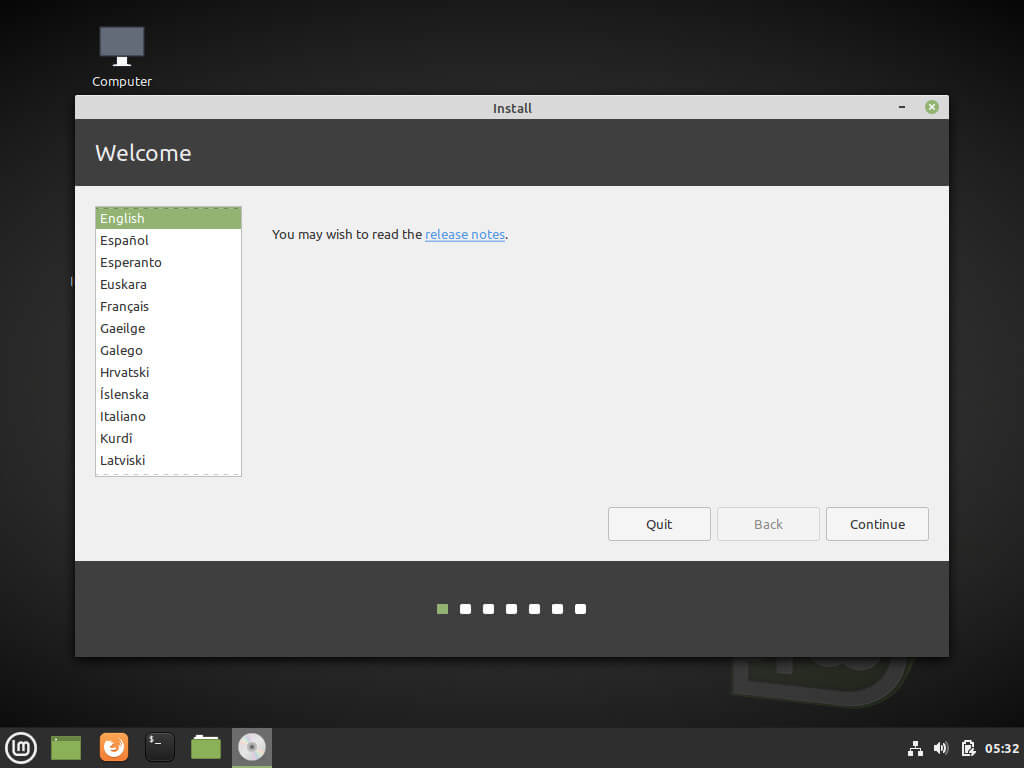
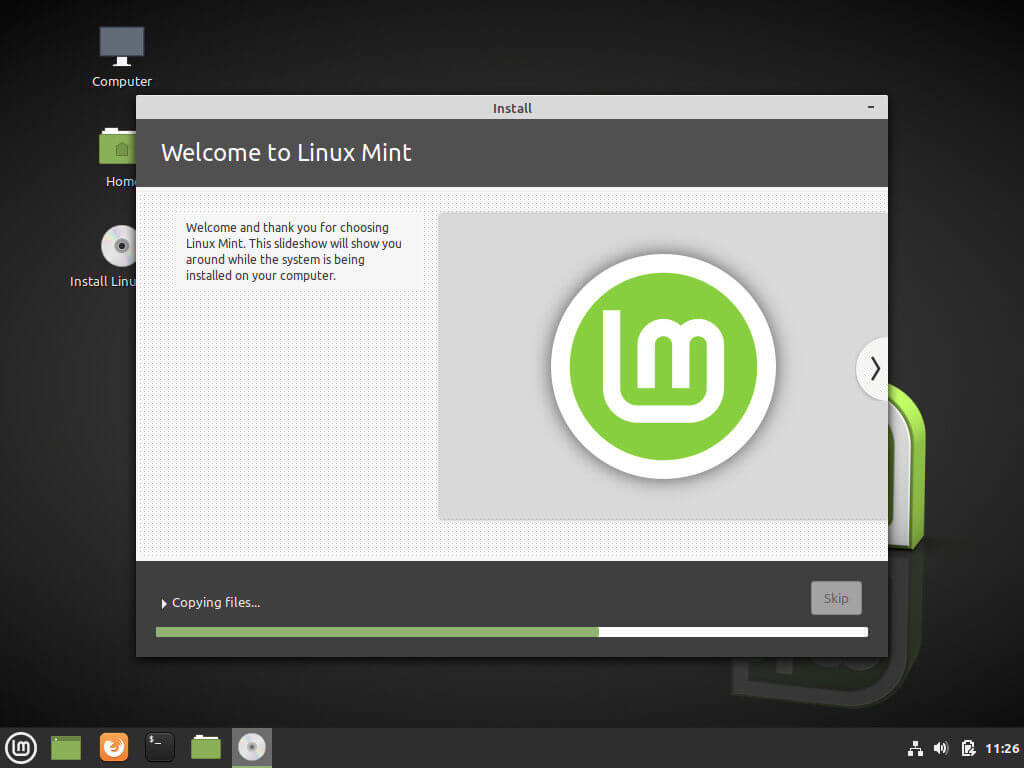
2. You go ahead and launch the installer and almost immediately, you’re prompted with a language selection screen where you select your install language before proceeding.
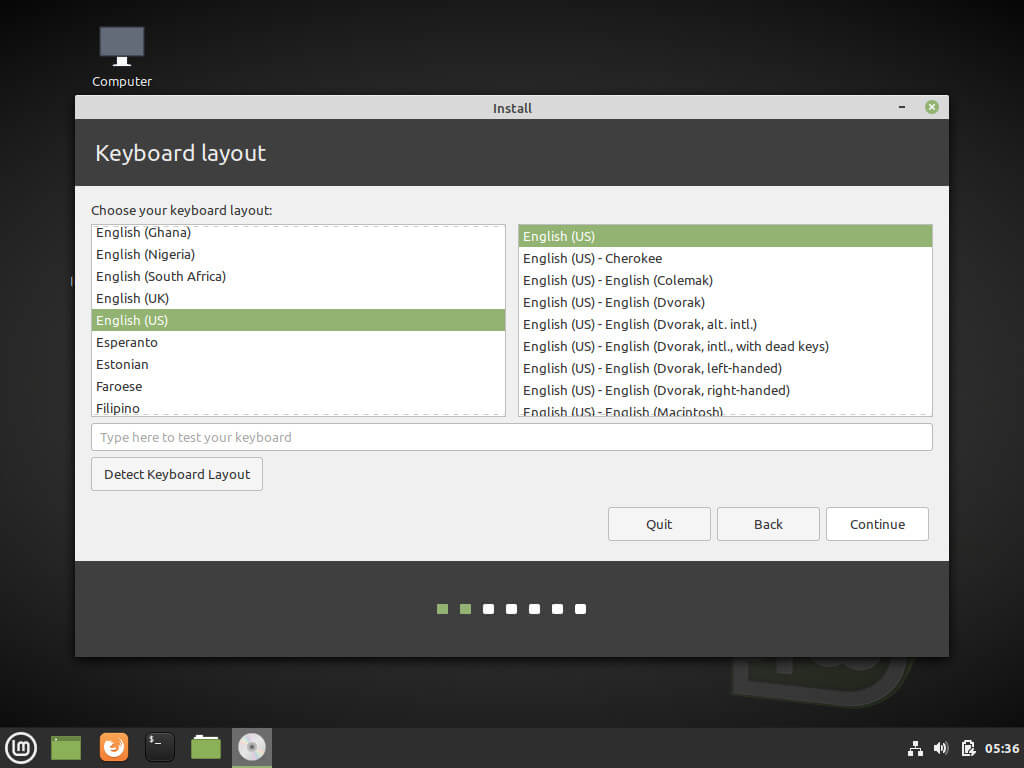
3. On the next screen, you’ll choose your keyboard layout and if you’re uncertain, you can as well type into the empty white box with grayed-out text then proceed by clicking the small rectangular box right below it.
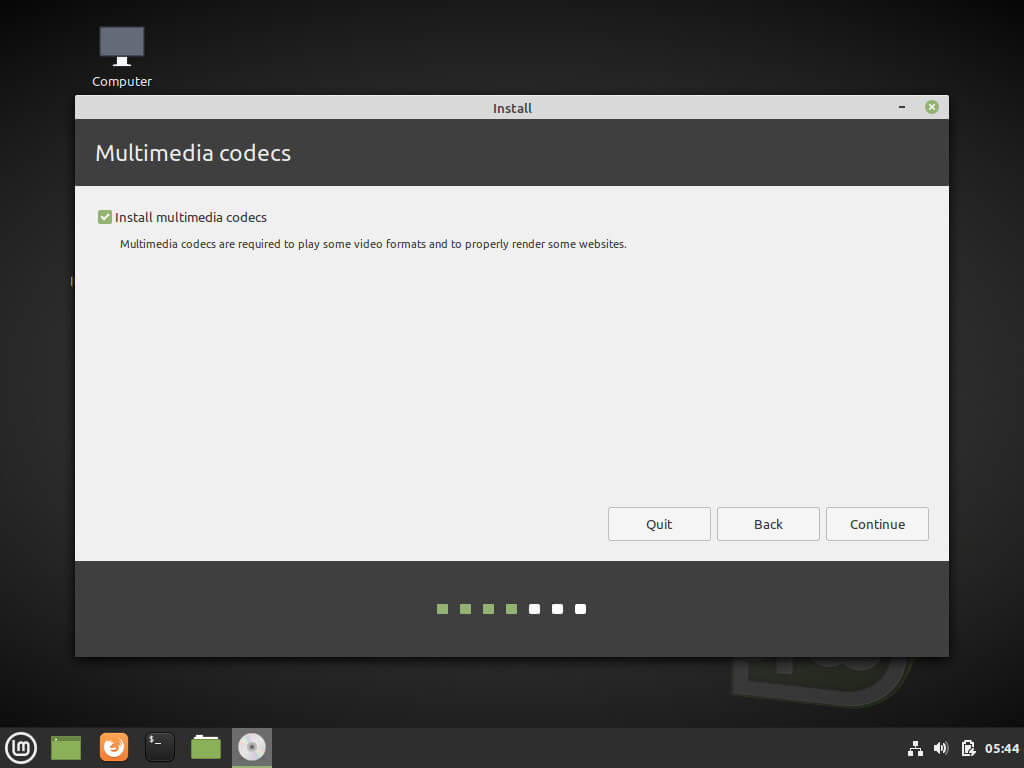
4. At this point, you see the installer ask you to install “Multimedia codecs” to play a variety of video formats and to render websites properly.
5. At the next step of the installation, you’re prompted to choose your installation type which always defaults to the first option, and depending on your system, i.e, if you already have an operating system installed, you’d be asked to continue in a dual-boot configuration or triple boot (as needed).
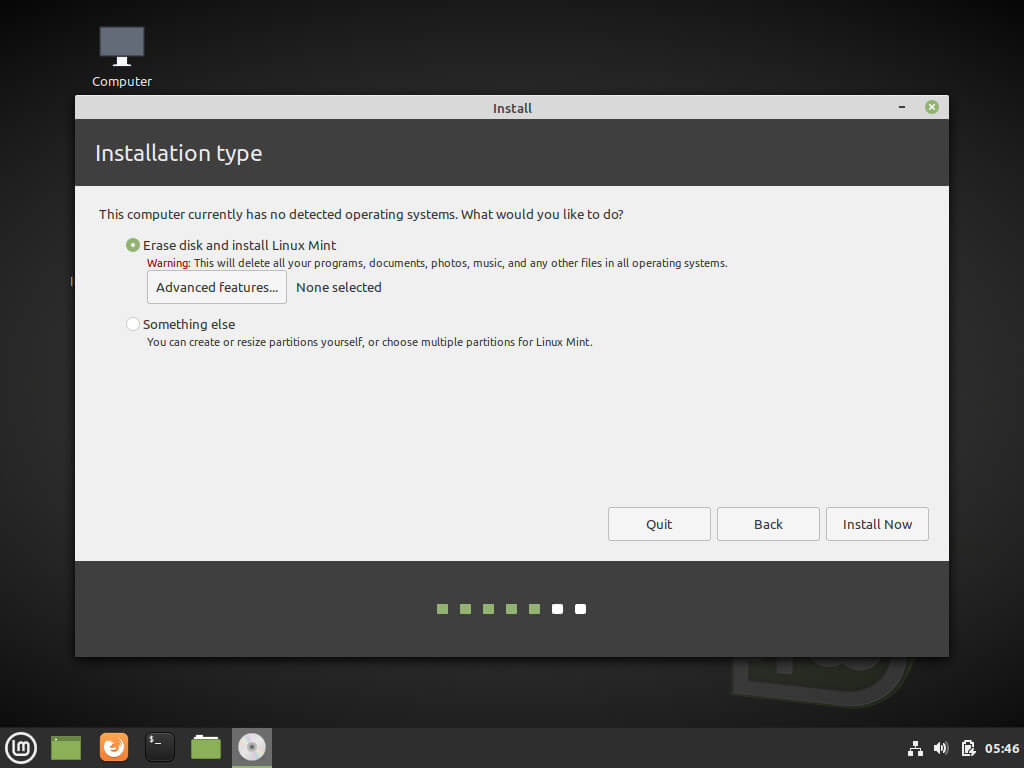
However, if the system is a clean slate, the options will default to “Erase disk and install Linux Mint” as see in the image below.
The options right below are for advanced users and you probably don’t want to touch them except you really know what you’re doing.
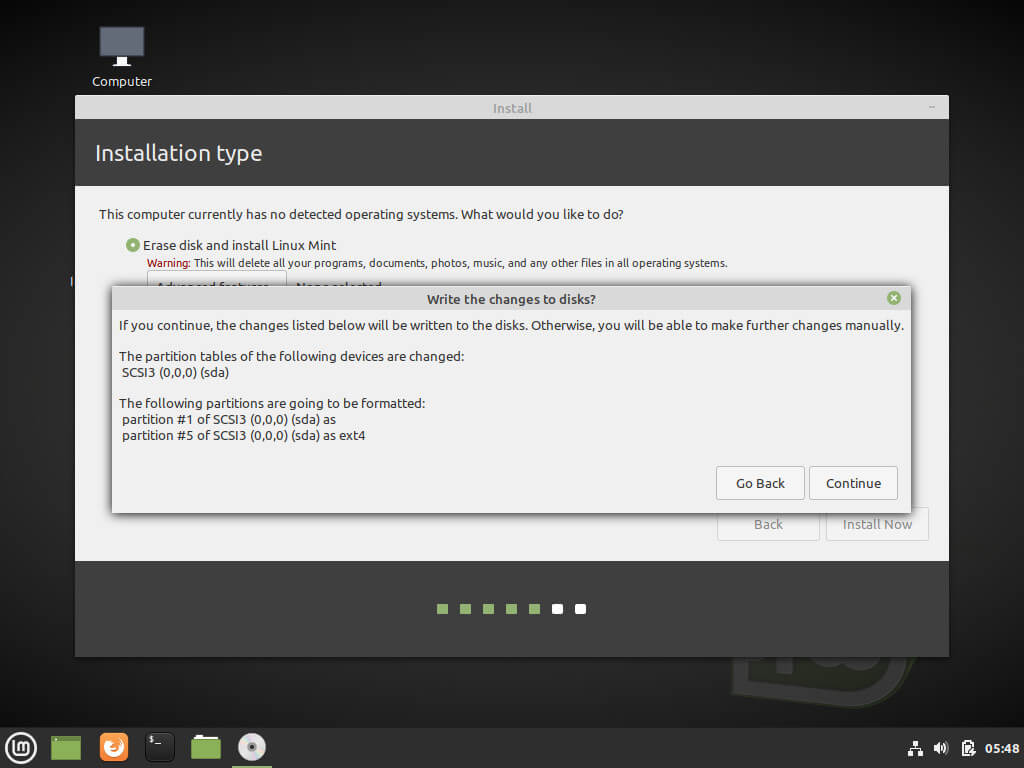
6. Once you click the “Install now” button, a quick dialog window shows you the changes that will be applied to your disk accordingly – pops up with all the configuration that will follow once you’re done installing the operating system.
7. Once you’ve successfully gone past this point, you’ve crossed the most crucial stages after which you’ll now select your region on the map.
Hint: it auto-selects provided you’re connected to the Internet.

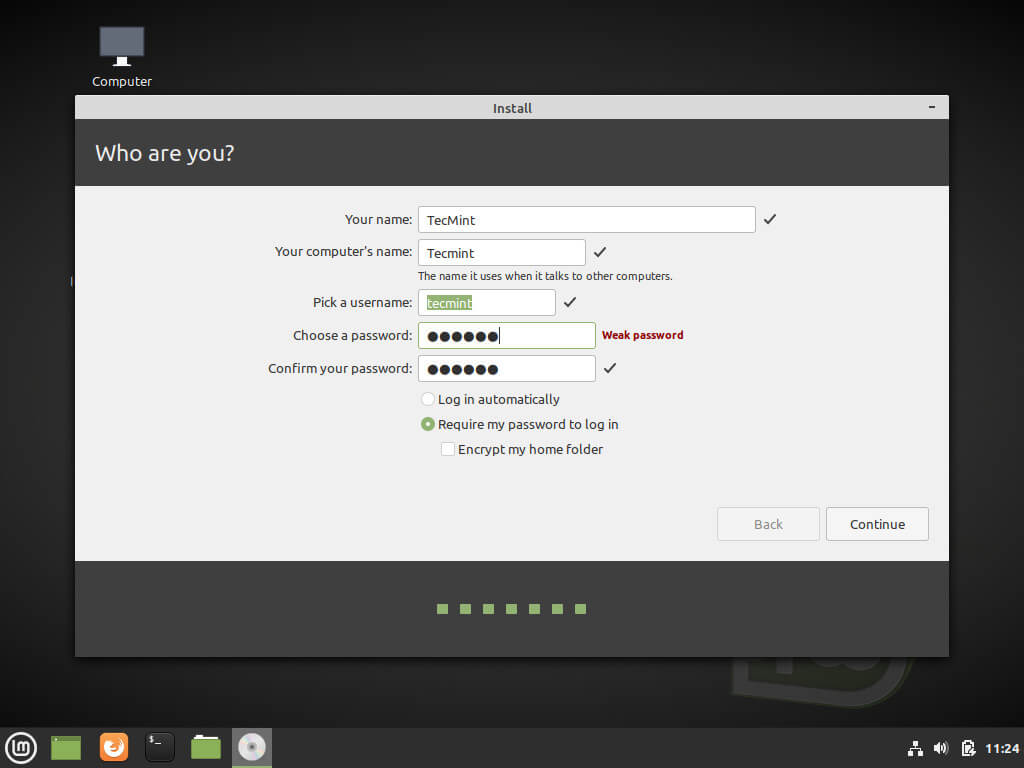
8. The next screen is where you input your details – Your name, password, etc.
9. Installation begins once you might have entered your details as needed.
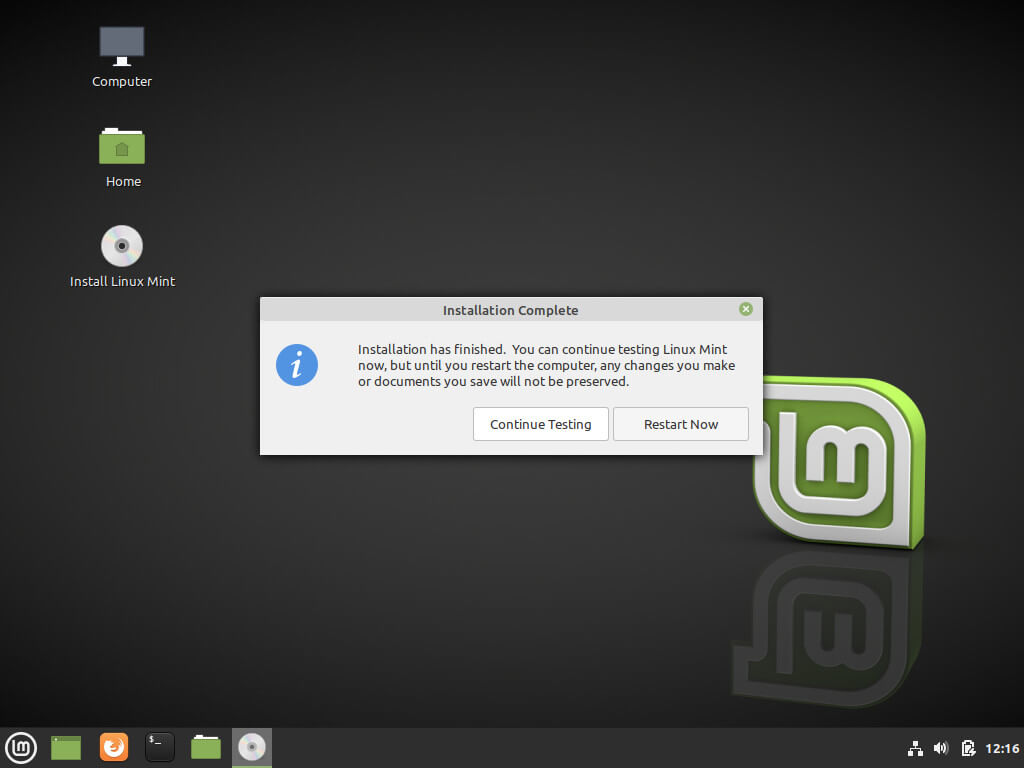
10. Once done, you’re prompted to continue testing or to restart your PC; in which case you select which options suits you at the moment – I’d take that you’d go with the latter.
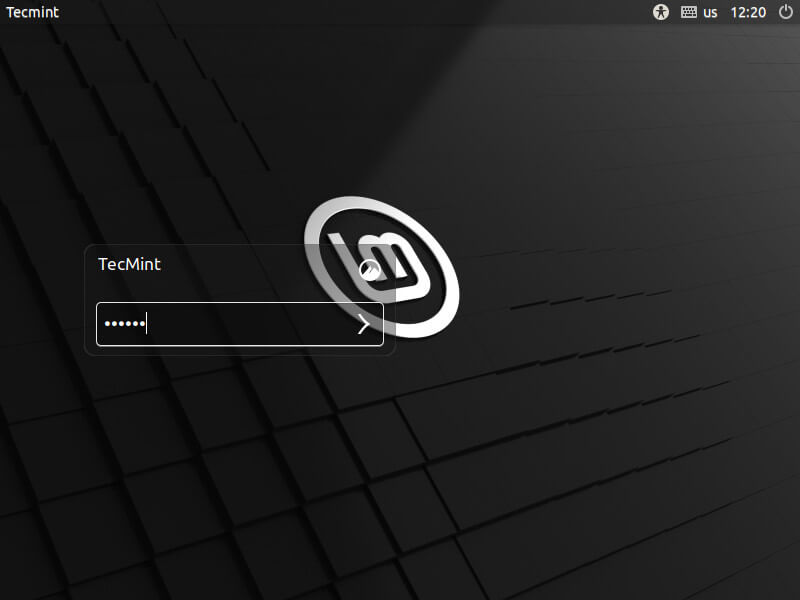
11. I’d assume you went with the latter after which your system restarts. At this point, you’ll input your username and then your password as needed and press enter to proceed.
12. Once on the desktop, you’re greeted with a welcome screen at which point you want to go to your lower right corner and untick the “show dialog at startup”.
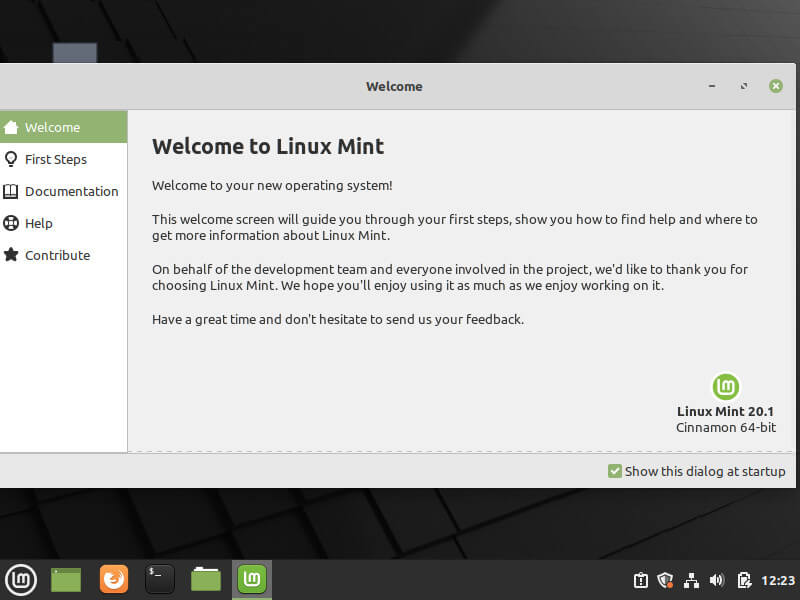
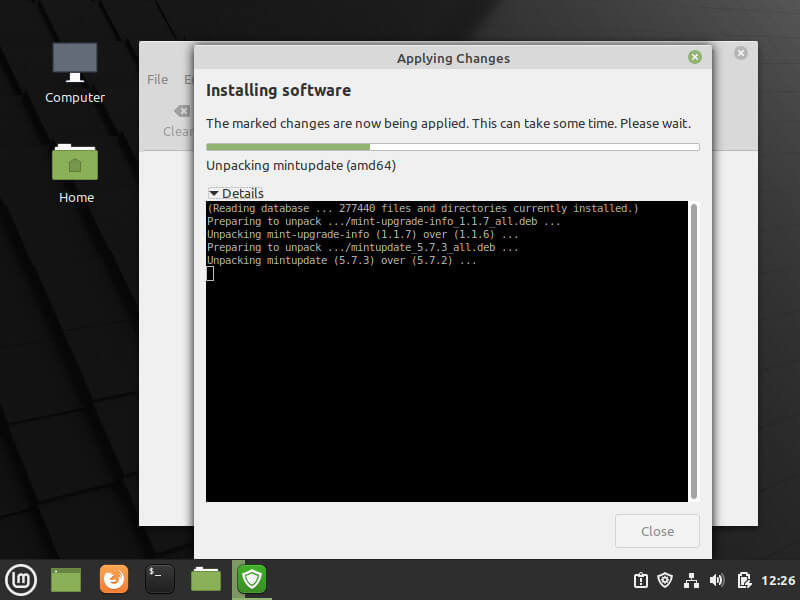
13. Once you’ve done that, you must update your system as it is a good practice with every Linux or any good PC user for that matter.
Brief Linux Mint 20.1 “Ulyssa” Review
It is without a doubt that Mint has made an example with its exemplary Cinnamon desktop to other Linux distributions and desktop environments alike.
You can almost certainly attribute Mint’s success to this day to the Cinnamon DE which is not only simplistic with a UI akin to Windows but also, intuitive as it doesn’t get in your way but rather makes your most basic tasks easier to get about with it.
This, of course, was a necessity at the time Linux Mint started to become a thing and Windows users that were looking to transition to Linux easily felt right at home with Cinnamon.
Cinnamon is currently at version 5.0.2 and 4.8 which got released with Linux Mint 20.1 Cinnamon (which is based on Ubuntu 20.04 LTS) and it features a host of improvements and a few new nifty additions here and there.
While it might not seem like a lot, there’s have been a lot of stability improvements to boot not to mention the loads and loads of bugs that have been squashed with this release.
Following the world popularity of Linux Mint’s Cinnamon, we can as well argue it to be the best desktop environment in Linux – which, is of course, subjective.
Clearly, its simplistic way of doing things derails from the likes of GNOME 3 of which it shares its core codebase, it is worth noting that it has since then matured to the extent of stripping as much of Gnome from its shell.
Clearly, with its own dedicated file manager (Nemo), system update software, and a few others, Mint with Cinnamon (which is the flagship of the bunch) is slowly approaching singularity.
While Cinnamon hardly has any learning curve to it, it is worth noting that there might be some cases where you can’t access some applications from the standard prebuilt software center in which case you’d have to go with the PPA way of doing things or downloading .debs from external sources.
This shouldn’t be too much of a hassle considering that the distro is based on Ubuntu 20.04 LTS; meaning there are ample resources online that will get you on with whatever it is you might need to do.
Most importantly, Linux Mint with Cinnamon provides an “out of the box” experience which has mostly spelled out the success of this operating system.
An added advantage of the Cinnamon desktop environment is its extreme configurability which can be achieved via applets, extensions, and desklets.
Customization also extends to the panel, calendar and themes. The image below shows is a good example of the extent to which I customize Cinnamon to give it a Google Material-like look and feel at the time I was still using it.
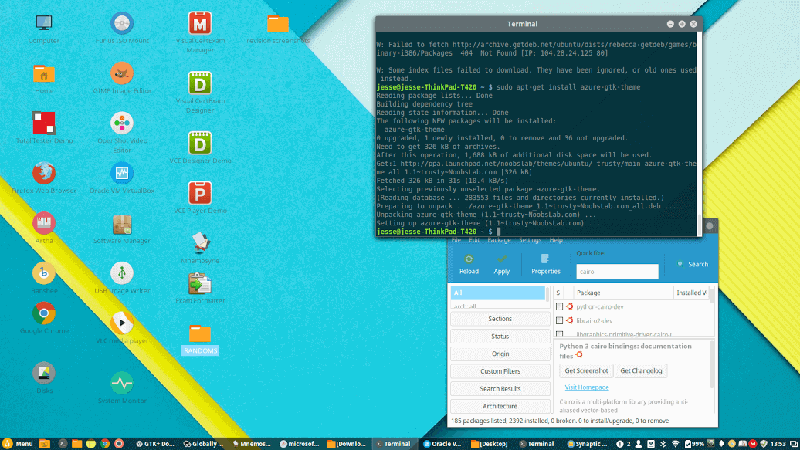
Just in case you want a similar setup after installing Mint, you can follow the instructions down below.
Install Paper Theme and Icons on Linux Mint
You can download the paper theme and icons here:
$ sudo add-apt-repository -u ppa:snwh/ppa
$ sudo apt-get update
$ sudo apt install paper-icon-theme
And I got an azure theme from noobslab’s PPA:
Install Azure Theme and Icons on Linux Mint
$ sudo add-apt-repository ppa:noobslab/themes
$ sudo apt-get install azure-gtk-theme
The respective packages for your system will be downloaded automatically and I got Numix circle here:
Install Numix Theme and Icons on Linux Mint
$ sudo add-apt-repository ppa:numix/ppa
$ sudo apt update
$ sudo apt install numix-icon-theme-circle
Conclusively, Linux Mint together with Cinnamon or whatever flavor you decide to go with (as they share the same underlying code) is quite the distro that lives up to its name especially if you’re the type of Linux user that looks to be more productive rather than explorative, Linux Mint will do you more than just justice.
Provided that the latest release Linux Mint 20.1 is based on an LTS, you’ll continue to get updates for the next three long years which is when Focal Fossa expires and you’ll have to upgrade to the next version of the operating system that will be based on the next LTS of the time.
If you’ve given Mint or Cinnamon a shot in the past or if it’s your current distro, kindly share your experience, tips, and whatnot with us in the comments below. Also, if you come across any challenge whatsoever, or getting Mint to run effectively, let us know in the comments too. We’ll be sure to reply to you as soon as possible. Happy exploring!