Unlike many different filesystems, ZFS mounts the swimming pools and filesystems that you just create mechanically.
If you create a ZFS pool pool1, it’s going to mechanically mount it within the /pool1 listing of your laptop.
If you create a ZFS filesystem paperwork on pool pool1, it’s going to mechanically mount it within the /pool1/paperwork listing of your laptop.
In the similar means, in case you create every other ZFS filesystem downloads on pool pool1, it’s going to mechanically mount it within the /pool1/downloads listing of your laptop. You get the theory.
In this newsletter, I’m going to turn you easy methods to mount ZFS swimming pools and filesystems in different directories of your laptop. So, let’s get began.
Table of Contents
- Filesystem Properties for Configuring ZFS Mounting Behavior
- Changing Mount Path of ZFS Pools
- Changing Mount Path of ZFS Filesystems
- Disable Mounting for ZFS Pools
- Conclusion
- References
Filesystem Properties for Configuring ZFS Mounting Behavior
The fixed assets of the ZFS filesystem is used to determine whether or not a ZFS pool/filesystem is fixed to your laptop or no longer. If a ZFS pool/filesystem is fixed to your laptop, the fixed assets can be set to sure. If a ZFS pool/filesystem isn’t fixed to your laptop, the fixed assets can be set to no.
NOTE: fixed is a read-only assets, and you’ll be able to’t exchange that from one price to the opposite. ZFS will mechanically exchange the worth of the fixed assets relying on whether or not a ZFS pool/filesystem is fixed or no longer.
The canmount and mountpoint homes of the ZFS filesystem are used to configure the mounting habits of the ZFS swimming pools and filesystems.
ZFS makes use of the canmount assets of a pool/filesystem to resolve whether or not the pool/filesystem may also be fixed or no longer.
ZFS makes use of the mountpoint assets of a pool/filesystem to resolve the listing trail the place it’s going to mount the pool/filesystem.
The canmount assets could have the values: on, off, or noauto. The default is on for brand spanking new ZFS swimming pools and filesystems. If this assets is about on a ZFS pool, it isn’t inherited via the filesystems created on that pool.
- canmount=on — The ZFS swimming pools and filesystems that experience canmount set to on may also be fixed mechanically at the listing trail set via the mountpoint assets.
- canmount=noauto — The ZFS pool/filesystem that has canmount set to noauto may also be fixed at the listing trail set via the mountpoint assets of the pool/filesystem. However, ZFS gained’t do it mechanically. You must do it manually as a substitute.
- canmount=off — The ZFS swimming pools and filesystems that experience canmount set to off can’t be fixed.
When you create a ZFS pool pool1, the mountpoint of the pool pool1 is about to /pool1, and canmount is about to on. When you create a brand new ZFS filesystem paperwork at the pool pool1, the mountpoint for the filesystem is about to /pool1/paperwork, and its canmount is about to on via default. In the similar means, in case you create every other ZFS filesystem downloads at the pool pool1, the mountpoint for the filesystem is about to /pool1/downloads, and its canmount is about to on via default.
You must know the elemental principle to know how the ZFS swimming pools/filesystems mounting procedure works. In the following sections, I will be able to display you many sensible examples of what I’ve mentioned on this segment. Let’s transfer on.
Changing Mount Path of ZFS Pools
For the demonstration, I will be able to create a brand new ZFS pool the usage of the vda and vdb garage gadgets, as observed within the screenshot underneath:
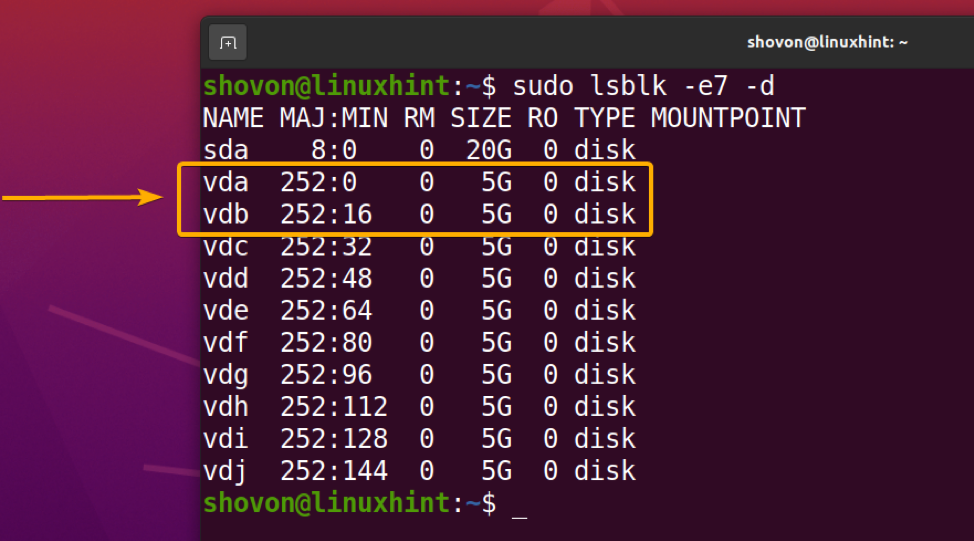
To create a brand new ZFS pool pool1 the usage of the vda and vdb garage gadgets in reflect configuration, run the next command:
$ sudo zpool create -f pool1 reflect vda vdb

A brand new ZFS pool pool1 must be created. The mountpoint must be set to /pool1, as observed within the screenshot underneath:
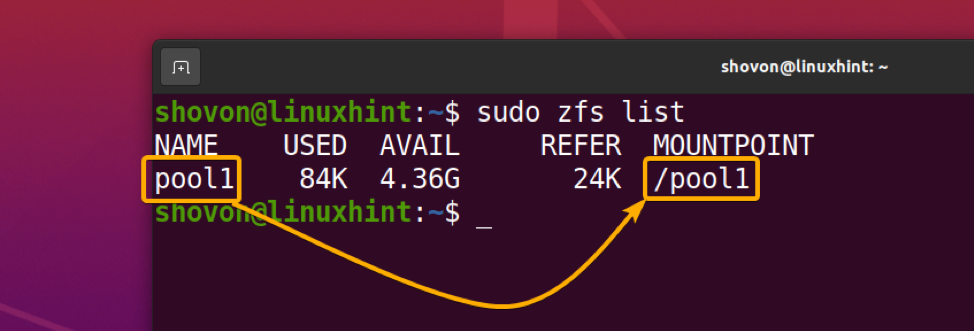
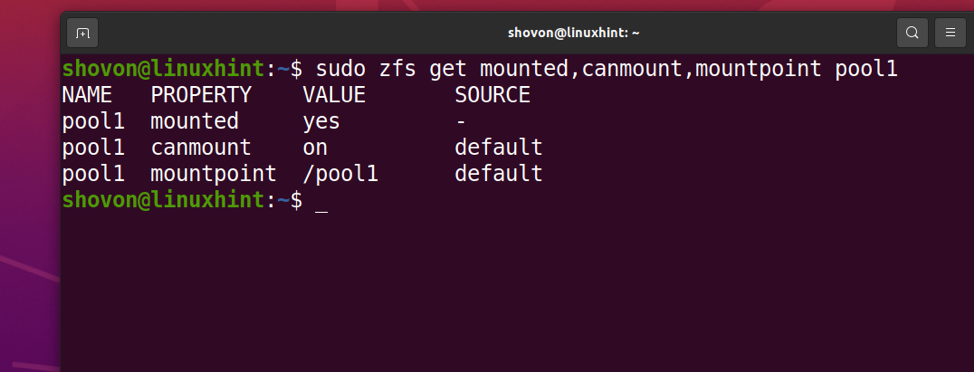
As you’ll be able to see, the ZFS pool pool1 is fixed (fixed is sure). It may also be fixed (canmount is on), and its mount listing trail is /pool1 (mountpoint is /pool1).
$ sudo zfs get fixed,canmount,mountpoint pool1
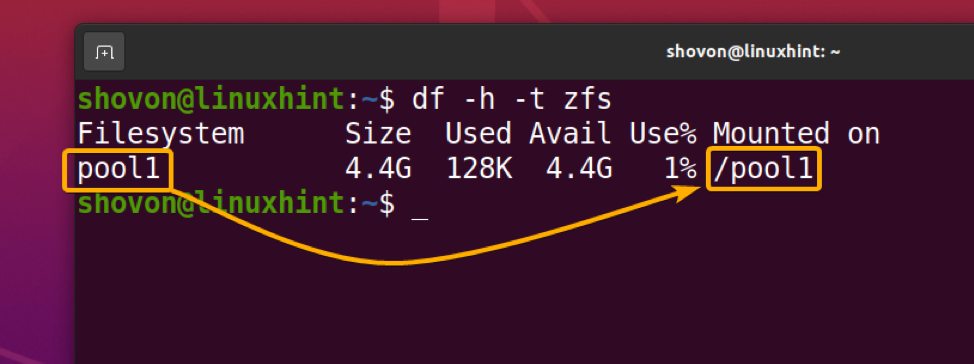
You can examine that the ZFS pool pool1 is fixed at the /pool1 listing of your laptop from the output of the df command:
To exchange the mount trail of the ZFS pool pool1 to /mypool, set the mountpoint assets of the ZFS pool pool1 as follows:
$ sudo zfs set mountpoint=/mypool pool1

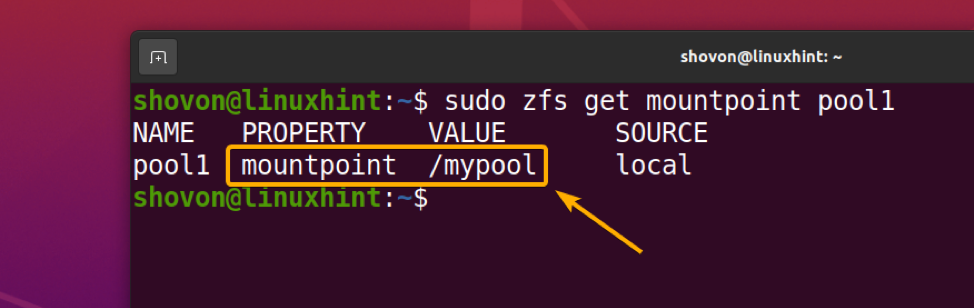
As you’ll be able to see, the mountpoint assets of the ZFS pool pool1 is about to /mypool:
$ sudo zfs get mountpoint pool1
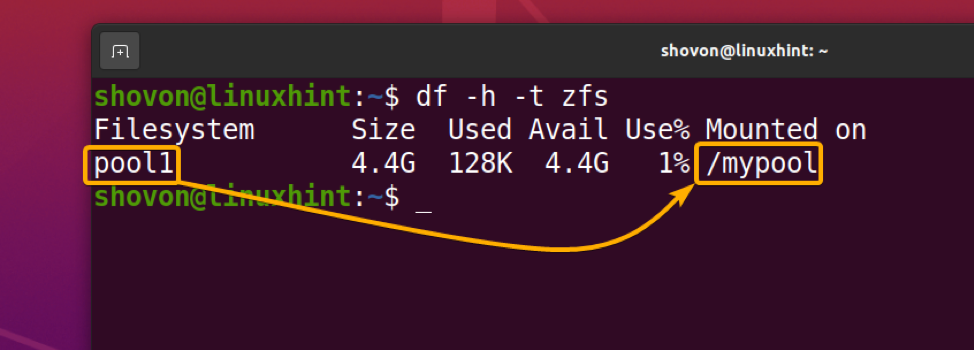
The mount trail of the ZFS pool pool1 must be modified to /mypool, as observed from the output of the df command underneath:
Changing Mount Path of ZFS Filesystems
In this segment, I’m going to turn you easy methods to exchange the mount trail of ZFS filesystems.
Create new ZFS filesystem paperwork at the ZFS pool pool1 with the next command:
$ sudo zfs create pool1/paperwork

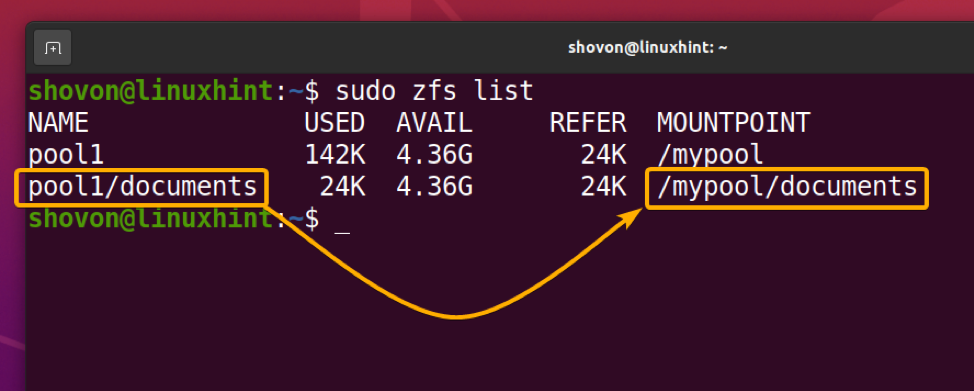
A brand new ZFS filesystem paperwork must be created at the ZFS pool pool1, and its mountpoint must be set to /mypool/paperwork, as you’ve modified the pool pool1’s mountpoint to /mypool previous:
As you’ll be able to see, the ZFS filesystem paperwork are fixed (fixed is sure). It may also be fixed (canmount is on), and its mount listing trail is /mypool/paperwork (mountpoint is /mypool/paperwork):
$ sudo zfs get fixed,canmount,mountpoint pool1/paperwork

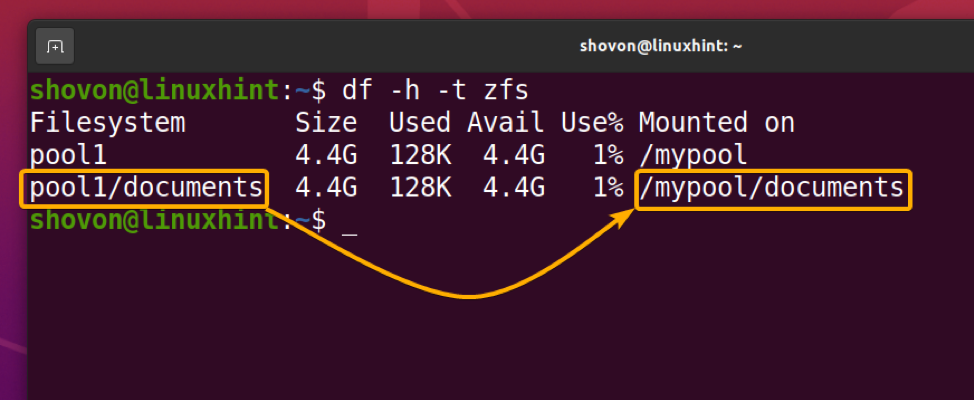
The ZFS filesystem paperwork must be fixed at the /mypool/paperwork listing of your laptop, as observed from the output of the df command underneath:
To exchange the mount trail of the ZFS filesystem paperwork to /mydocs, set the mountpoint assets of the ZFS filesystem paperwork as follows:
$ sudo zfs set mountpoint=/mydocs pool1/paperwork

As you’ll be able to see, the mountpoint assets of the ZFS filesystem paperwork is about to /mydocs:
$ sudo zfs get mountpoint pool1/paperwork

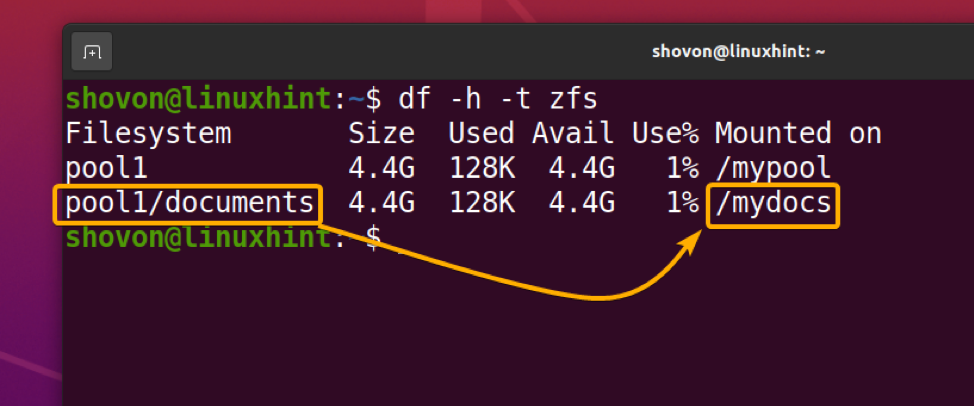
The mount trail of the ZFS filesystem paperwork must be modified to /mydocs, as observed from the output of the df command underneath:
Disable Mounting for ZFS Pools
At occasions, chances are you’ll solely wish to mount the ZFS filesystems of a ZFS pool however no longer the pool itself. In that case, you’ll be able to disable mounting for the mentioned ZFS pool and solely set mount paths for the filesystems on that ZFS pool.
I will be able to create a brand new ZFS pool the usage of the garage gadgets vdc and vdd to reveal it:
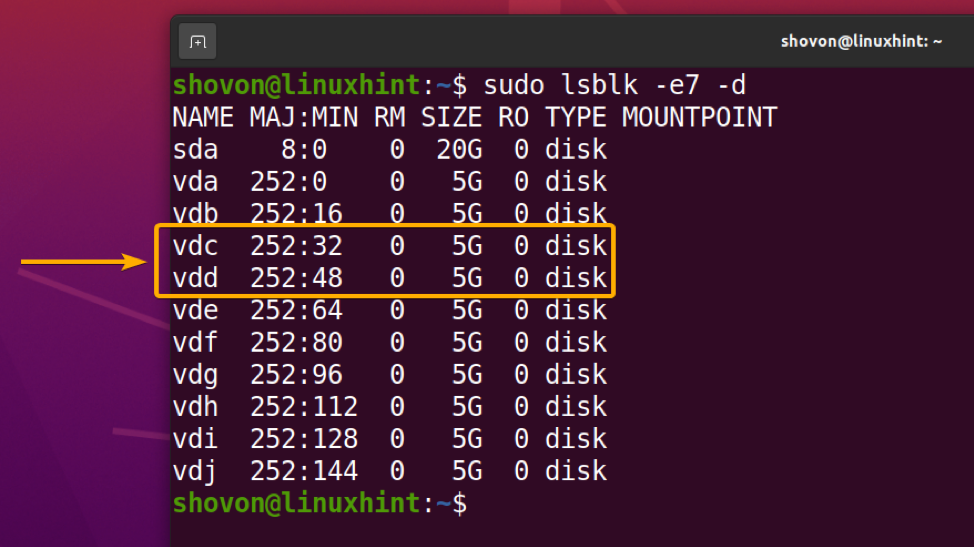
To create a brand new ZFS pool pool2 the usage of the vdc and vdd garage gadgets in reflect configuration, run the next command:
$ sudo zpool create -f pool2 reflect vdc vdd

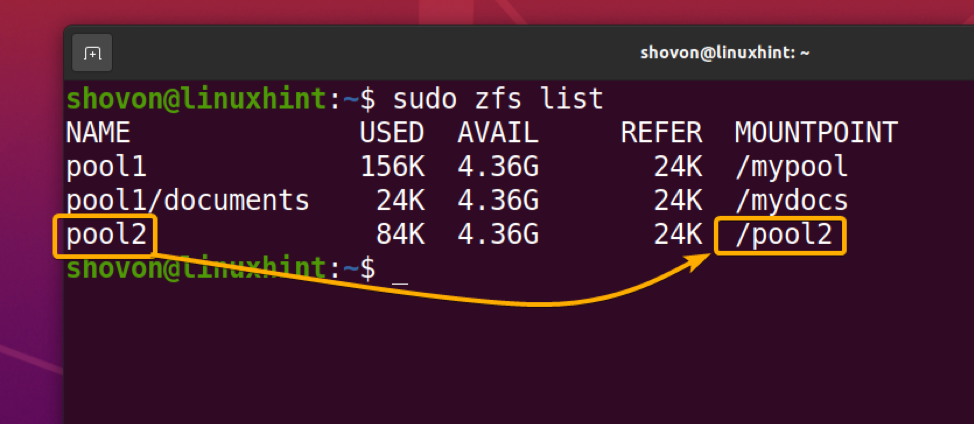
A brand new ZFS pool pool2 must be created and its mountpoint must be set to /pool2.
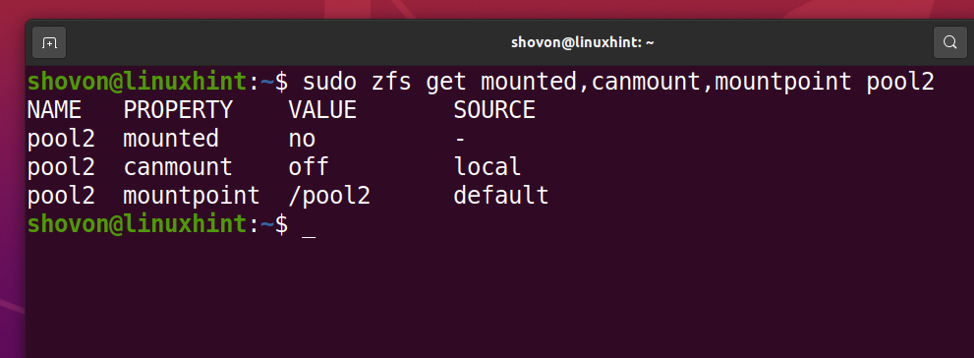
As you’ll be able to see, the ZFS pool pool2 is fixed (fixed is sure). It may also be fixed (canmount is on), and its mount listing trail is /pool2 (mountpoint is /pool2):
$ sudo zfs get fixed,canmount,mountpoint pool2

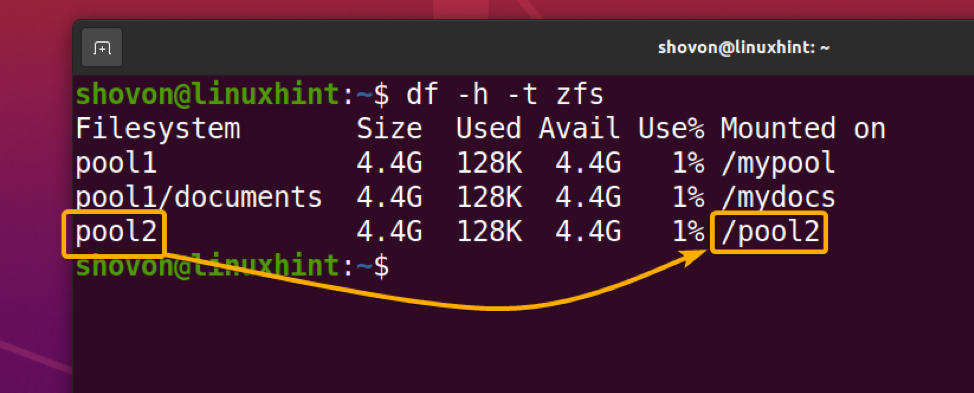
The ZFS pool pool2 must be fixed at the /pool2 listing of your laptop, as observed from the output of the df command:
Since you don’t need ZFS to mount the ZFS pool pool2, set the canmount assets of the ZFS pool pool2 to off as follows:
$ sudo zfs set canmount=off pool2

As you’ll be able to see, even supposing the ZFS pool pool2 isn’t fixed (fixed is no) and mounting is disabled (canmount is off) for the pool, the mountpoint assets is about to /pool2. The ZFS filesystems you create at the pool pool2 will use it to set its mountpoint assets. It is not going to inherit the fixed and canmount assets from the pool pool2:
$ sudo zfs get fixed,canmount,mountpoint pool2
As you’ll be able to see, the ZFS pool pool2 isn’t fixed anymore:

Now, create a brand new filesystem downloads at the ZFS pool pool2 with the next command:
$ sudo zfs create pool2/downloads

As you’ll be able to see, the ZFS filesystem downloads set its mountpoint assets the usage of the mountpoint assets of the ZFS pool pool2 solely. So, its mountpoint is about to /pool2/downloads via default:
$ sudo zfs get fixed,canmount,mountpoint pool2/downloads
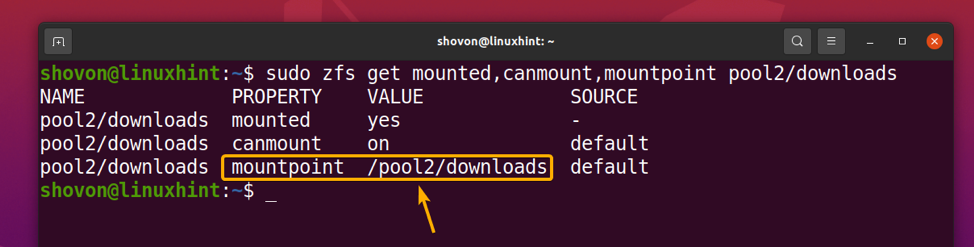
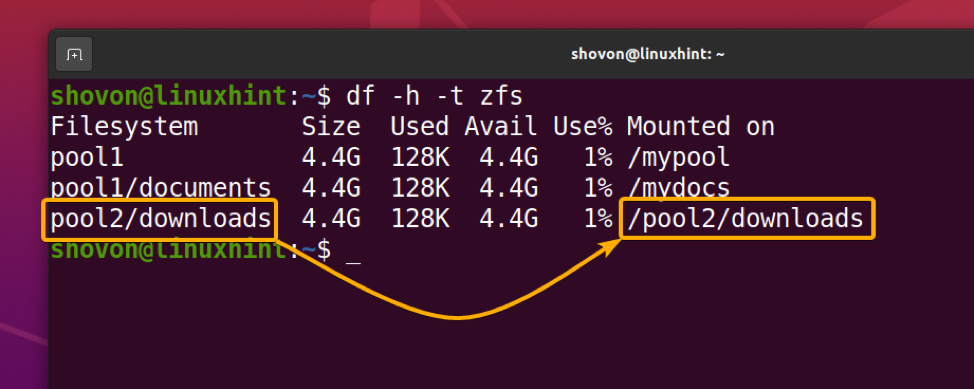
The ZFS filesystem downloads must even be fixed at the /pool2/downloads listing of your laptop, as observed from the output of the df command:
If you don’t need the filesystems, you create at the ZFS pool pool2 to make use of the mountpoint assets. You can set the mountpoint assets of the ZFS pool pool2 to none. This means, the mountpoint assets of the ZFS filesystems at the pool pool2 may also be set to none and can be unmounted via default. You must set a mountpoint price for the filesystems you wish to have to mount manually.
You can set the mountpoint assets of the ZFS pool pool2 to none as follows:
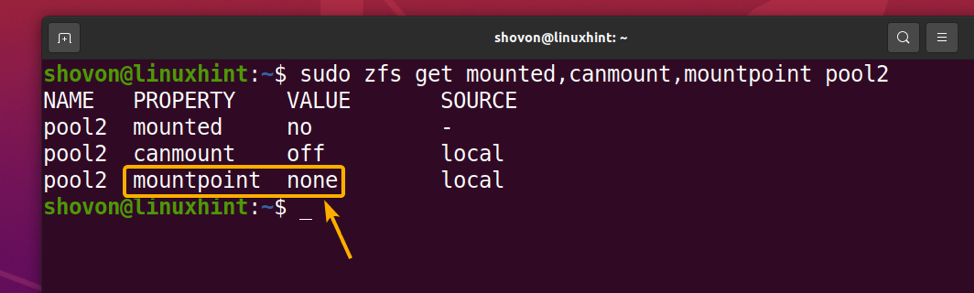
$ sudo zfs set mountpoint=none pool2

The mountpoint assets of the ZFS pool pool2 must be set to none, as observed within the screenshot underneath:
$ sudo zfs get fixed,canmount,mountpoint pool2
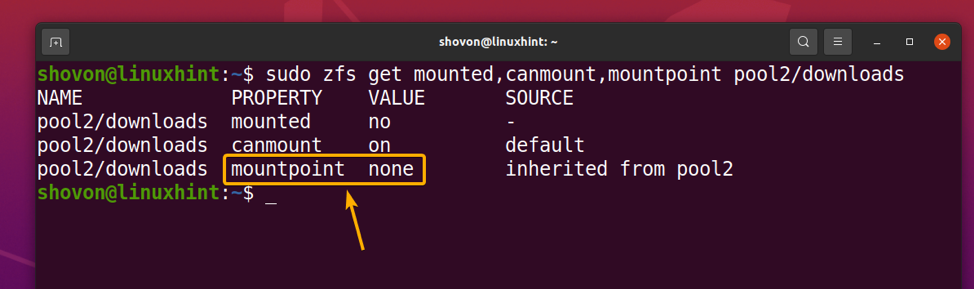
The mountpoint assets of the ZFS filesystem downloads must even be set to none as observed within the screenshot underneath:
$ sudo zfs get fixed,canmount,mountpoint pool2/downloads
Create a brand new ZFS filesystem movies at the pool pool2 as follows:
$ sudo zfs create pool2/movies

The mountpoint of the newly created filesystem movies must even be set to none, as observed within the screenshot underneath:
$ sudo zfs get fixed,canmount,mountpoint pool2/movies

Neither the downloads nor the movies filesystem of the ZFS pool pool2 must be fixed to your laptop, as observed from the output of the df command:
To mount the downloads filesystem of the ZFS pool pool2 to /mydownloads listing of your laptop, set the mountpoint assets of the filesystem as follows:
$ sudo zfs set mountpoint=/mydownloads pool2/downloads

In the similar means, to mount the movies filesystem of the ZFS pool pool2 to /myvideos listing of your laptop, set the mountpoint assets of the filesystem as follows:
$ sudo zfs set mountpoint=/myvideos pool2/movies

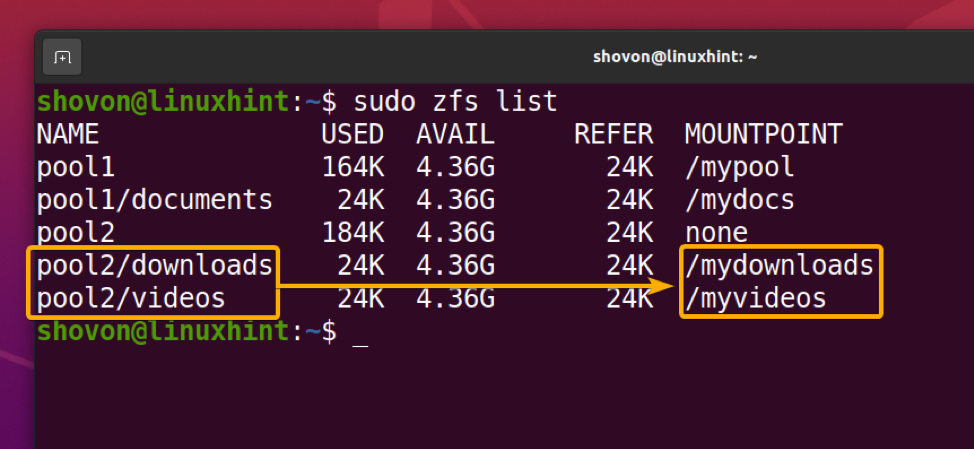
The mountpoint assets of the downloads and movies filesystem of the ZFS pool pool2 must be set to /mydownloads and /myvideos, respectively as observed within the screenshot underneath:
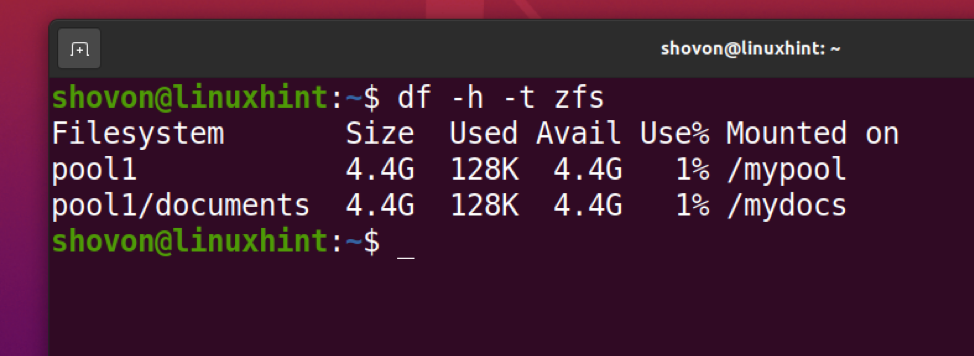
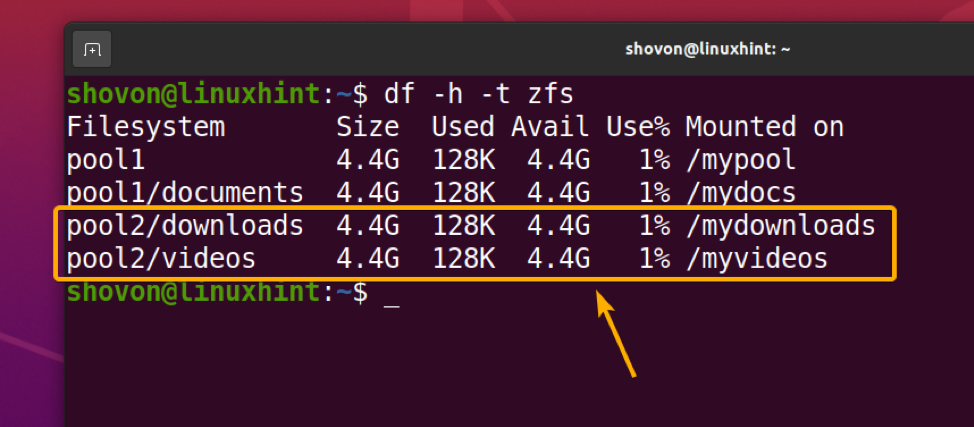
The downloads and movies filesystems of the ZFS pool pool2 must be fixed at the /mydownloads and /myvideos listing of your laptop respectively, as proven from the output of the df command:
Conclusion
This article has proven you the results of atmosphere other values for the canmount, fixed, and mountpoint homes on ZFS swimming pools and filesystems. I’ve additionally proven you easy methods to mount ZFS swimming pools and filesystems in numerous directories than their default ones. In addition, I offered easy methods to disable mounting for the ZFS swimming pools and manually mount filesystems from the mount-disabled ZFS swimming pools.
References
[1] Ubuntu Manpage: zfs — configures ZFS record methods