In Linux, copying files in local system is handled by the cp command. When it comes to copying files over remote systems, the scp command is the way to go. The scp command takes advantage of the SSH protocol to copy files between two locations.
In this guide, check out how to use the scp command on Linux.
Linux SCP Command
The scp command comes pre-installed on all the Linux distros. There’s no need for any additional package installation.
Working with scp requires having SSH installed on both the local and remote machines. The scp tool itself uses SSH at the core. It’s reflected throughout the usage of scp. The syntax and usage are quite similar to working with SSH. If you have prior experience with SSH, then scp will be easier to understand. Here’s a quick guide on how to use SSH.
Similar to SSH, the scp command will connect to a certain user account on the remote system. You need to know the username and password of the user account. Note that the remote user account must also have file permission to the target directory (on the remote system). Here’s an in-depth guide on Linux file permissions and ownership.
Data transfer with scp is encrypted, so no need to fear data theft.
Using SCP
Basic Command Structure:
All the scp commands will generally follow the following command structure. Here, we’ll be copying a file from the local machine to the remote machine.
$ scp <options> <source_username@source_ip_address>:<local_file> <remote_username>@<remote_ip_address>:<remote_directory>
Here’s a quick breakdown of the command structure.
: Various scp parameters that define scp behavior, for example, SSH port, SSH configuration, cipher, recursive copy, etc. - <[email protected]_ip_address>:
: Similar to the Linux cp command, it’s the “source”. It defines the source file/directory to copy to the target location.
If “<[email protected]_ip_address>” isn’t provided, then scp automatically assumes it’s the local username on the local machine. @ : : Similar to the cp command, it’s the “destination”. The structure is similar to what you’d enter when connecting to a remote system via SSH.
If “<[email protected]_ip_address>” isn’t provided, then scp automatically assumes it’s the local username on the local machine.
Copying a Local File to a Remote Directory
Here’s a dummy text file. It’s a 2MB text file containing repetitive text.

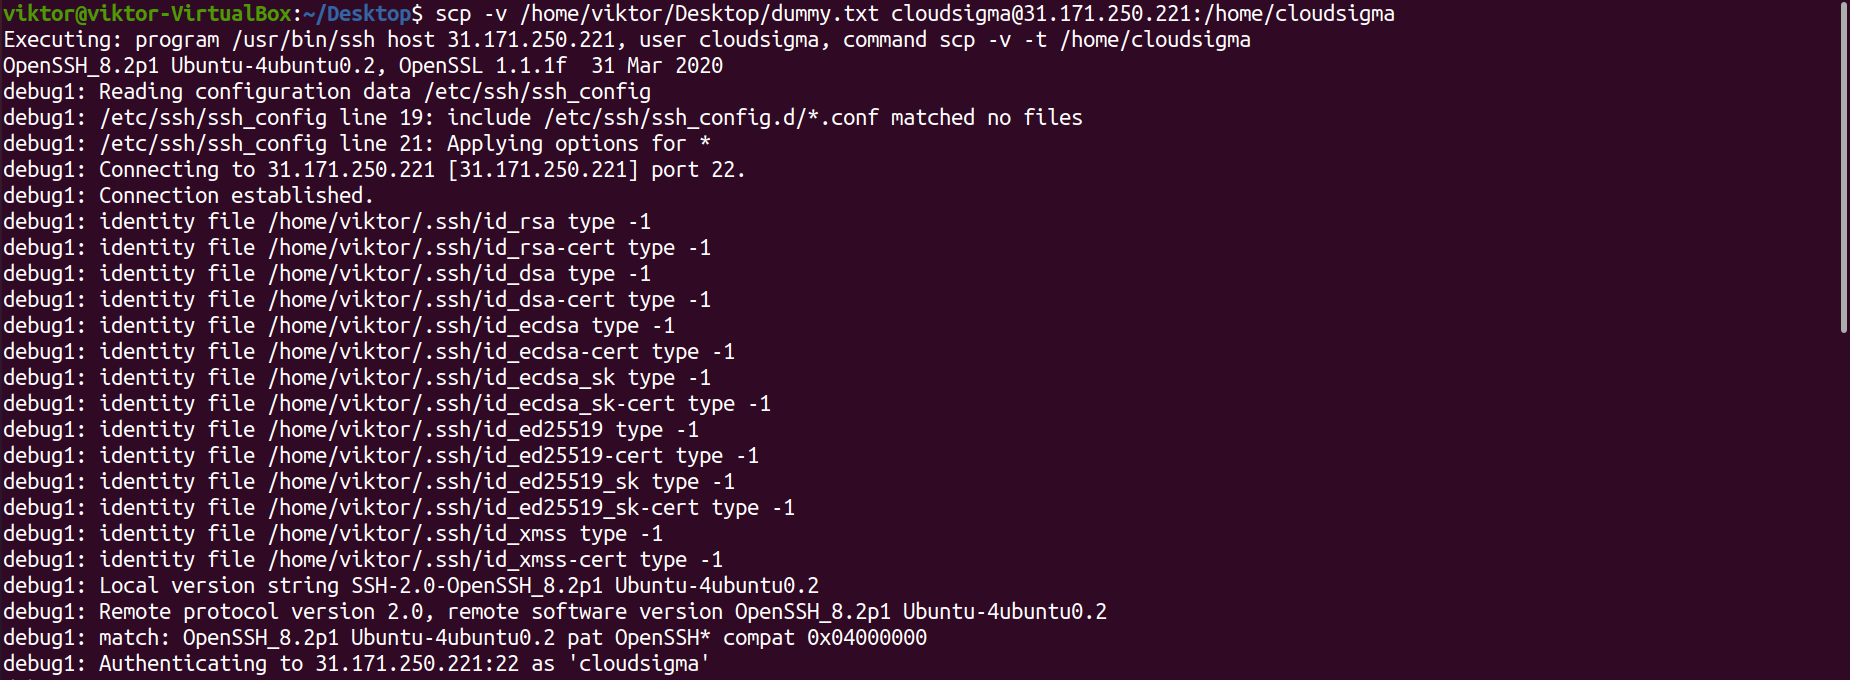
The following scp command will copy the text file to the remote machine. Use the “-v” flag for verbose output.
$ scp -v /home/viktor/Desktop/dummy.txt cloudsigma@x.x.x.x:/home/cloudsigma
If you want to save the file with a different name, then you have to specify the filename at the destination. For example, the following command will save “dummy.txt” as “renamed-dummy.txt” on the remote machine.
$ scp /home/viktor/Desktop/dummy.txt cloudsigma@x.x.x.x:/home/cloudsigma/renamed-dummy.txt

Copying a Remote File to the Local Machine
The scp command can also copy a remote file to a local directory.
For demonstration, “dummy.txt” is stored on a remote machine. To copy it locally, use the following command.
$ scp cloudsigma@x.x.x.x:/home/cloudsigma/dummy.txt /home/viktor/

To save the file with a different file name, specify the filename in the command.
$ scp cloudsigma@x.x.x.x:/home/cloudsigma/dummy.txt /home/viktor/dummy-local.txt

Copy files between remote machines
As the command structure of scp suggests, it’s also possible to copy files in-between remote servers. All you have to do is describe the source and destination accordingly.
For example, let’s copy the file “dummy.txt” from one remote machine to another.
$ scp -v cloudsigma@x.x.x.x:/home/cloudsigma/dummy.txt cloudsigma@y.y.y.y:/home/cloudsigma/dummy-copy.txt
Copying Multiple Files
What if you wanted to copy multiple files? Depending on the location of the source, the command may get quite big.
In the following example, let’s copy dummy_1.txt, dummy_2.txt, and dummy_3.txt to the remote machine.
$ scp dummy_1.txt dummy_2.txt dummy_3.txt cloudsigma@x.x.x.x:/home/cloudsigma

If the filename follows a certain pattern, we can describe the pattern to choose the source file(s). In this example, we can use wildcard (*) to copy all the text files.
$ scp dummy_*.txt cloudsigma@x.x.x.x:/home/cloudsigma

Increasing File Transfer Speed Using Compression
The scp command exchanges traffic via a network. It’s the bandwidth of the network that ultimately determines the file transfer speed. However, given a fixed bandwidth, it’s possible to increase the effective file transfer speed using compression. The scp tool has such a feature built-in.
The unique thing is, data is compressed only in the network. When the file arrives at the destination, it returns to the original size.
To enable compression, use the “-C” flag.
$ scp -C dummy_*.txt cloudsigma@x.x.x.x:/home/cloudsigma/

Encryption Algorithm
As previously mentioned, scp encrypts data transfer to prevent data theft. By default, data is encrypted using AES-128 encryption. It’s possible to use different cipher for encryption.
For the cipher, scp uses SSH. The following SSH command will list all the supported ciphers. All of them are valid for scp as well.
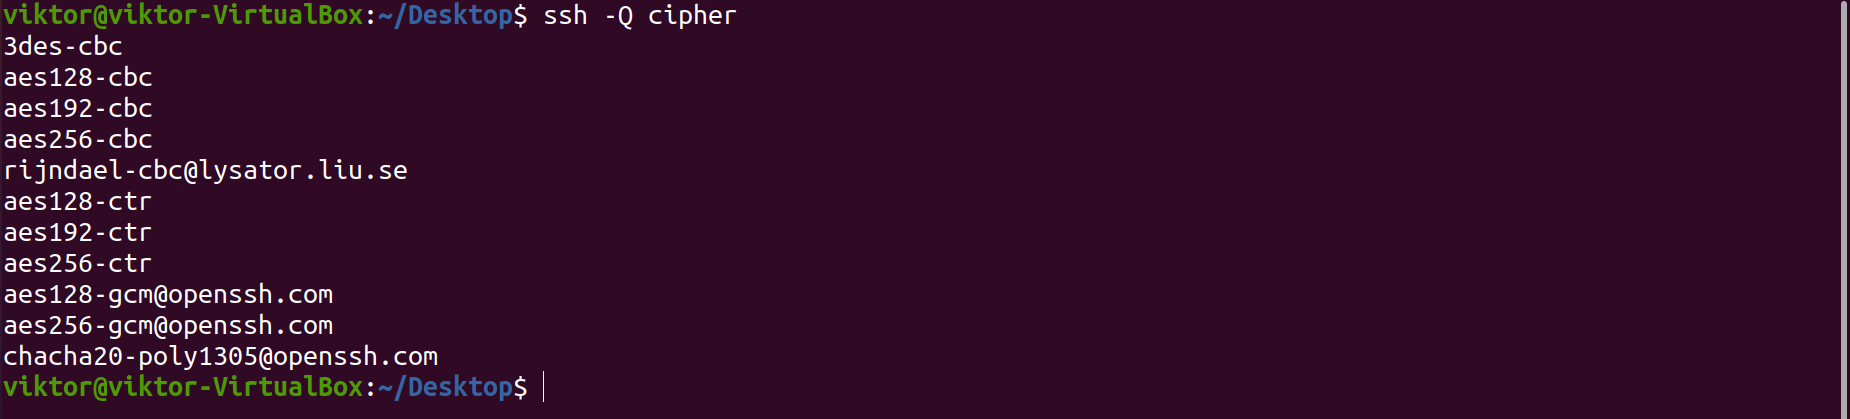
For example, the following scp command will use the aes256-ctr algorithm for file encryption.
$ scp -C -c aes256-ctr dummy_*.txt cloudsigma@x.x.x.x:/home/cloudsigma/

Bandwidth Limitation
By default, scp will use the maximum bandwidth available to copy files. However, it can be problematic in various situations. For example, using an automated script for backup.
To limit bandwidth, use the “-l” flag followed by the bandwidth limit. Here, the bandwidth limit value will be in kilobits/sec (kbps).
$ scp -C -l 800 dummy.txt cloudsigma@x.x.x.x:/home/cloudsigma/dummy-remote.txt

Port Specification
Similar to SSH, scp will use port 22 by default. However, if SSH is configured to operate on a different port, then it needs to be declared in the command.
To specify the specific port, use the flag “-P” followed by the port number.
$ scp -C -P 1234 dummy.txt cloudsigma@x.x.x.x:/home/cloudsigma/dummy-remote.txt
Copying Directory Recursively
Similar to the cp command, to copy a directory and all the sub-directories/files within it, use the “-r” flag. If the directory contains lots of files/folders, then it’s recommended to use compression for faster data transfer.
Here’s a demo directory with dummy files and directories.

The following command will copy this directory to the remote location.
$ scp -C -r dummy/ cloudsigma@x.x.x.x:/home/cloudsigma

Disabling Progress Meter and Warning Messages
The default behavior of scp is to report the operation progress and warning/diagnostic messages on the screen. However, it’s possible to disable all this output info. It’s useful if you’re implementing scp in a script.
To disable the progression and warning/diagnostic messages, use the flag “-q”.
$ scp -C -q dummy.txt cloudsigma@x.x.x.x:/home/cloudsigma/dummy-remote.txt

Conclusion:
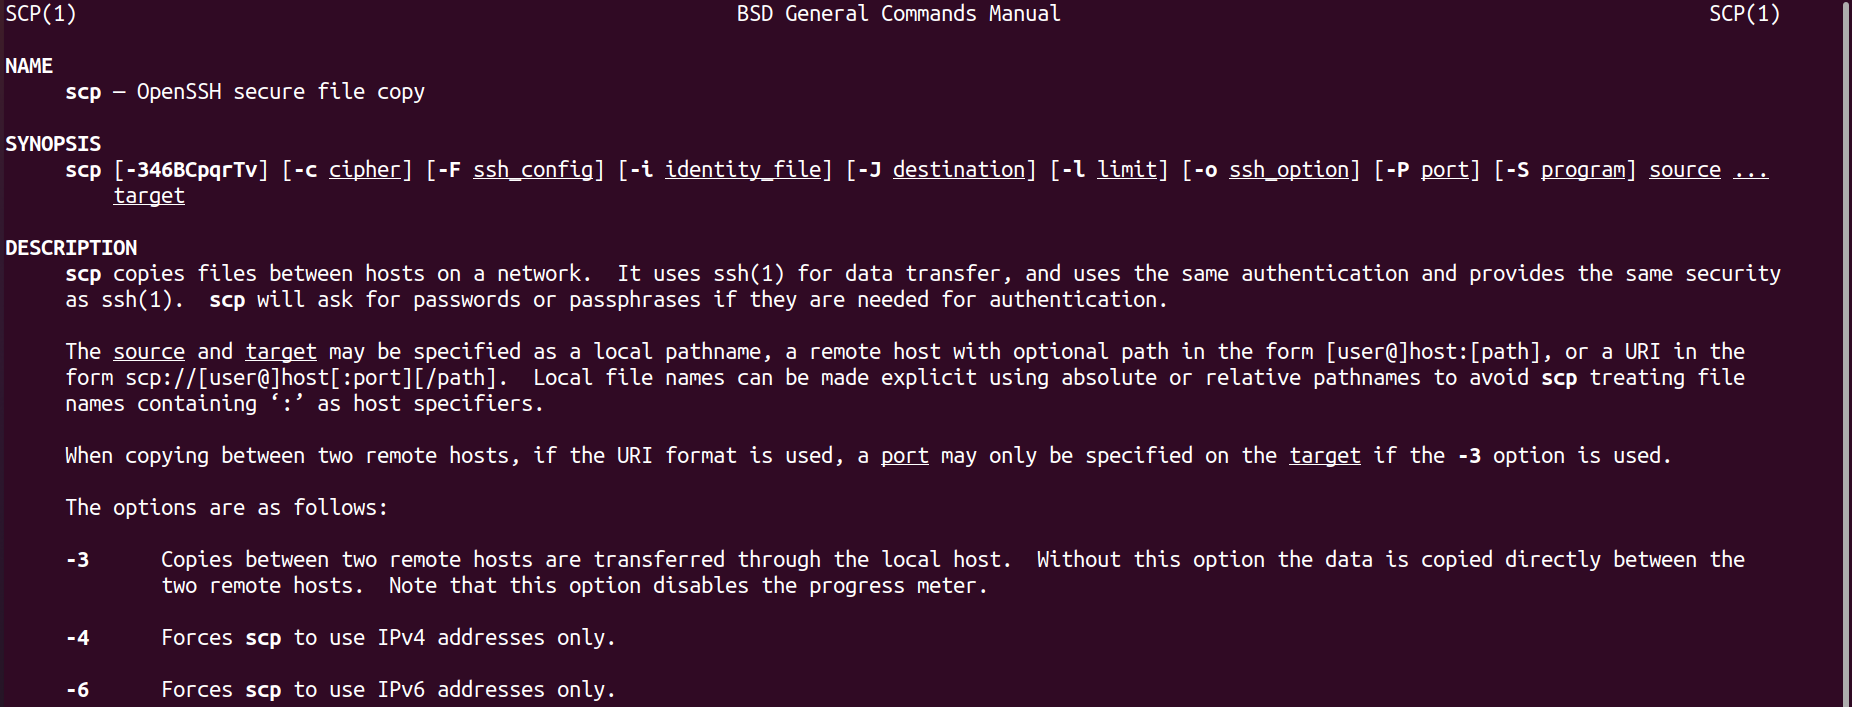
Using the scp command is very simple. All you need is to have a proper understanding and experience using SSH. These are only some of the most basic methods of using scp. For more in-depth information about scp, check out the man page.
Happy computing!