If various users are using your Linux system, these users can mess with an important common set of files. As an administrator of the device, you would not want some files to be deleted or modified unintentionally. In such cases, “chattr,” also called the “Change Attribute” command, is used, which is designed to confront these kinds of situations.
In Linux, every file has some metadata properties, which include attributes and these attributes can be set or cleared, and few attributes can only be viewed. This command’s primary objective is to make important files secure and prevent them from being deleted accidentally.
Firstly, let’s check the syntax of “chattr” command:
chattr [operator] [flag] [filename]
The operators are:
| Operators | Description |
|---|---|
| + | To add the attribute to a file |
| – | To remove the attribute from a file |
| = | Keep the selected attributes to be the only attribute that files have |
Now let’s check the list of flags that are used with the “chattr” command:
| Flag | Description |
|---|---|
| A | When set, a time (access time) record remains unchanged |
| S | When set, the changes are updated synchronously on the disk |
| a | When set, the file opens in append mode to write |
| i | When set, the file becomes unmodifiable, and only the superuser can enable it |
| j | When set, all information is updated on the ext3 journal before the file itself |
| t | When set, no tail merging |
| u | When set for a file, its data is saved. This enables the user to undelete the file |
| e | This attribute indicates that the file is using the extents to map block on memory |
Let’s further understand the “chattr” with examples:
How to add read-only restriction to a file using the “chattr” command:
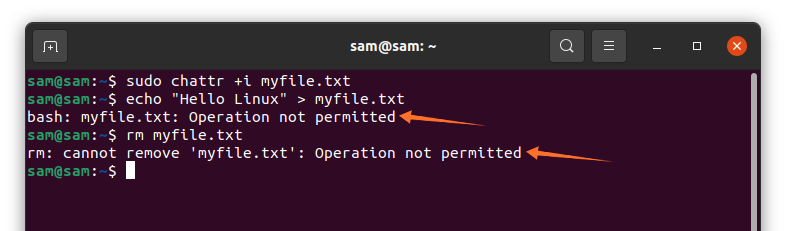
Firstly, the most common use of the “chattr” command sets the immutable flag “i”. Let’s create a file by the name “myfile.txt” and make it read-only using the command:
$sudo chattr +i myfile.txt
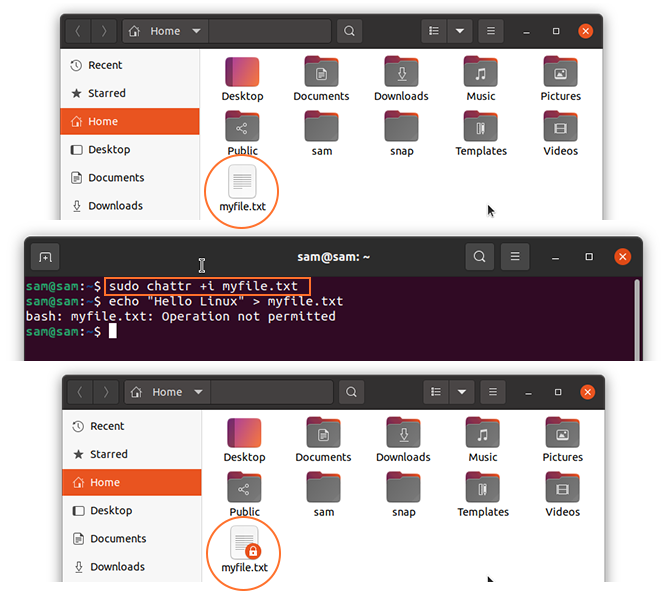
A lock icon will appear on the file after applying the “i” flag, as shown in the above image. After setting the flag, the file will no more be editable, as shown in the following image:
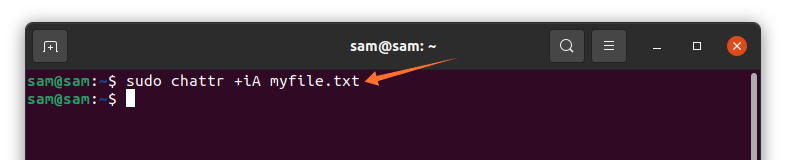
Multiple flags can also be set; for example, if you want to make a file read-only and restrict access record as well, then use:
$sudo chattr +iA myfile.txt
How to remove the read-only restriction to a file using the “chattr” command:
If you want to remove these setting the use the command given below:
$sudo chattr -i myfile.txt
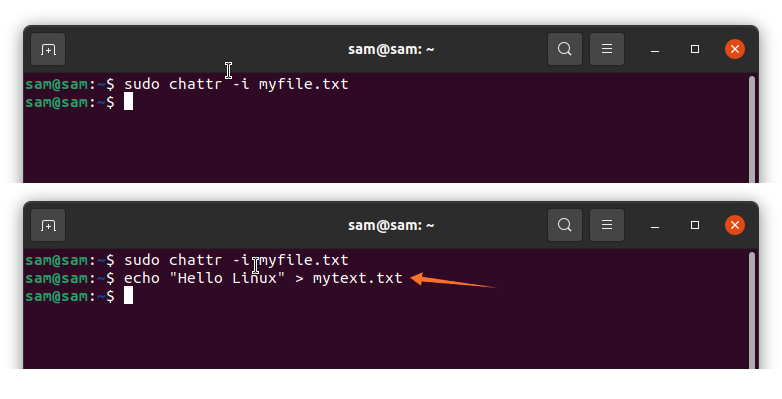
As it can be viewed, that the file can now be modified after eliminating the “i” flag.
How to give append-only access to a file using the “chattr” command:
To give append-only permission to a file, an “a” flag can be set. The objective of “a” flag is to permit users to add something to a file and restrict to change data that is already in the file:
$sudo chattr +a myfile.txt
Let’s check it with an example:
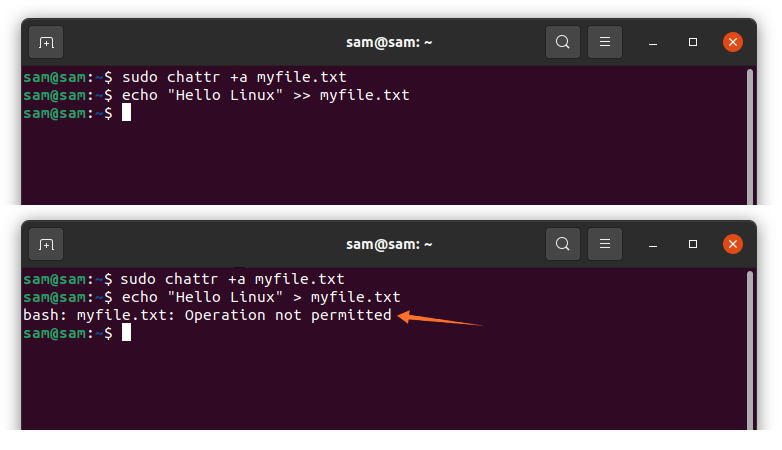
As shown in the above images, the text can only be appended, but it cannot overwrite the existing text.
Similarly, to remove the access use:
$sudo chattr -a myfile.txt
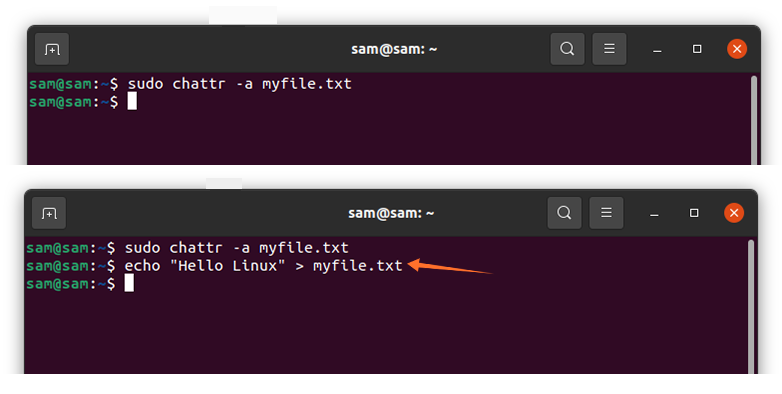
After removing the restriction, the file can be overwritten, as depicted in the above images.
How to set the restriction to a directory using the “chattr” command:
A whole directly can also be restricted using the “chattr” command. For this guide, I have created a directory by the name of “mydir” with some files in it:
$ sudo chattr –R +i ./mydir/
To verify it, try to remove a file:
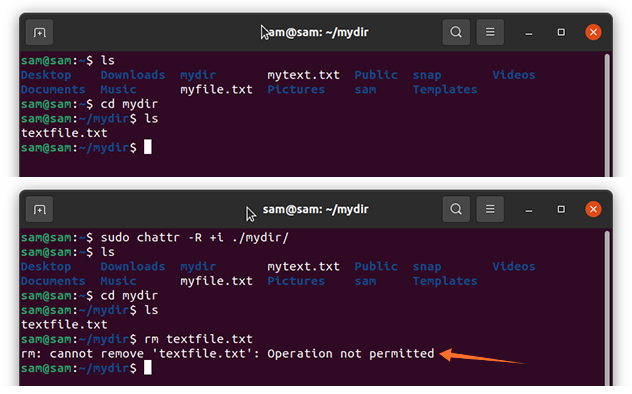
As it can be seen, the operation is not permitted.
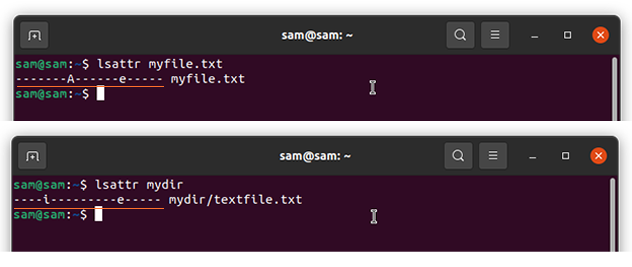
How to check applied “chattr” attributes to a file:
To check which attributes have been set, use the command shown below:
Conclusion:
Change attribute is the handy command-line tool to modify file permissions. It helps protect the important files and prevent them from being altered if your system uses multiple users. In this guide, we discussed how to use the “chattr” command to modify metadata properties to change the permission of the file using different flags.