Autofs is a program this is used to mount native filesystems and community stocks robotically on-demand. What that implies is whilst you navigate to the autofs configured mount level or listing, the specified filesystem or community percentage is robotically fixed. So, so long as you don’t want to get right of entry to the native filesystems or community stocks, autofs is not going to mount them.
This article will display you tips on how to set up autofs on Ubuntu/Debian and CentOS/RHEL 8. I will be able to additionally display you tips on how to mount native filesystems, Samba/Windows stocks, and NFS stocks robotically on-demand with autofs. I will be able to display you tips on how to troubleshoot autofs mount problems as smartly. So, let’s get began.
Table of Contents:
- Installing autofs on Ubuntu/Debian
- Installing autofs on CentOS/RHEL 8
- Mounting Local Filesystems with autofs
- Mounting Samba/Windows Shares with autofs
- Mounting NFS Shares with autofs
- Troubleshooting autofs Mount Issues
- Conclusion
- References
Installing autofs on Ubuntu/Debian:
autofs is to be had within the reputable bundle repository of Ubuntu/Debian. So, you’ll simply set up autofs on Ubuntu/Debian from the reputable bundle repository of Ubuntu/Debian.
First, replace the APT bundle repository cache with the next command:
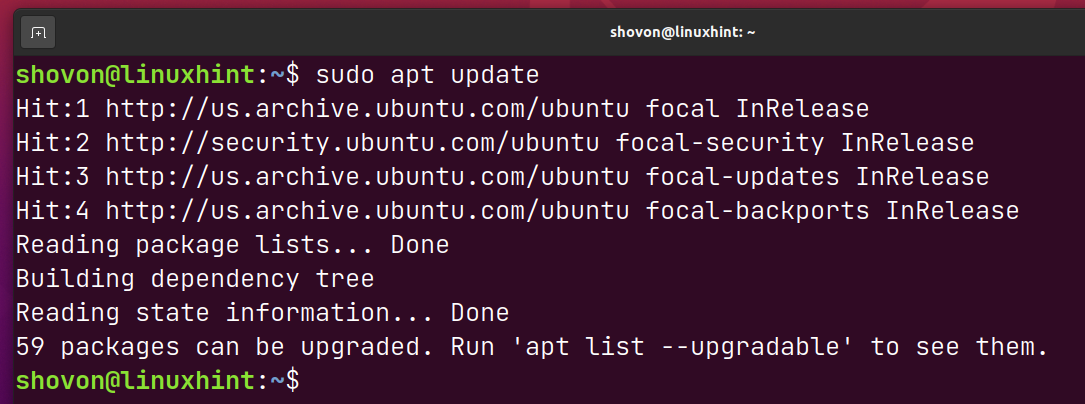
To set up autofs, run the next command:
$ sudo apt set up autofs

To verify the set up, press Y after which press
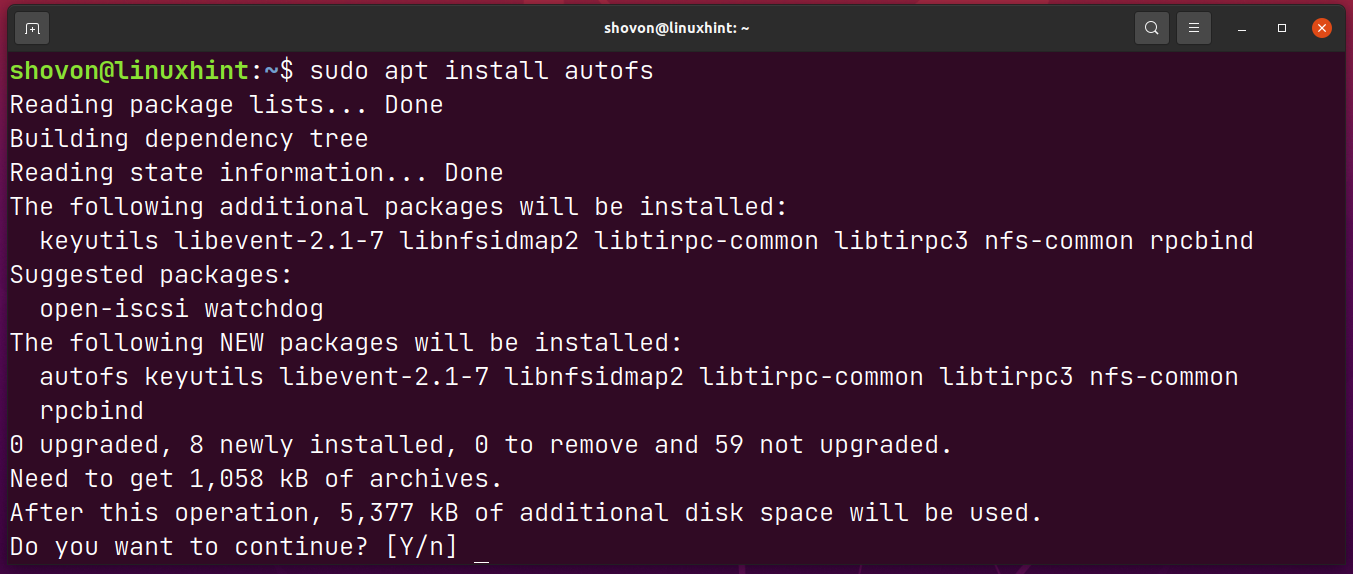
autofs must be put in.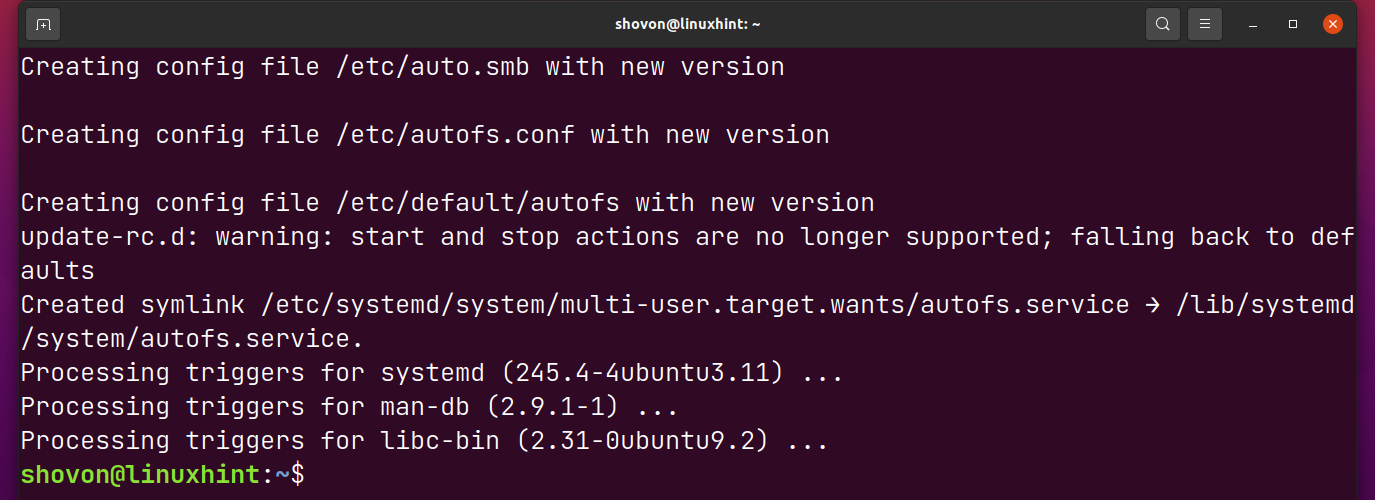
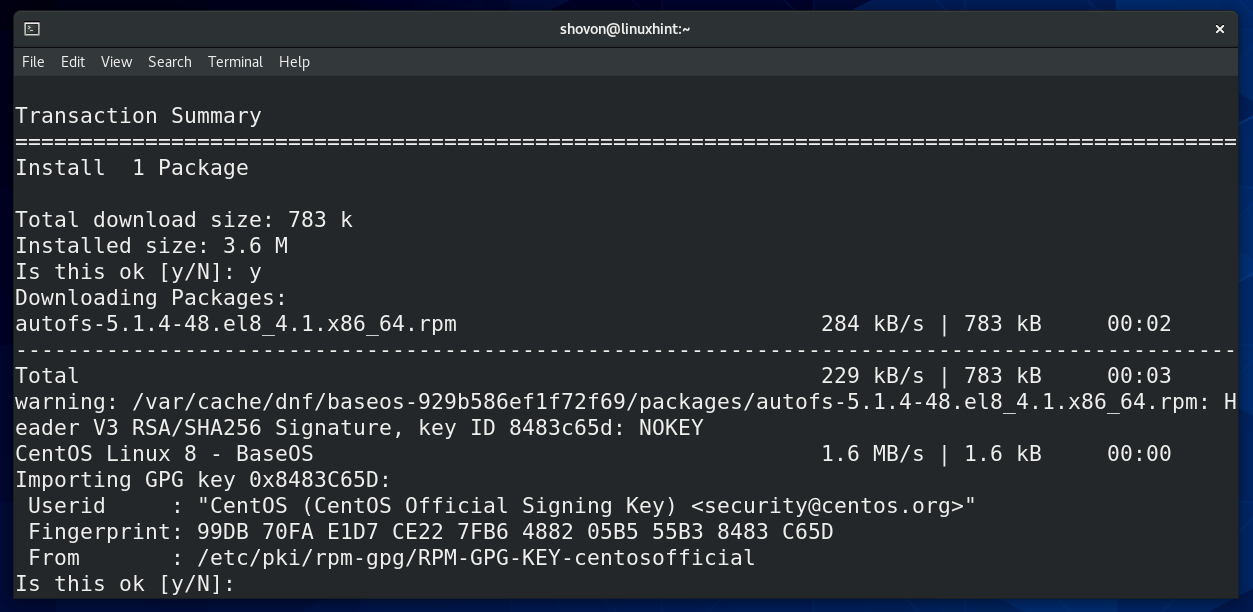
Installing autofs on CentOS/RHEL 8:
On CentOS/RHEL 8, you’ll set up autofs simply from the reputable bundle repository.
To set up autofs, run the next command:
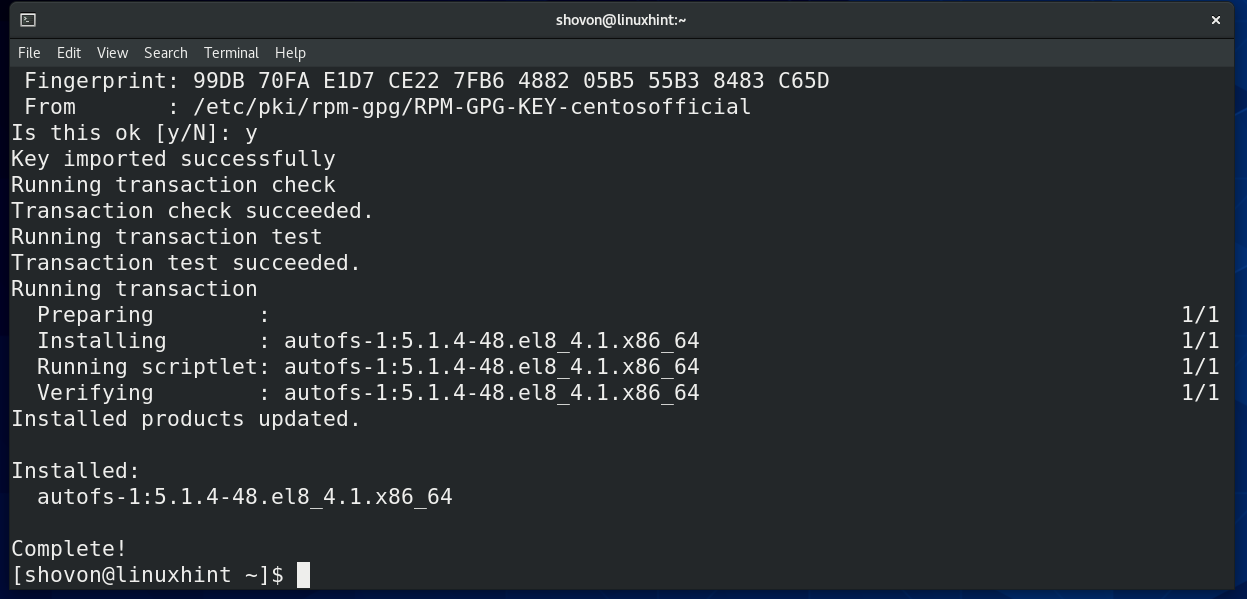
$ sudo dnf set up autofs

To verify the set up, press Y after which press
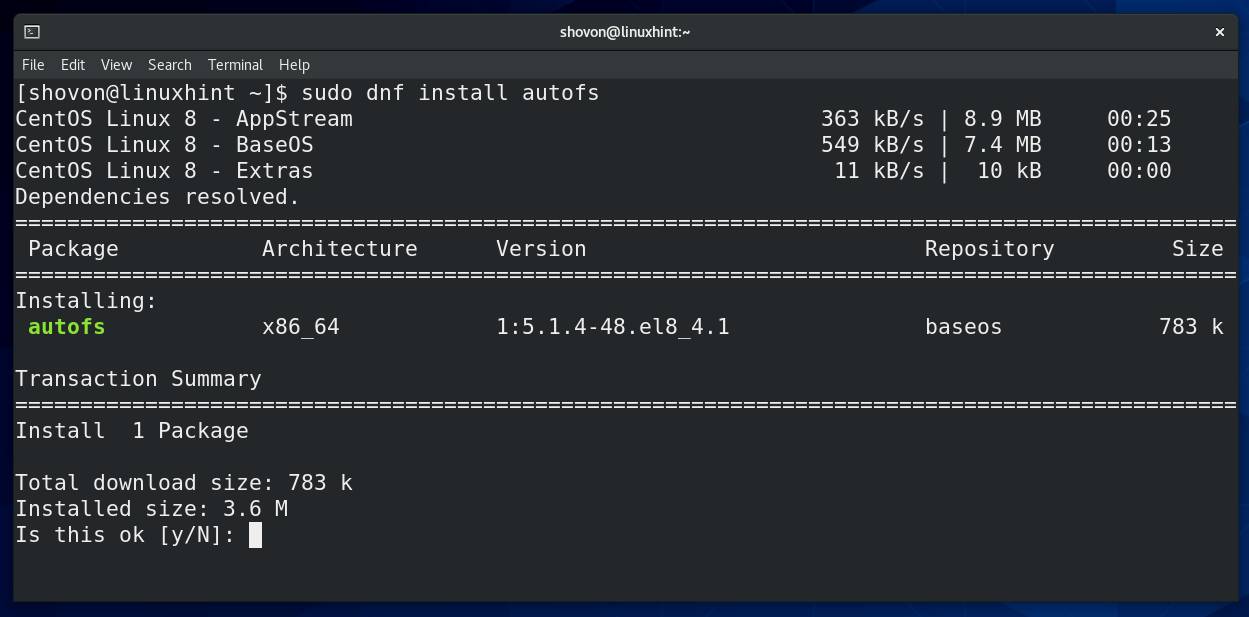
You could have to just accept the GPG key of the reputable bundle repository of CentOS/RHEL 8.
To do this, press Y after which press
autofs must be put in.
Mounting Local Filesystems with autofs:
In this phase, I will be able to display you tips on how to use autofs to mount native filesystems robotically on call for.
For the demonstration, I’ve created 3 walls /dev/sdb1, /dev/sdb2, and /dev/sdb3 and formatted them within the EXT4 filesystem structure.
The /dev/sdb1 filesystem has the UUID 8c3cc143-9aa7-4be0-8a67-ba2cc9758f2c.
The /dev/sdb2 filesystem has the UUID 3a0cc358-dc39-401e-91aa-c24712490257.
The /dev/sdb3 filesystem has the UUID dccb348c-7f25-4b1e-8f1b-d254aeaec78b.
Let’s see tips on how to mount them robotically on-demand the use of autofs.

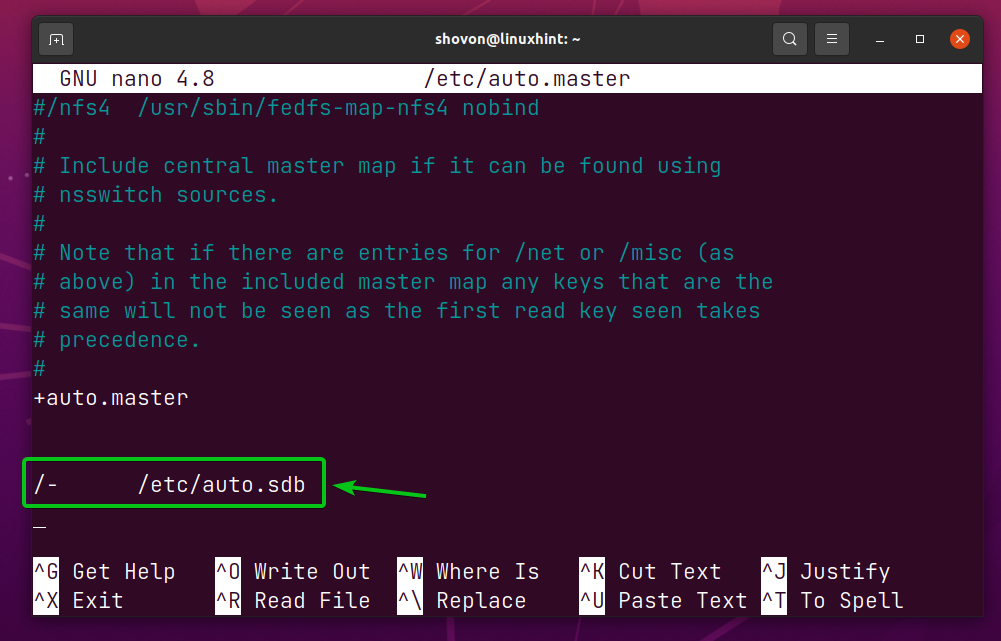
The primary autofs configuration report is /and so forth/auto.grasp. To robotically mount filesystems with autofs, you must upload an access at the /and so forth/auto.grasp report.
Open the /and so forth/auto.grasp report with the nano textual content editor as follows:
$ sudo nano /and so forth/auto.grasp

Add the marked line on the finish of the auto.grasp report. This line tells autofs to search for filesystems to automount within the /and so forth/auto.sdb report.
Once you’re carried out, press
Now, create a brand new report /and so forth/auto.sdb as follows:
$ sudo nano /and so forth/auto.sdb

Type within the following strains within the /and so forth/auto.sdb report.
/records/fs1 -fstype=auto :/dev/sdb1
/records/fs2 -fstype=auto UUID=3a0cc358-dc39-401e-91aa-c24712490257
/records/fs3 -fstype=ext4,noatime UUID=dccb348c-7f25-4b1e-8f1b-d254aeaec78b
Once you’re carried out, press
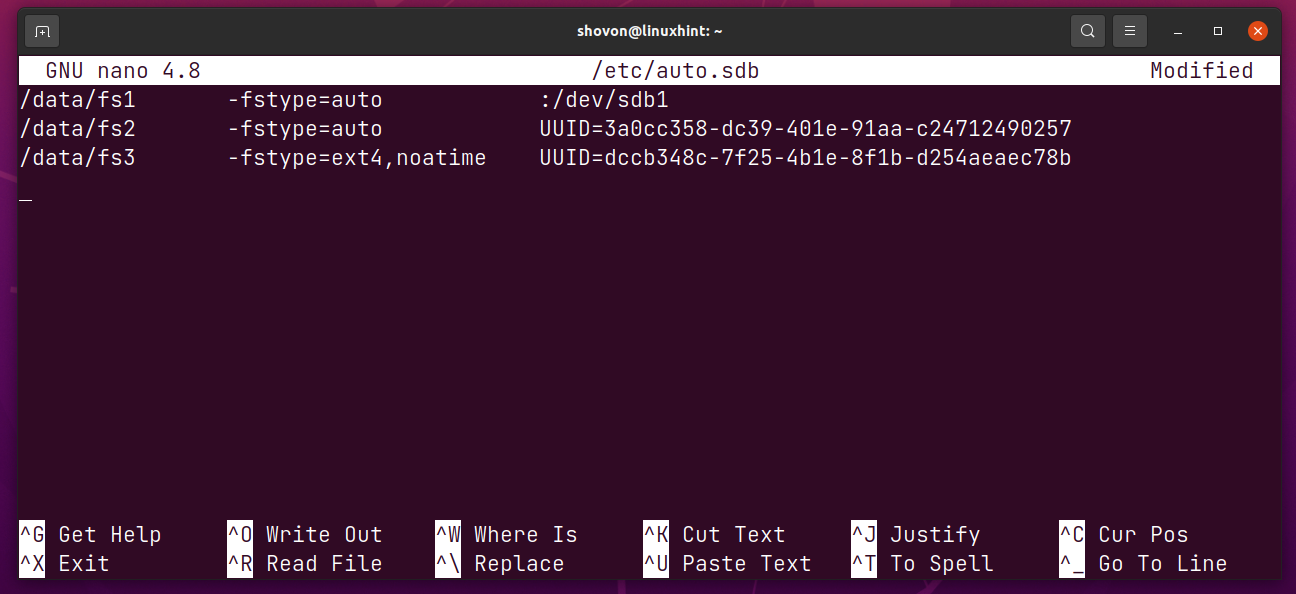
The following line mounts the /dev/sdb1 partition within the listing /records/fs1.
![]()
The following line mounts the /dev/sdb2 partition through its UUID 3a0cc358-dc39-401e-91aa-c24712490257 within the listing /records/fs2.
![]()
The following line mounts the /dev/sdb3 partition through its UUID dccb348c-7f25-4b1e-8f1b-d254aeaec78b within the listing /records/fs2. The filesystem sort (ext4 on this case) is explicitly outlined and in addition the noatime mount possibility is used.
![]()
For the autofs adjustments to take impact, restart the autofs carrier with the next command:
$ sudo systemctl restart autofs.carrier

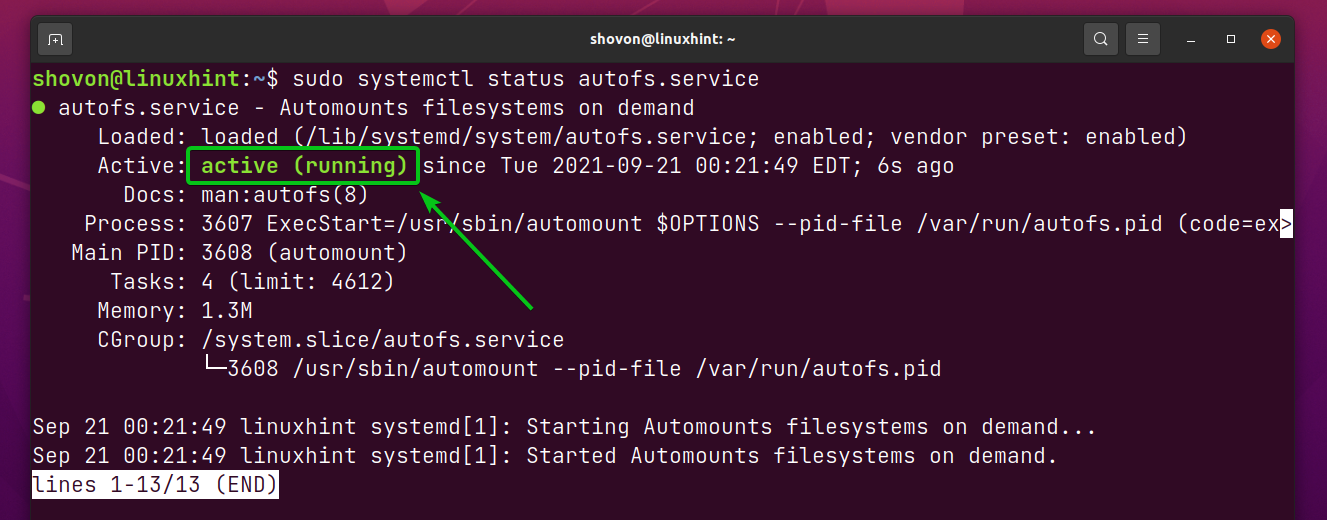
The autofs carrier must be working after it’s restarted, as you’ll see within the screenshot under.
$ sudo systemctl standing autofs.carrier
The/records listing and the subdirectories fs1/, fs2/, and fs3/ must be robotically created, as you’ll see within the screenshot under.
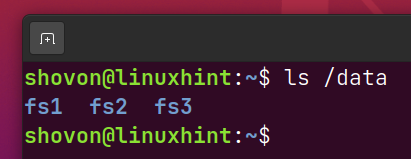
Also realize that not one of the configured walls (/dev/sdb1, /dev/sdb2, and /dev/sdb3) are fixed but.

Navigate to the /records/fs1 listing as follows:

As you’ll see, the partition /dev/sdb1 is robotically fixed at the listing /records/fs1 once you’ve navigated to the listing /records/fs1.

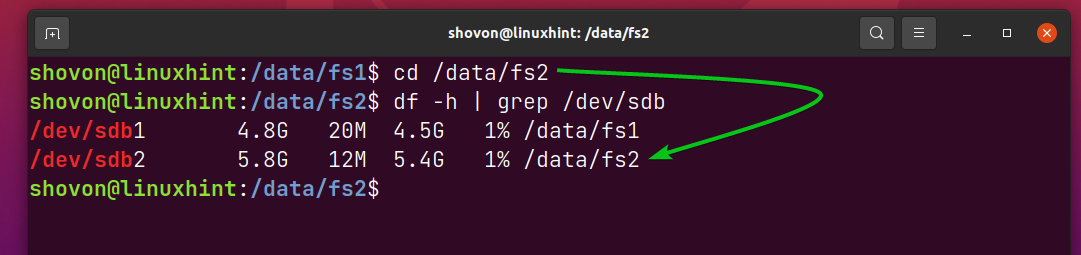
In the similar manner, should you navigate to the /records/fs2 listing, the /dev/sdb2 partition must be fixed at the /records/fs2 listing robotically, as you’ll see within the screenshot under.
$ cd /records/fs2
$ df -h | grep /dev/sdb
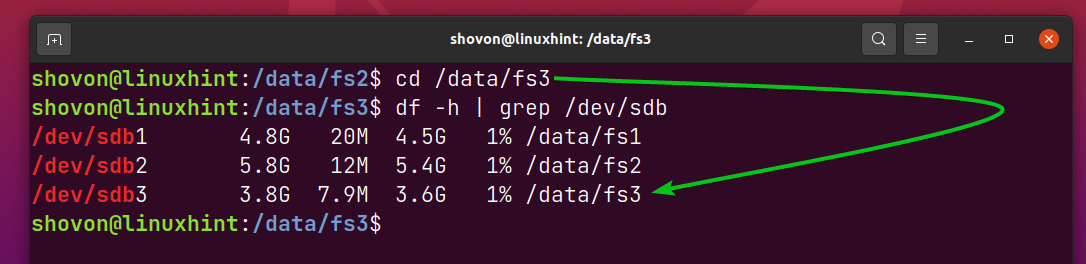
In the similar manner, should you navigate to the /records/fs3 listing, the /dev/sdb3 partition must be fixed at the /records/fs3 listing robotically, as you’ll see within the screenshot under.
$ cd /records/fs3
$ df -h | grep /dev/sdb
Mounting Samba/Windows Shares with autofs:
You too can mount Samba or Windows stocks robotically on-demand with autofs.
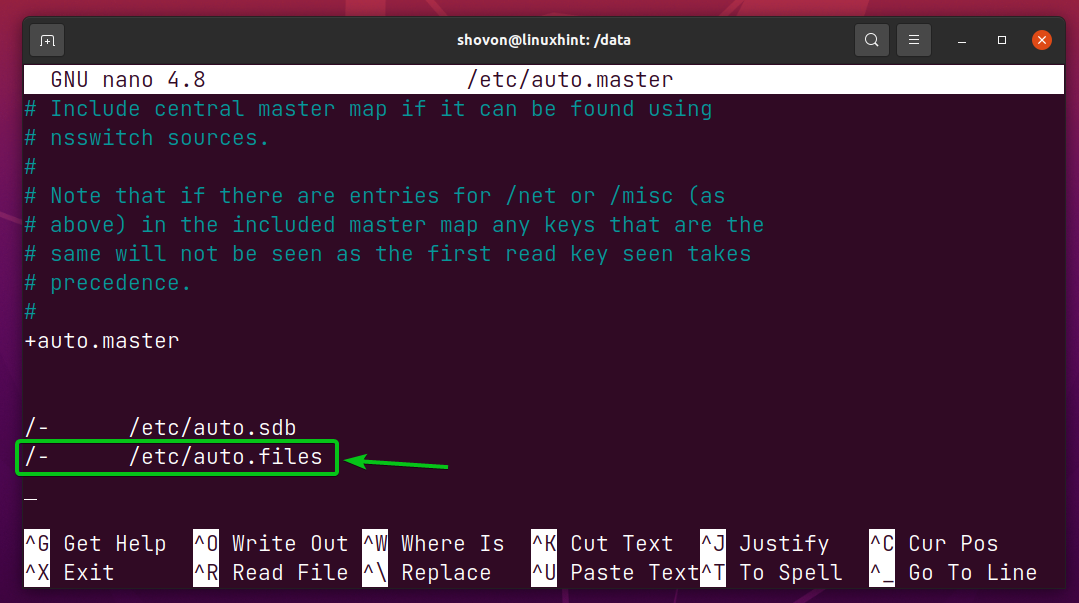
First, open the /and so forth/auto.grasp report with the nano textual content editor as follows:
$ sudo nano /and so forth/auto.grasp

Type within the line as marked within the screenshot under. This line tells autofs to search for filesystems to automount within the configuration report /and so forth/auto.recordsdata.
Once you’re carried out, press
Now, create a brand new report /and so forth/auto.recordsdata as follows:
$ sudo nano /and so forth/auto.recordsdata

Type within the following line within the /and so forth/auto.recordsdata report.
/records/Files -fstype=cifs,uid=1000,gid=1000,username=username>,password=password> ://192.168.0.112/Files
Once you’re carried out, press
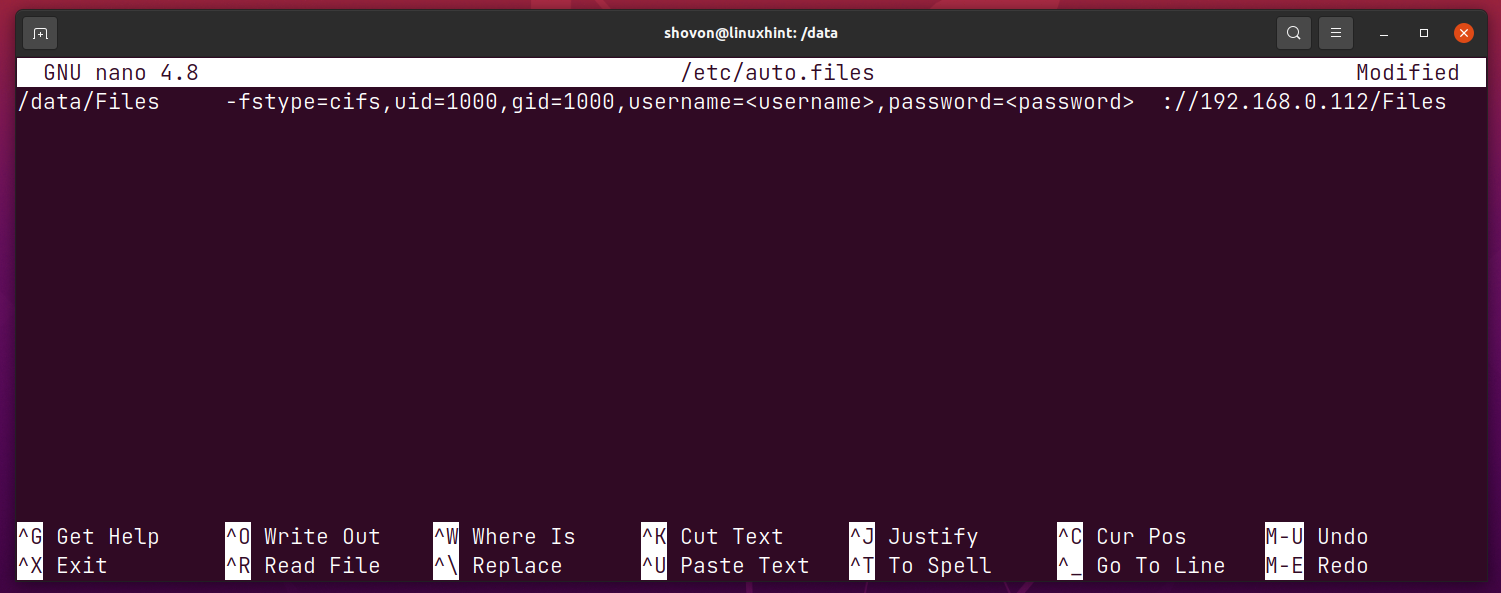
Here, autofs is urged to mount the Samba or Windows percentage //192.168.0.112/Files within the listing /records/Files.

The login username of the Samba/Windows percentage is

The uid and gid mount choices are used to set your login consumer as the landlord and the main workforce of the login consumer because the/records/Files listing workforce so that you could write to the Samba/Windows percentage. The uid and gid of the primary non-root consumer created all through the set up of lots of the Linux distributions are 1000. So, you would possibly not have to switch this.

If you do wish to permit every other consumer (let’s say, www-data) get right of entry to to the Samba/Windows percentage, you’ll in finding the uid and gid of that consumer as follows:

Once you’re carried out, restart the autofs carrier as follows:
$ sudo systemctl restart autofs.carrier

As you’ll see, the Samba/Windows percentage //192.168.0.112/Files isn’t fixed but.
$ df -h | grep 192.168.0.112

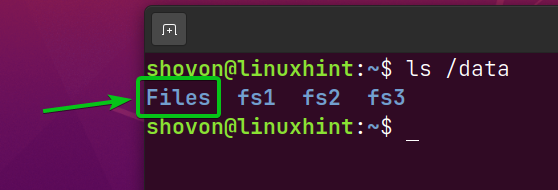
But a brand new listing /records/Files must be created robotically, as you’ll see within the screenshot under.
Navigate to the /records/Files listing as follows:
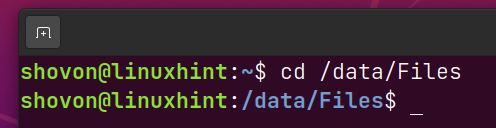
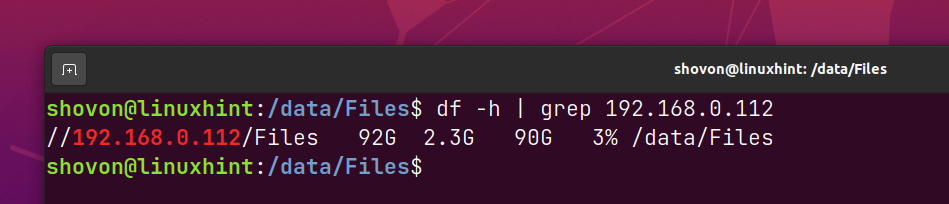
As you’ll see, the Samba/Windows percentage //192.168.0.112/Files is fixed within the /records/Files listing robotically.
$ df -h | grep 192.168.0.112
Mounting NFS Shares with autofs:
You can mount NFS stocks robotically on-demand with autofs as smartly.
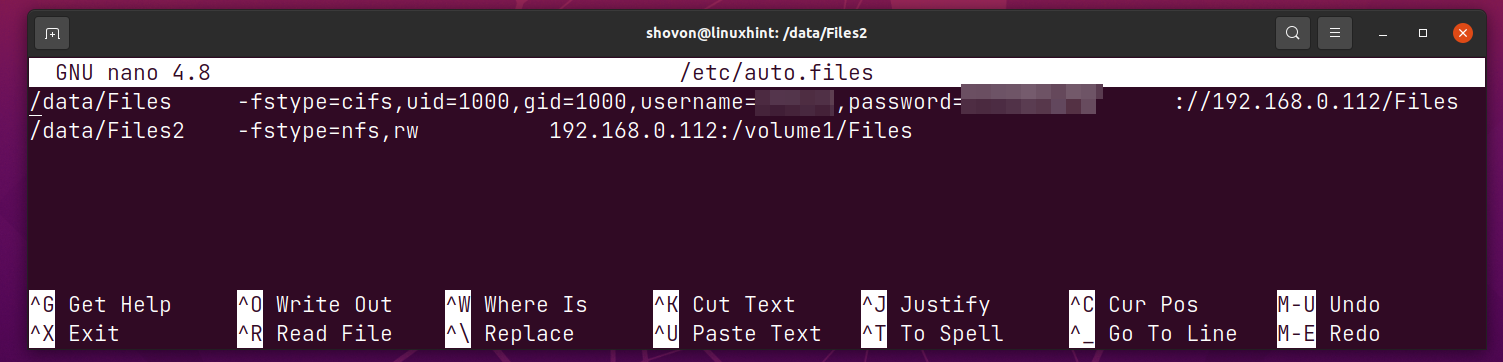
Open the /and so forth/auto.recordsdata with the nano textual content editor as follows:
$ sudo nano /and so forth/auto.recordsdata

To mount the NFS percentage 192.168.0.112:/volume1/Files within the listing /records/Files2, sort within the following line on the finish of the /and so forth/auto.recordsdata report.
/records/Files2 -fstype=nfs,rw 192.168.0.112:/volume1/Files
Once you’re carried out, press
For the adjustments to take impact, restart the autofs carrier with the next command:
$ sudo systemctl restart autofs.carrier

As you’ll see, the NFS percentage 192.168.0.112:/volume1/Files isn’t fixed but.
$ df -h | grep 192.168.0.112

But a brand new listing /records/Files2 must be created robotically, as you’ll see within the screenshot under.
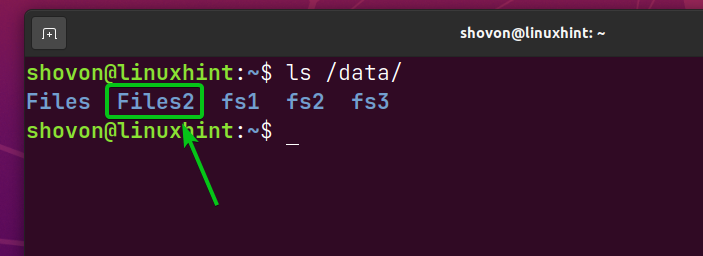
Navigate to the /records/Files2 listing as follows:
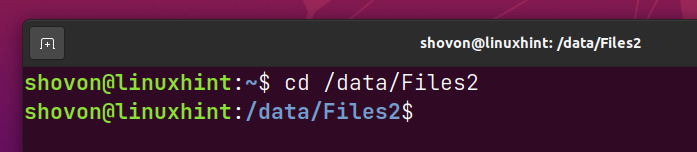
As you’ll see, the NFS percentage 192.168.0.112:/volume1/Files is fixed within the /records/Files2 listing robotically.
$ df -h | grep 192.168.0.112

Troubleshooting autofs Mount Issues:
At occasions, whilst you exchange autofs configuration recordsdata, restarting the autofs carrier would possibly not practice the adjustments. You could have to reboot your pc for the adjustments to take impact.

At occasions, you’ll have mount problems with autofs. Some filesystems would possibly not mount as anticipated.
To troubleshoot mount problems with autofs, forestall the autofs carrier with the next command:
$ sudo systemctl forestall autofs.carrier

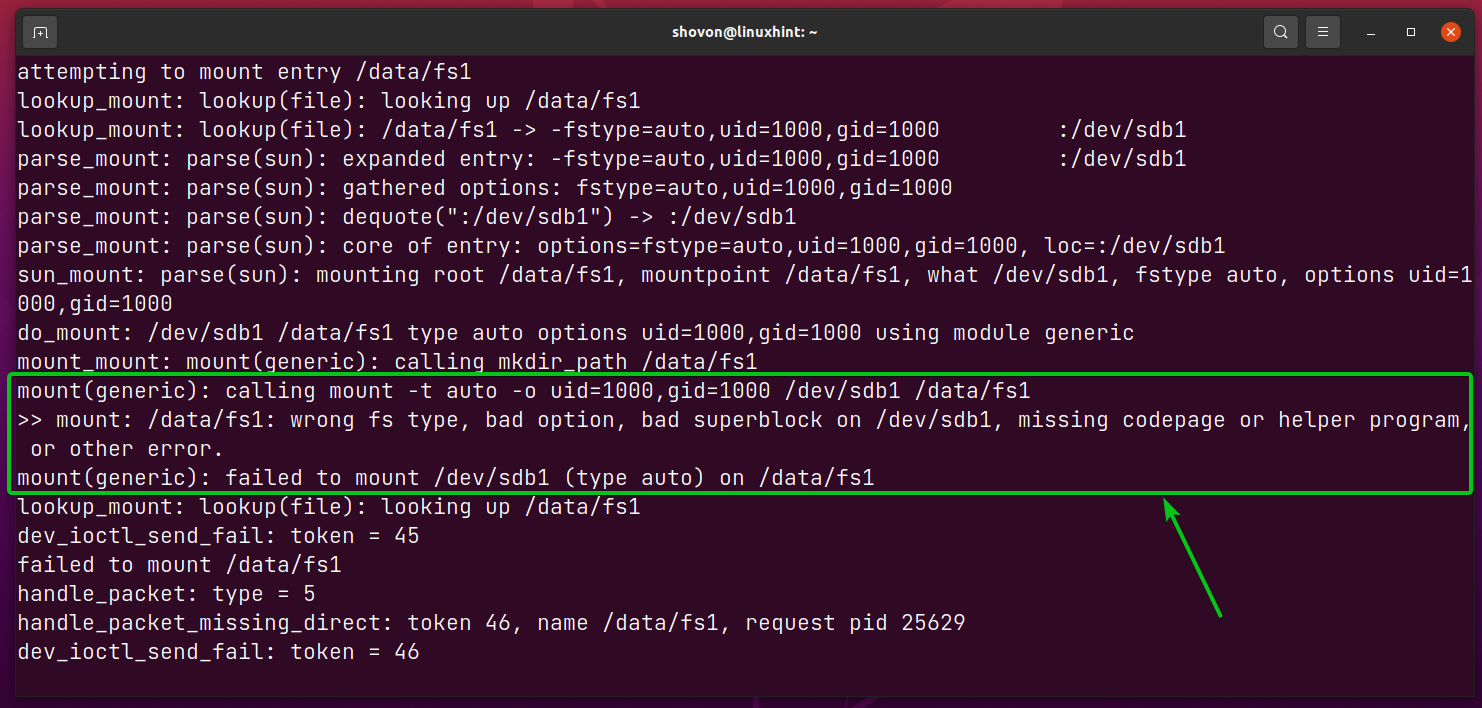
Run the automount program with the -f and –debug command-line choices as follows:
$ sudo automount -f –debug

Now, attempt to navigate to the listing the place autofs fail to mount the filesystem/community percentage.
You must be capable to in finding why autofs fails to mount the filesystem/community percentage within the output of the automount command.
Conclusion:
This article displays you tips on how to set up autofs on Ubuntu/Debian and CentOS/RHEL 8. I’ve additionally proven you tips on how to robotically mount native filesystems, samba/home windows stocks, and NFS stocks on-demand with autofs. I’ve proven you tips on how to troubleshoot autofs mount problems as smartly.
References:
[1] AutoFs – Debian Wiki
[2] Autofs – Ubuntu Community Help Wiki
[3] Autofs – ArchWiki
[4] 8.3. autofs Red Hat Enterprise Linux 7 | Red Hat Customer Portal