Linux distributions are extensively used to create servers, and companies are making the most of this low cost and safe resolution. Linux distributions together with Debian supply lots of utilities to arrange, configure, and safe servers.
Debian is a solid, safe, and slightly widespread Linux running device and excellent for server setup. Many distributions are in keeping with it, particularly popular Ubuntu, PureOS, SteamOS, and so on.
The latest model of Debian is Debian 11 Bullseye, which comes with hundreds of recent programs, helps a couple of desktop environments, driverless scanning, and an progressed guide web page.
This write-up is that specialize in how you can set up, arrange a server on Debian 11 Bullseye. When you put in or improve to Debian 11, there’s a configuration you want to accomplish to make your server safe.
Steps contain for preliminary server setup on Debian 11 are said beneath:
Step 1 – Update and Upgrade the Debian
- The first step is correctly upgrading and updating the programs and the distribution. Login to the Debian 11 device and open a shell. To replace the programs record use:
sudo apt replace - Upgrade the programs the usage of:
sudo apt improve - It is beneficial to replace your distribution, for that use the below-mentioned command:
sudo apt dist-upgrade - Upon upgrading take away the undesirable report out of your device via executing:
sudo apt autoremove
Step 2 – Creating a Sudo User
It is beneficial to create a brand new sudo person in your server control as a substitute of the foundation account. For that run the below-mentioned command so as to add person:
sudo adduser tecadminIn the command “admin” is the brand new person. Now, supply sudo privileges to the brand new person:
sudo usermod -aG sudo tecadminSwitch account via executing the command:
sudo su tecadmin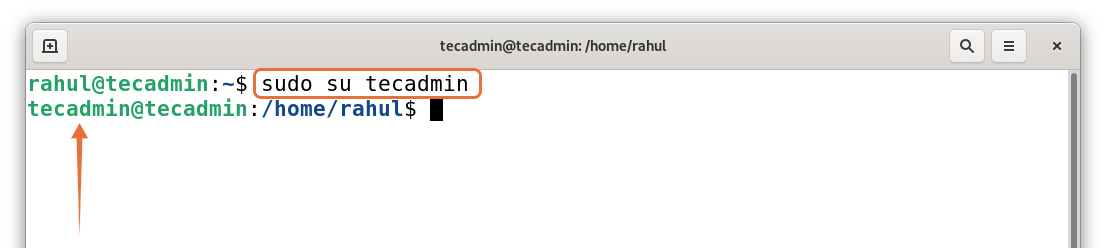
It may also be observed that the person has switched.
Step 3 – Configuring the System Hostname
To take a look at the present hostname, use:
sudo hostnamectlThe hostname is the identification of your device over a community so this can be a excellent follow to correctly title your hostname and to switch the hostname use the below-mentioned command:
sudo hostnamectl set-hostname debian11For the sake of demonstration, I’ve modified the hostname to “debian11”. Now shut the shell example and open it once more a brand new hostname will seem. To take a look at the hostname use:
hostname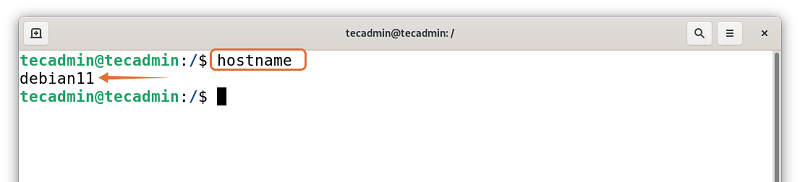
The new hostname is “debian11” now.
Step 4 – Securing SSH Server
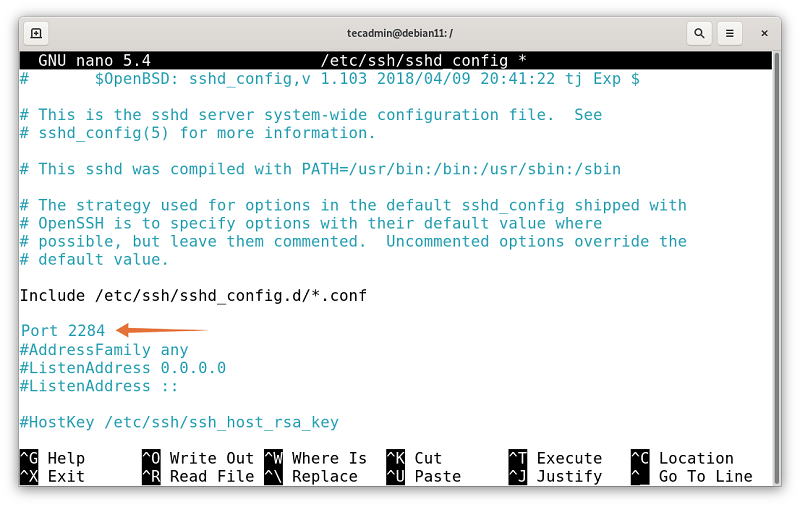
SSH is often referred to as safe shell is a protocol this is used to connect to faraway servers. When configuring the server, it is recommended to switch the default port and disable the foundation SSH login. To carry out those operations you want to open the configuration report in any editor:
sudo nano /and so on/ssh/sshd_confiqSearch for the beneath line, take away “#” from starting of line and alter port 22 to 2284:
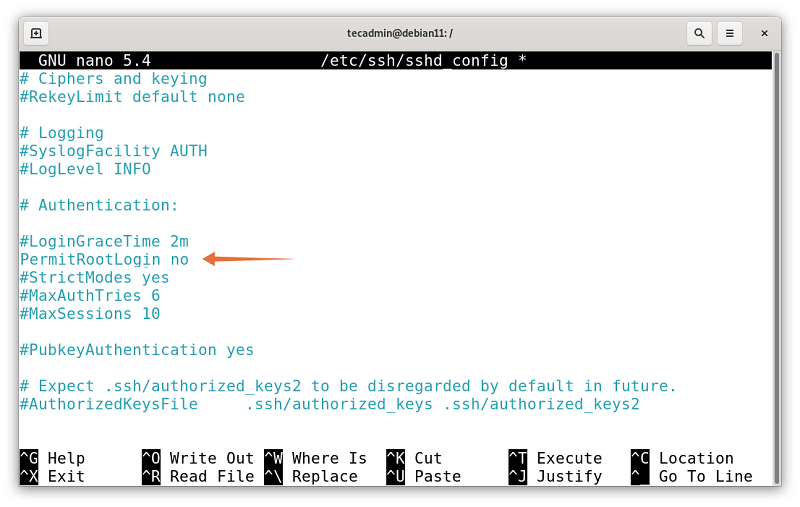
Also set AllowRootLogin to no and take away “#” to uncomment, as demonstrated beneath:
Save the report and execute the below-mentioned command:
sudo systemctl restart sshIf you might be not able to open this report then SSH server could be lacking out of your device, set up SSH the usage of:
sudo apt set up openssh-serverStep 5 – Managing the Firewall (ufw)
- Debian does no longer include a firewall, so that you are meant to set up it. Use the below-given command to put in an clear-cut firewall (ufw) on Debian 11:
sudo apt set up ufw - To permit the firewall use:
sudo ufw permit - To permit the port, use:
sudo ufw permit 2284 - Though it’s depend on the personal tastes, to disclaim the incoming visitors use:
sudo ufw default deny incoming - And to permit outgoing visitors use:
sudo ufw default permit outgoing - And reload ufw:
sudo ufw reload - To take a look at the standing:
sudo ufw standing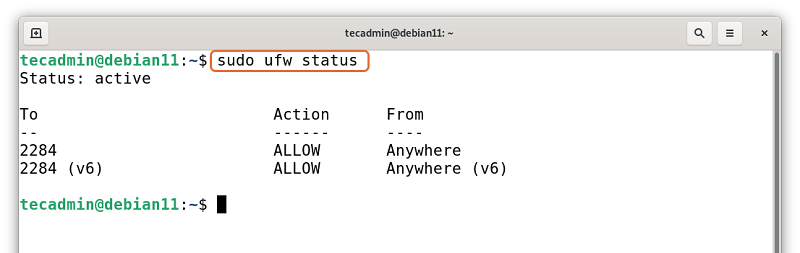
Step 6 – Rebooting The System
After making all of the adjustments, reboot your Debian device.
sudo reboot Conclusion
While putting in a brand new server on Linux there are a couple of steps that wish to be adopted, that come with upgrading programs, including a brand new person, putting in a firewall, securing SSH.
This write-up completely explains how you can arrange a server at the newly launched Debian 11 Bullseye. We discovered how you can create a brand new person with sudo privileges, how you can trade the default SSH port, and putting in a firewall for the preliminary server setup on Debian 11.