Certain tasks are pretty easy to perform, but many users get stuck because they are unaware of their proper functionality. When a user shifts to a different platform, these minor operations become time-consuming, and one of those tasks is moving files/folders from one path to another.
When you switch from Windows to Linux system, the question may arise in the beginners’ mind on “How can we move files?” In Linux, there are several routes to reach the same destination, and Linux distributions are designed to make the system easy to use for all types of users.
Before getting started with moving files, let’s discuss what moving the files means? This might be helpful for the beginners confused with the move(mv) and copy(cp) command.
Moving a file or folder means to cut the file from the previous location and paste it to the new location. To put it in another way, moving is transferring the original content to a new location and removing it from the old location. When we move the file, the file gets deleted from the previous directory and added to a new destination, whereas in copying, the files stay in the source directory.
Now, I think that’s enough to understand the term “moving files.”
The difference between Copy and Move is that the “Move” relocate the file to a new destination while “Copy” means to create a duplicate of the content and paste it into the new destination.
Copying a file uses copy (Ctrl+C) and paste (Ctrl+V) keys; whereas, moving means “Cut (Ctrl+X) and Paste (Ctrl+V).”
When to Move:
Moving data files is useful when users want to keep one version and don’t want to duplicate the content. It would be good if you are careful while doing this because you could lose the original file in case of any mistake during the process, which may be a great loss.
Advantages of Moving Data:
There are several possibilities that explain to you why moving data is necessary.
Let’s demonstrate them:
It is good to move the file instead of copying them when you are working on different systems. If you are not supposed to work only on one workstation; you can transfer the document you’re working on to another system and continue. Moving data also helps when you migrate to a new system. Moreover, it can also be handy for backup purposes. If your hard drive is short on storage and you want to archive data into another storage device, it is good to move them instead of deleting them.
Or, if the system isn’t connected to external devices like the printer and scanner, you can transfer the files you want to print to the system connected with the printer.
We have discussed briefly moving the files and why anyone needs to move data. Also, we have discussed its advantages and saw how moving is different from copying data.
Now, it is easy to move forward to find how we can move files in the Linux Operating System:
How to Move Files in the Linux System:
There is no traditional way to perform move operation; in Linux distributions,
a couple of methods are used to move files:
- Through the command-line tool (Terminal)
- Through Graphical User Interface (GUI)
How to Move Files Using the Command-line Tool (Terminal):
The command used for moving files from the source location to a particular destination is the “mv” command:
The “mv” command-line tool is considered as a multi-purpose command. It is not only used to transfer files from source to destination but also used to rename a file or folder:
Syntax:
The syntax of the “mv” command is:
mv [options] [source_path] [destination_path]
Before starting the examples to move files using the “mv” command, there’s another point we need to understand.
When a file or folder is created, an “inode” is assigned to the file/directory, which contains the metadata of the file. The full form of “inode” is “index node” that explains the file-system object like whether it is a file or directory and stores the information about the representative file like permission access, type of file, group, size, etc. The index node is a string of integers, and each inode is unique.
To check the inode of a specific file, the syntax is mentioned:
If I want to check the inode value of text file “sample.txt”, the command would be:

Whenever you move a file, it’s not about moving the data from one inode to another; you only change the path. Its permission access setting would remain the same as before. It is because you’re not changing the file or re-creating it, and only its path in the memory has changed.
Now, let’s check how the “mv” command is helpful to move files through different examples.
Example 1: Moving a File
Create a sample file “sample_file.txt” using the “touch” command in the “Home” directory:

Use the “mv” command to move the file into the “Documents” directory; the following command detects “Documents” as a directory/folder and transfers the “sample_file.txt” into it:
$ mv sample_file.txt /home/wardah/Documents

To confirm the existence of “sample_file.txt” in the Documents directory, run the “ls” command in the terminal:
$ ls /home/Wardah/Documents

Note: You must write permission to access the Source and Destination to move a file. Otherwise, it will show the permission denied error message.
Additional Note:
Some folks get confused while giving the source and destination path, so they get the wrong results. However, there’s an easy way to find the path of any directory or file, which is mentioned below:
Select the folder/directory you want to get the path of and right-click on it. In the Popup menu, navigate towards “Properties” and click on it,
For example, I want to find the path of “text.txt” folder in the home directory:
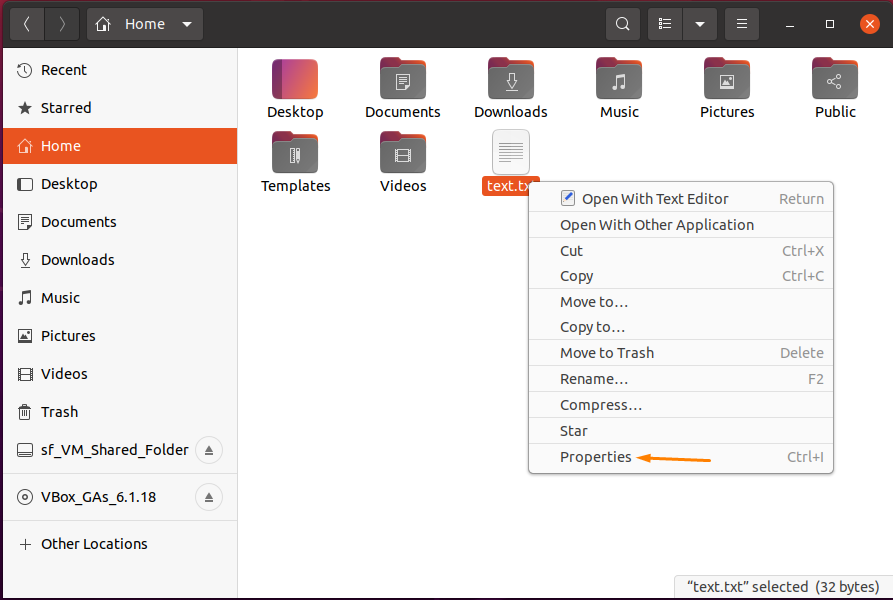
When you hit the “Properties”, it will show you all the necessary details of the “text.txt” with the path:
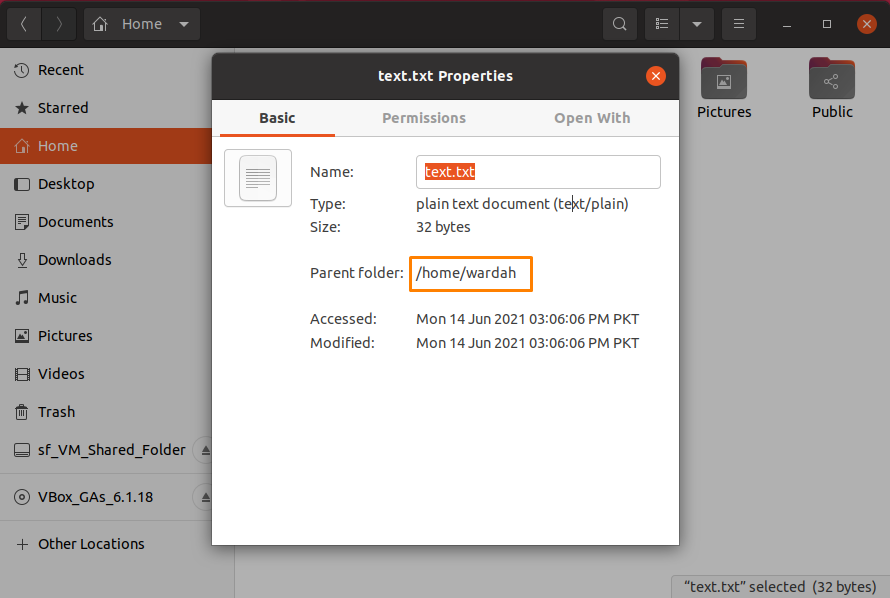
From there, you can copy the path and paste it in terminal.
Once you moved the file, you can rename it using the “mv” command again:
$ sample_file.txt /home/Wardah/Documents/testing.txt

Let’s check through the “ls” command if the file’s name has changed or not:

Example 2: Moving a Folder Into the Directory
Just like in the example above, we moved a file from one location to another. Similarly, there’s no separate way to move the directory as in the “cp” command.
The approach is the same as we did above using the “mv” command:
Create a testing folder and set the name as “testing” using the “mkdir” command. Add the random file in it, like create a “testing.txt” file in it through the “touch” command:
$ mkdir Testing
$ touch Testing.txt

Move the “Testing.txt” file in the “Testing” folder using the “mv” command:

Now, move the “Testing” folder into the “Downloads” directory:
$ mv Testing /home/wardah/Downloads

To confirm, type:
$ ls /home/wardah/Downloads

Example 3: Moving Multiple Files at Once
When we move multiple files at the same time, the “mv” command considers the last directory name as the destination directory:
Let’s move files “sample.txt”, “testing.txt”, and “test.txt” in the “Downloads” directory. For this, open the terminal in the “Documents” directory as all of these files are placed there:
$ mv sample.txt testing.txt text.txt /home/wardah/Downloads

Execute the “ls” command to confirm it:
$ ls /home/wardah/Downloads

As you can see, all files are successfully transferred from the “Documents” directory to the “Downloads” directory.
How to Move Files Using GUI:
There are multiple GUI tools and file management systems available for Linux operating system. The widely used ones are Nautilus, a GNOME file manager, and Dolphin, which is a file manager for KDE. These two file managers are preferred because of their flexibility.
I am currently working on Ubuntu 20.04 that uses a Gnome desktop environment. Therefore, we will see how we can move files from one directory to another through the Nautilus file manager.
GUI makes file transfer relatively easy. We just have to follow a few simple sentences that are listed below:
- Open the Nautilus file manager in the system you’re working on.
- Choose the file you want to relocate and right-click on it.
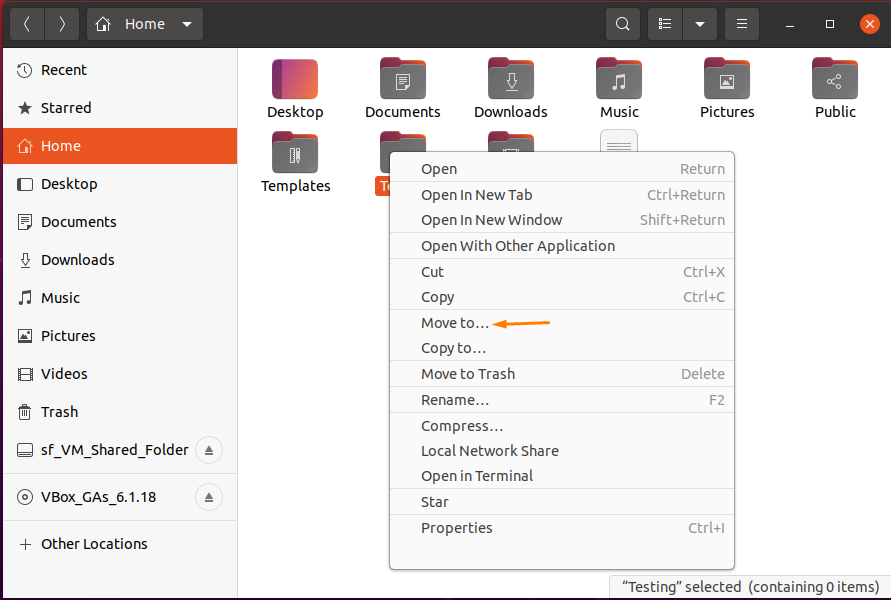
- A Context menu will appear on the screen and navigate towards “Move to” options.
- Once you clicked on the “Move to” option, a window with the list of possible destination directories will appear in front of you.
- Select the new location you want to transfer the file into and press “Select”.
Let’s understand it through an example:
Open the Nautilus file manager in the Ubuntu 20.04:
For the folks confused with the term “Nautilus”, it is just the name of the File manager. And if you are wondering on how to get it, let me display it more explicitly.
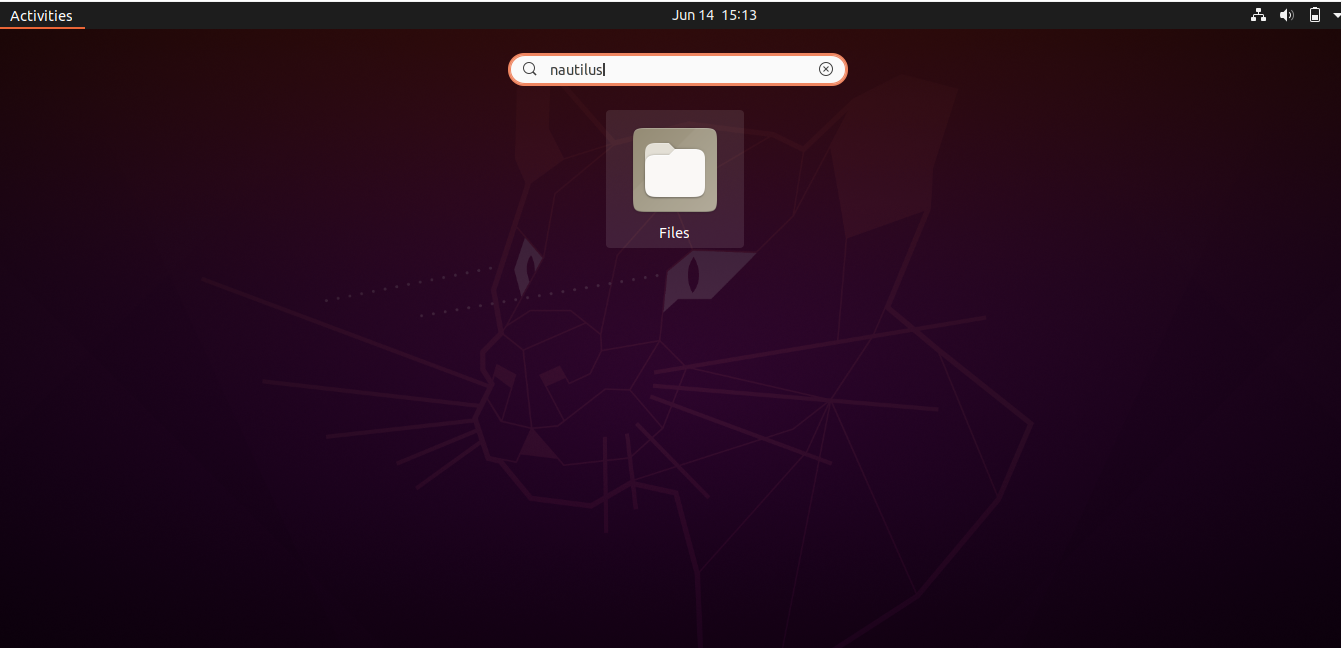
Open the applications menu, search for the file manager, and type “nautilus” or “Files”:
You can see, after typing the nautilus, it reveals the “Files” option. Click on it to get the file manager window:
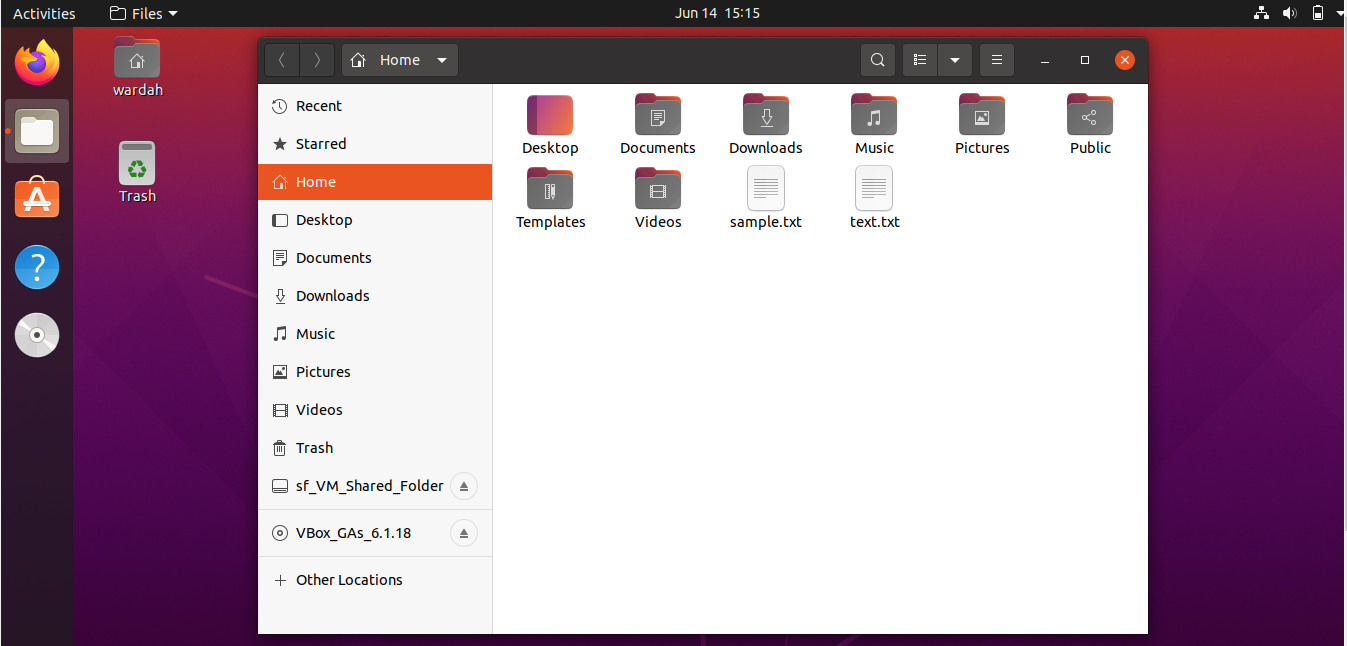
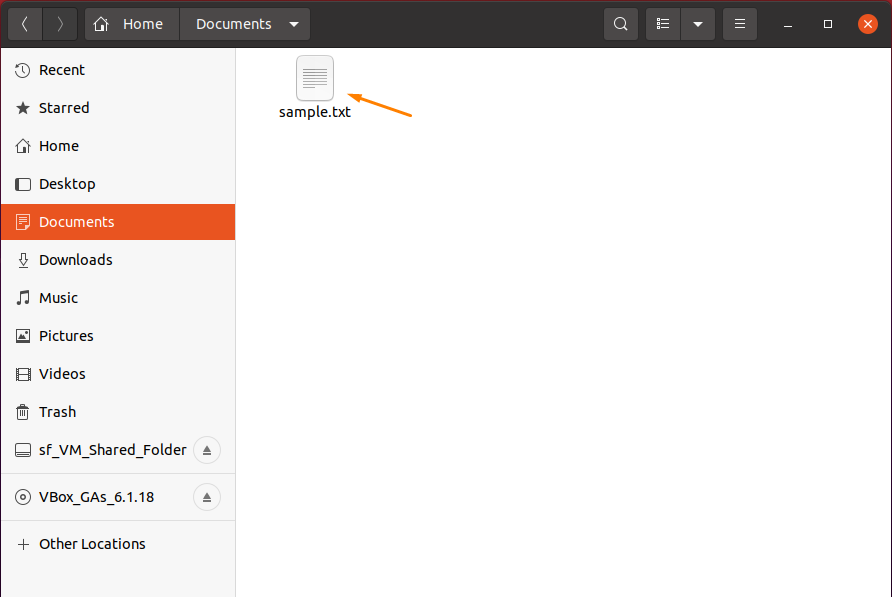
As dsiplayed, there are multiple folders and some text files in it. Suppose I want to move the “sample.txt” text file into another location. Select the “sample.txt” file and right-click on it:
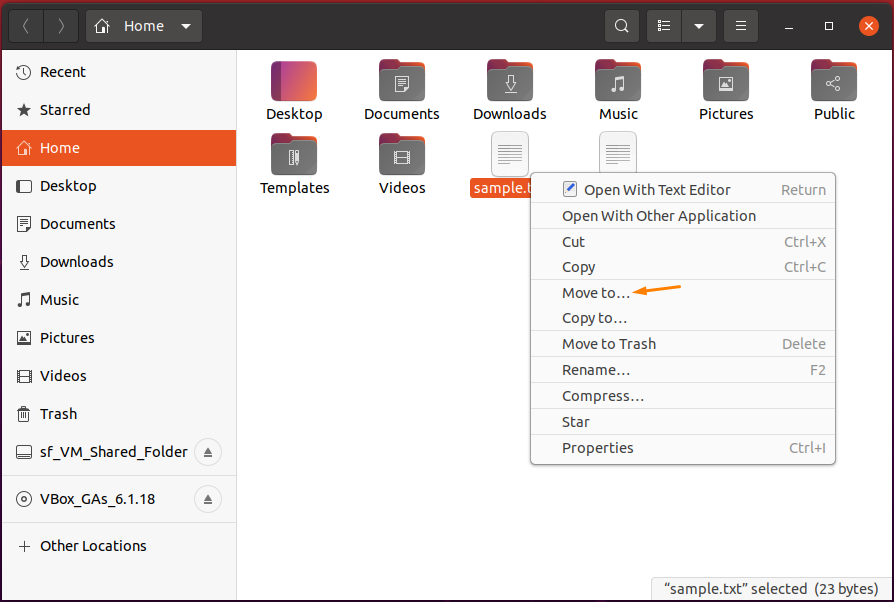
Click on “Move to…”, a list of all possible destinations will appear on the screen:
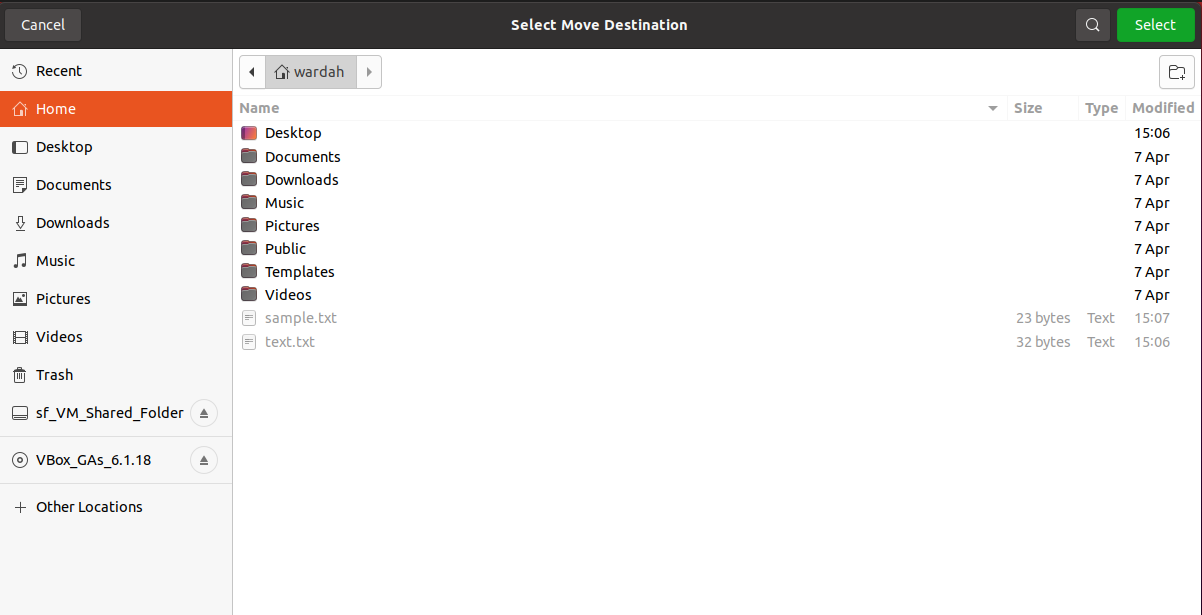
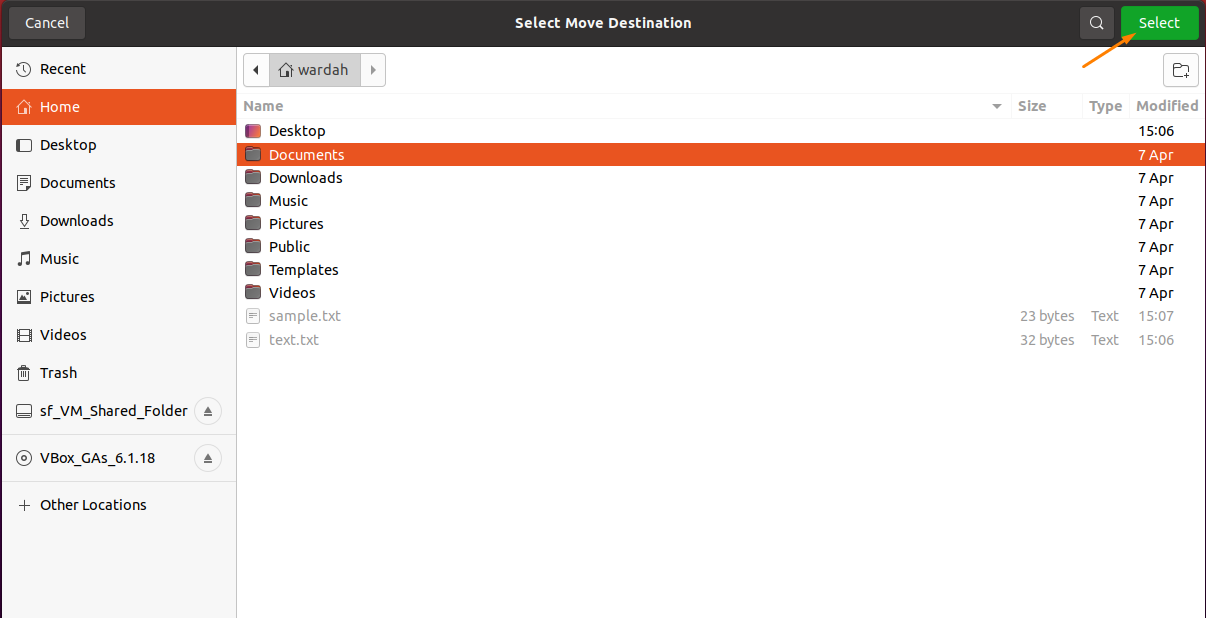
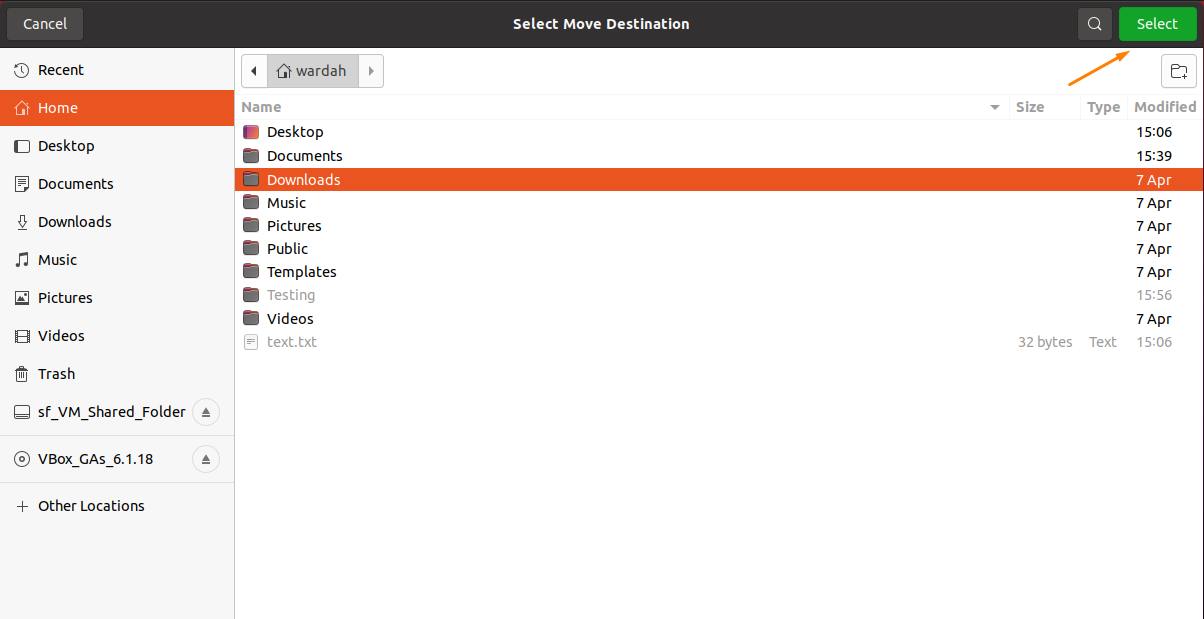
Let’s move the “sample.txt” file to the “Documents” directory. Then, choose it from the window and hit the “Select” button:
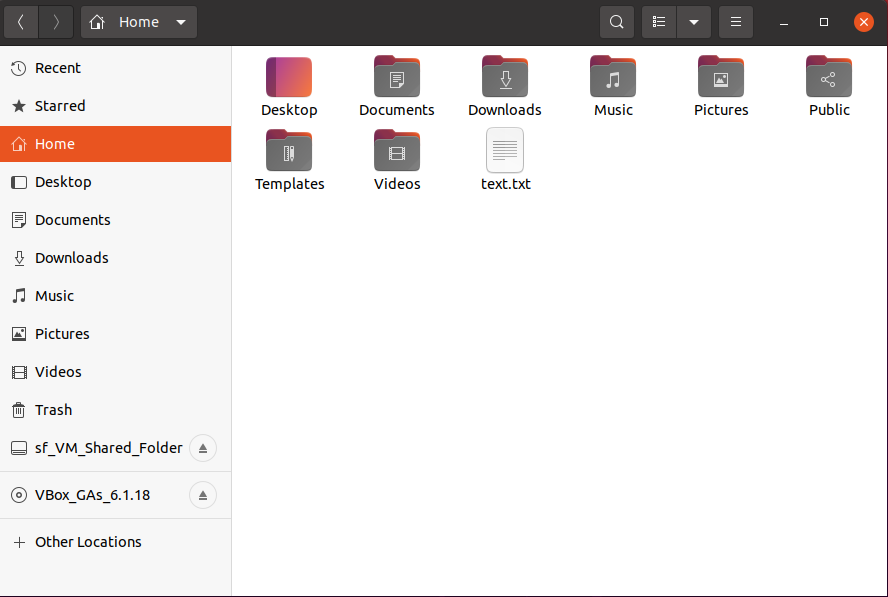
The files have been successfully moved from the “Home” directory to the “Documents” directory.
As you can see, “sample.txt” is no longer present in the “Home” directory:
To verify if it is successfully moved to the destination, open the “Documents” directory and check if the “sample.txt” file exists:
Similarly, if you want to move a directory to another location, you can also do it by repeating the same steps we discussed above. Let’s review it through an example,
create a new folder in the “Home” directory and name it. I am creating a folder by the name of “Testing”, as shown in the following image:

Imagine that we want to move the “Testing” directory/folder to the Downloads directory. So, select the “Testing” folder, right-click on it, and in the sub-menu, navigate towards the “Move to…” option:
A window will open, select the “Downloads” directory to transfer the “Testing” folder to it by clicking the “Select” button:
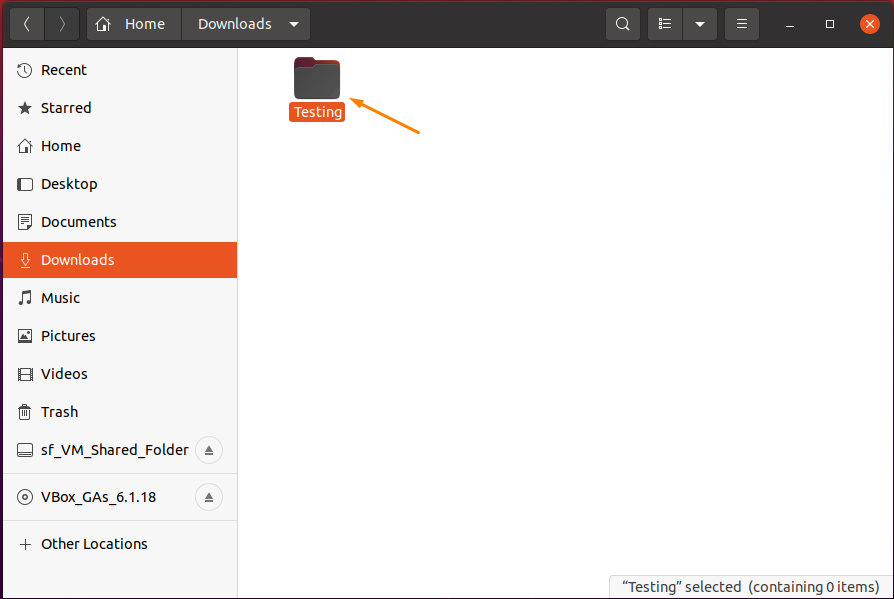
Confirm the moved folder existence in the “Downloads” directory by opening it in the file manager:
As you can see, it is simple to move a file or directory through the “Nautilus” file manager:
Conclusion:
In this guide, we have an in-depth explanation for beginners on how to move files in Linux. Moving a file is not a difficult task if you know exactly how to do it. In a Linux system, we have several ways to perform a single operation as they are designed to make the system comfortable for all types of users.
We have briefly discussed a couple of ways of transferring files to another location in your system. Approaches to move files or folders, such as through GUI and Terminal, are pretty simple and relatively straightforward as it does not require you to be an expert to utilize these approaches. This guide is beneficial as you get a step-by-step discussion of the two different procedures.
For me, both methods are quick and less complex. If you move a file through GUI, simply right-click on the target file and click on the “Move to…” option in the context menu. A window will appear for you to select the destination directory to transfer the file. The file will be removed from the previous location.
If you prefer to use a terminal, then the “mv”, a multi-purpose command, is used. It is not only used to move files/folders but also to rename them. We have performed multiple examples of the “mv” command for better understanding. The procedure is similar in each example; if you follow one example carefully, then you can use the “mv” command anywhere.