This article will cover a guide on installing and using Ksnip image and screenshot annotation utility available for Linux. Developed in C++ and Qt, this application can be used as a replacement for another similar Linux app called “Shutter”, whose development picked up again after a long time. In fact, it has some useful features that are not present in Shutter and it supports Wayland protocol as well. Ksnip works on all Linux distributions, regardless of the desktop environment you use. It is a cross-platform application and it can also be used on macOS and Windows.
Main Features of Ksnip
Besides annotation of screenshots and other images, Ksnip can also be used to directly capture screenshots of your desktop in a variety of layouts. Main features of Ksnip include:
- Built-in post-processing effects.
- Tabbed layout for managing multiple images at once.
- Custom actions that can be defined by application users.
- Ability to overlay predefined and custom stickers on images.
- Command line interface for those who prefer commands and scripts.
- Ability to take delayed screenshots.
- Ability to capture only a part of a visible window or desktop.
- Ability to put watermarks on images.
- Built-in support for uploading edited images to online services.
- Supports capturing images from multiple monitors.
- Ability to undo and redo user edits.
- Supports capturing mouse pointer whose position can be moved later while editing the image.
- Images can be directly opened in Ksnip form the clipboard.
- Supports capturing screenshots through customizable hotkeys.
- Ability to pin and unpin images.
- Numerous built-in image effects that can be used to manipulate colors, add shadows, and so on.
- Ability to censor parts of an image using pixelation or blur tool.
- Many geometrical shape tools are included to overlay shapes and annotate images.
- Highlighter tool with customizable colors.
- It can automatically generate files names for edited images using user defined patterns.
- Images can be exported to PDF format using “Print” functionality.
- Supports custom user scripts.
- Ability to capture full screen screenshots.
- It can be used to capture a screenshot of an opened or focused window only.
- Includes an option to zoom images.
- You can use it to crop and scale images.
- Features movable panes so you can customize the user interface to some extent.
- Shows a system tray indicator in almost all Linux based desktop environments.
- Includes an option to increase or decrease the quality of edited images.
- Users can set their own custom folder to automatically save edited images at a particular location.
Installing Ksnip
Ksnip packages can be downloaded and installed in Linux distributions using numerous ways.
- A universal AppImage package is available here.
- A Universal Flatpak build is available here.
- A universal Snap package is available here.
- Included in default Ubuntu repositories since Ubuntu version 21.04.
- Newer Ubuntu and Debian compatible “.deb” packages are available here.
- Fedora and OpenSUSE compatible “.rpm” packages are available here.
- Packages for Arch Linux are available here.
Using the Screenshot Capturing Function
Once Ksnip is installed on your system, you can use it to capture a screenshot before editing or you can import existing images. To capture a screenshot, launch Ksnip and click on the downward arrow besides the “New” button. Select your desired option to start capturing screenshots. The “New” button will highlight your current selection and remember it on the next launch. So you can use it as a quick shortcut. On the top right corner, you will find an option to take a timed screenshot by adding your desired capture delay in seconds.

Once a screenshot has been captured, it will be available automatically for editing.
Using the Image Annotation and Editing Functionality
To open an existing image, hit
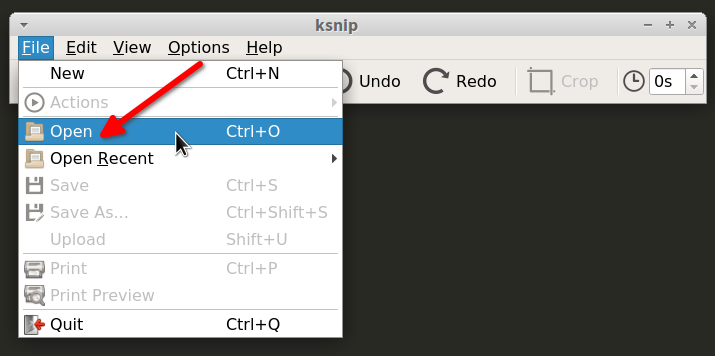
The main annotation and editing window looks like this:
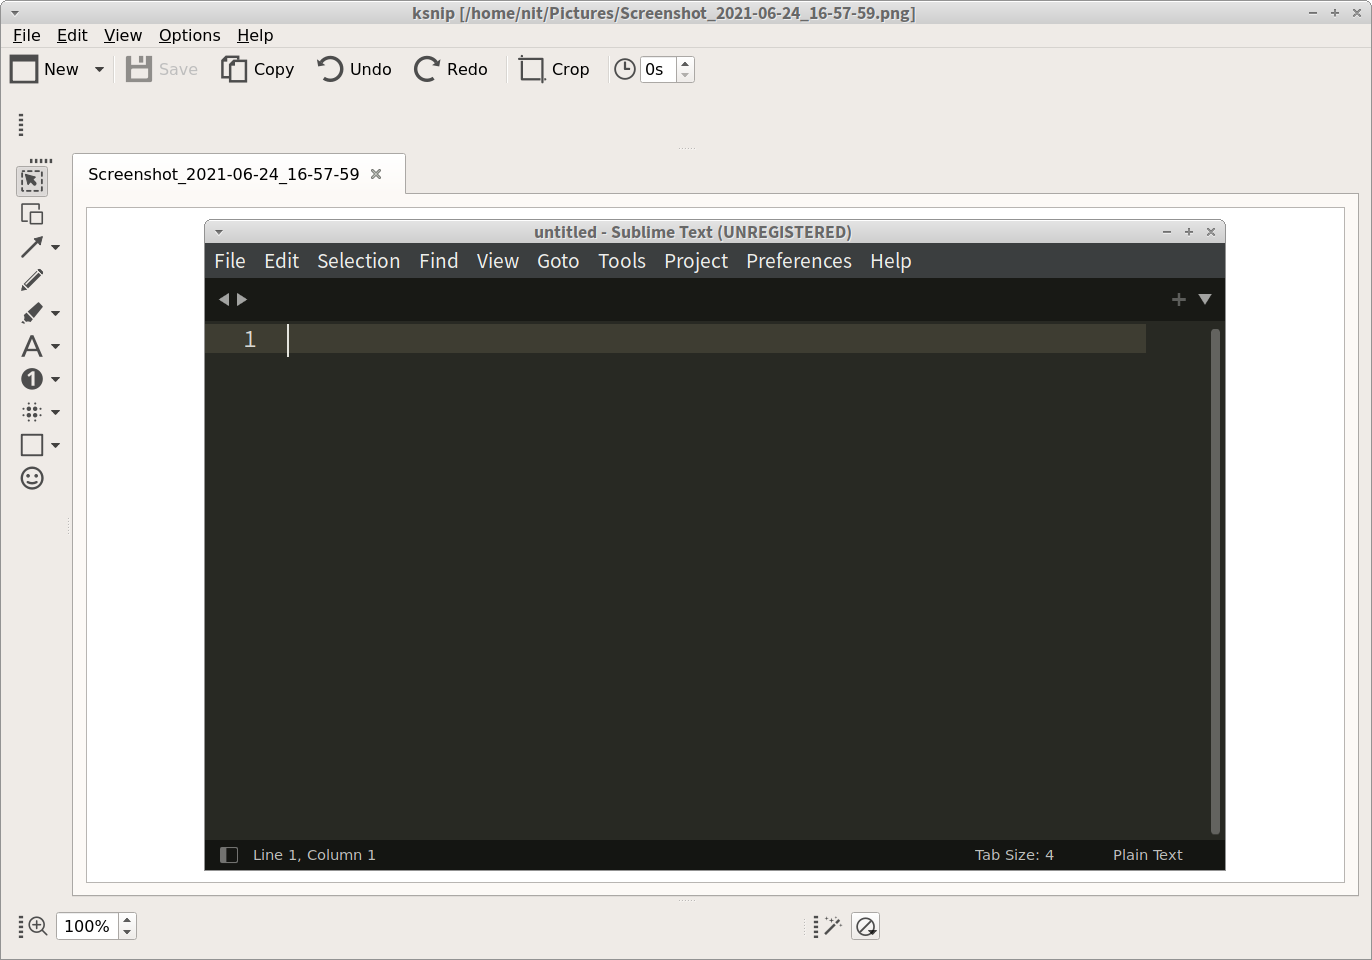
The vertical panel on the left shows various tools that can be used to edit images. These tools include geometrical shapes tool, line tool, selection tool, highlighter tool, censor and obfuscation tool, arrow tool, number tool and a sticker tool. The bottom panel includes options for applying image effects and controls for zooming into images. Once you are satisfied with your edits you can just hit
Conclusion
Ksnip annotation utility is being developed quite actively. It is by far one of the most comprehensive screenshot editing applications available for Linux today. It is nearly on par in functionality with another such utility called “Shutter” which doesn’t seem to work on Wayland at the time of writing this article. If you have used Shutter in the past and are looking for something similar, especially one that works on Wayland as well, Ksnip can be used as an excellent drop-in replacement.