In Linux, the tar command is one of the essential commands as far as file management is concerned. It’s short for Tape Archive, and it’s used for creating & extracting archive files. An archive file is a compressed file containing one or multiple files bundled together for more accessible storage and portability.
This guide will demonstrate, using examples, how to create, list, modify and extract tar achieve files and cover some of the most widely used tar command options.
tar Command Syntax
The tar command takes the following syntax:
$ tar [options][archive-file] [file or dir to be archived]
Let’s check out some of the options that go along with the tar command.
tar Command Options
The tar command provides the following options:
-c: This creates an archive file.
-x: The option extracts the archive file.
-f: Specifies the filename of the archive file.
-v: This prints verbose information for any tar operation on the terminal.
-t: This lists all the files inside an archive file.
-u: This archives a file and then adds it to an existing archive file.
-r: This updates a file or directory located inside a .tar file
-z: Creates a tar file using gzip compression
-j: Create an archive file using the bzip2 compression
-W: The -w option verifies an archive file.
Create an archive file
The tar utility allows you to create archive files using various compression algorithms such as xz, gzip, and bzip2. The accepted convention is to suffix the archive file with the compression suffix.
For example, when using the gzip compression (using the -z option), the file should bear the .tar.gz suffix.
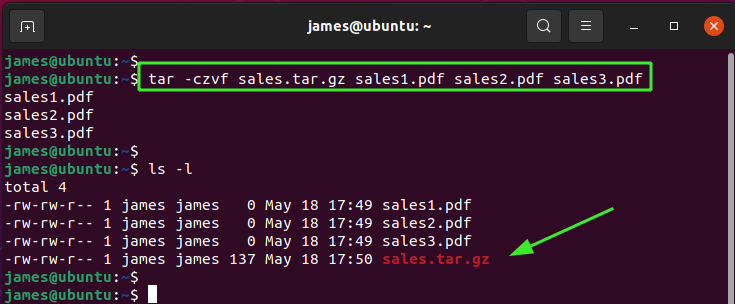
For example, the command below creates an archive file called sales.tar.gz from the three PDF files.
$ tar -czvf sales.tar.gz sales1.pdf sales2.pdf sales3.pdf
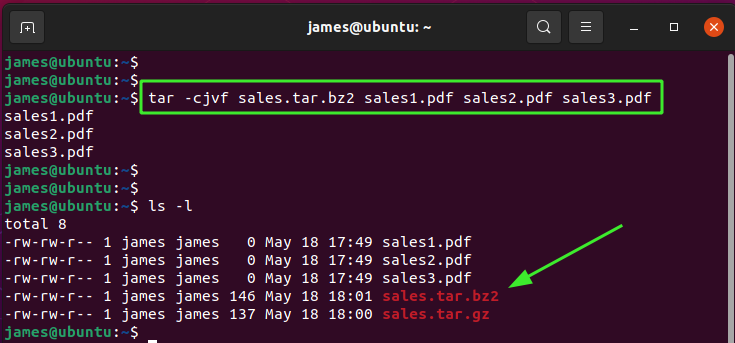
Suppose you want to create an archive file using the bzip2 compression ( using the -j option ) algorithm. The archive file should be suffixed with a .tar.bz2 extension.
Using our first example, we can compress the three PDF files using the bzip2 algorithm as follows.
$ tar -cjvf sales.tar.bz2 sales1.pdf sales2.pdf sales3.pdf
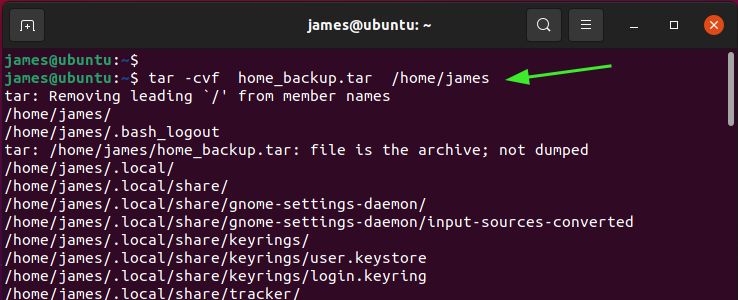
Apart from archiving files, you can also compress directories. For example, the command below creates a simple tar archive file of the home directory.
$ tar -cvf home.tar /home/james
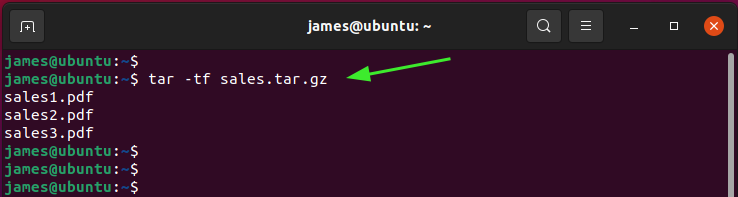
List the contents of an archive file
Using the -t option, you can have a peek or list the contents of an archive file without extracting it as shown.
Extract an archive file in the current directory
To extract an archive file in the current working directory, use the -x option as shown below. In the example below, we are uncompressing or extracting the documents.tar.gz archive, which contains three text files.
$ tar -xvf documents.tar.gz

Extract an archive file in a separate directory
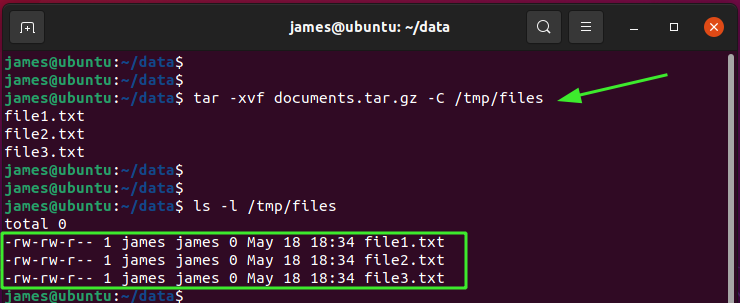
To extract an archive file to a different directory, the -C option is followed by the destination path, as shown in the example below.
$ tar -xvf documents.tar.gz -C /tmp/files
Extract specific files from an archive
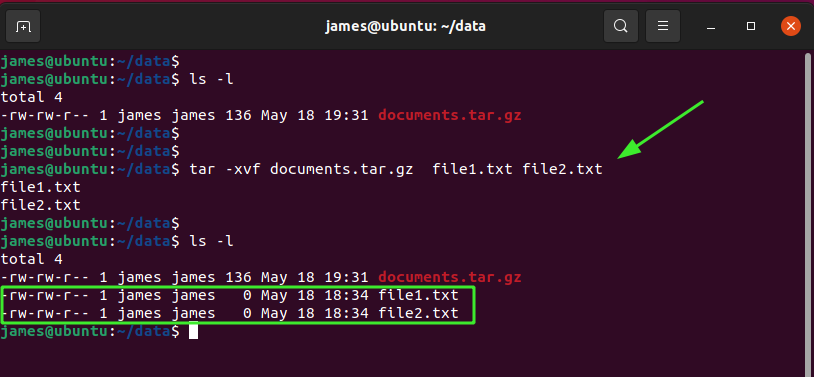
You can extract certain specified files by listing them one by one on the command line. In the example below, we are extracting the files file1.txt and file2.txt from the documents.tar.gz archive.
$ tar -xvf documents.tar.gz file1.txt file2.txt
Add a file to a .tar archive
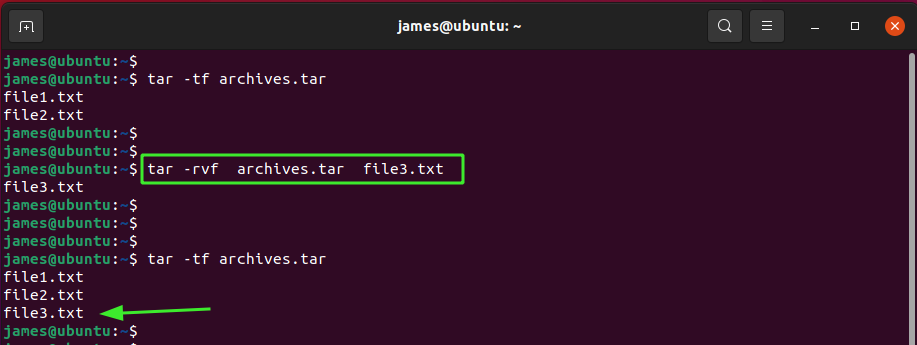
To add or append a .tar archive file, use the -r option as shown. Here, we are adding the file file3.txt to the archives.tar archive.
$ tar -rvf archives.tar file3.txt
Remove a file from a .tar archive
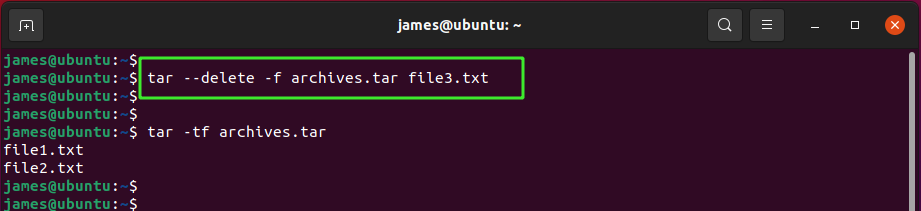
To remove a file from a .tar archive, use the –delete option as shown. Here, we are doing the complete opposite and removing the file file3.txt instead.
$ tar –delete -f archives.tar file3.txt
Wrapping up
As you have seen, the tar command is essential in creating and extracting archive files. It provides an array of command options that help you manage archive files created from various algorithms such as gzip, xz, and bzip2.