KVM (
Kernel-Based Virtual Machine) is a
virtualization software that provides an ability to run multiple virtual machines (guests) with the help of hardware virtualization extensions. It supports a wide variety of guest operating systems such as
Linux,
Windows, Solaris, and much more.
Virtual machines can be created or managed using command-line tools ( virsh, virt-install, and guestfish) or available graphical tools (
Cockpit web console).
Here, we will see how to install
KVM on
CentOS 8 /
RHEL 8 and learn
how to create virtual machines.
Prerequisites
Check VT Support
As said earlier, You can run virtual machines only if the CPU has the support of hardware virtualization, either Intel VT or AMD-V.
To find whether your CPU supports VT features, run the following command.
egrep '(vmx|svm)' /proc/cpuinfo | wc -l
If the above command returns other than zero, then your hardware has VT enabled else it doesn’t.
Network Bridge
Create a network bridge on your system to let virtual machines can communicate with the external networks.
Here, we will create a virtual bridge called br0. To do that, first, create a bridge network configuration file.
vi /etc/sysconfig/network-scripts/ifcfg-br0
Update the configuration file with IP address and other network information. This bridge will be my primary network connection.
DEVICE="br0"
BOOTPROTO="static"
IPADDR="192.168.0.10"
NETMASK="255.255.255.0"
GATEWAY="192.168.0.1"
DNS1="192.168.0.1"
ONBOOT="yes"
TYPE="Bridge"
Edit your network interface’s configuration file to use the bridge br0.
vi /etc/sysconfig/network-scripts/ifcfg-ens33
Update the configuration with the below information.
DEVICE="ens33"
TYPE="Ethernet"
BOOTPROTO="none"
ONBOOT="yes"
BRIDGE="br0"
Reload the connection profile and restart the NetworkManager.
nmcli connection reload

systemctl restart NetworkManager
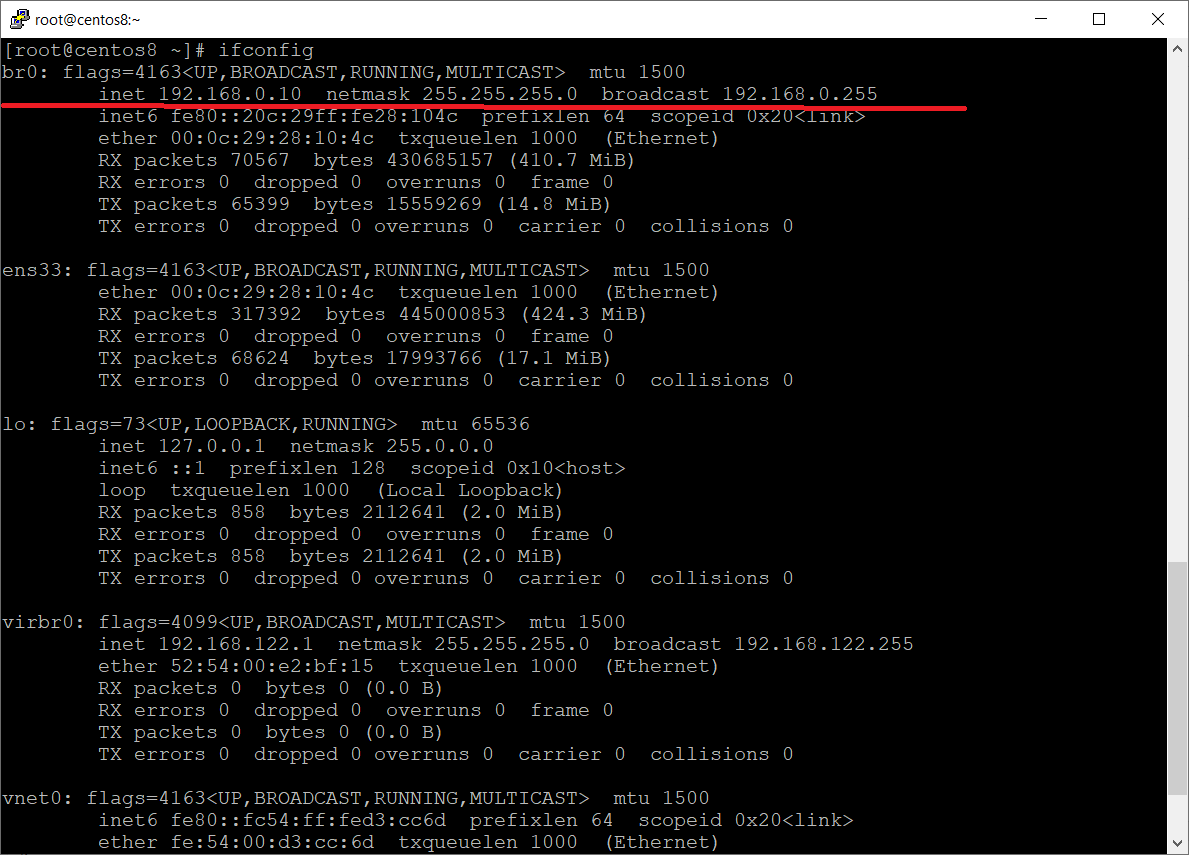
Validate the network configuration using the
ifconfig command.
ifconfig
Output:
Install KVM
Install the virtualization module. This module will install all the necessary packages for the system to support virtualization.
dnf module install -y virt
Install the virt-install and virt-viewer packages.
dnf install -y virt-install virt-viewer
virt-install – Command-line tool to create virtual machines.
virt-viewer – Graphical console
Run the below command to validate if the host is ready to run virtual machines.
virt-host-validate
Output:

  QEMU: Checking for hardware virtualization                                 : PASS
  QEMU: Checking if device /dev/kvm exists                                   : PASS
  QEMU: Checking if device /dev/kvm is accessible                            : PASS
  QEMU: Checking if device /dev/vhost-net exists                             : PASS
  QEMU: Checking if device /dev/net/tun exists                               : PASS
  QEMU: Checking for cgroup 'cpu' controller support                         : PASS
  QEMU: Checking for cgroup 'cpuacct' controller support                     : PASS
  QEMU: Checking for cgroup 'cpuset' controller support                      : PASS
  QEMU: Checking for cgroup 'memory' controller support                      : PASS
  QEMU: Checking for cgroup 'devices' controller support                     : PASS
  QEMU: Checking for cgroup 'blkio' controller support                       : PASS
  QEMU: Checking for device assignment IOMMU support                         : WARN (No ACPI IVRS table found, IOMMU either disabled in BIOS or not supported by this hardware platform)
If you get QEMU: Checking for hardware virtualization: FAIL (Only emulated CPUs are available, performance will be significantly limited), then your machine can not run virtual machines.
Create and Manage Virtual Machines
If the host validation is good, then we can go and create virtual machines using either command-line or graphical interface.
Command Line Mode
The virt-install command is used to create virtual machines. The command needs few mandatory arguments to create a virtual machine such as VM name, CPU, memory, disk, network, installation media location, OS variant, and more.
virt-install --name=itzgeekguest --ram=1024 --vcpus=1 --os-type=linux --os-variant=rhel6.0 --cdrom=/tmp/CentOS-6.10-x86_64-minimal.iso --network bridge=br0 --graphics vnc,port=5901,listen=0.0.0.0 --disk path=/var/lib/libvirt/images/itzgeekguest.qcow2,size=10
| Arguments | Purpose |
|---|---|
| –name | Name of the Virtual machine |
| –ram | Memory size in MB |
| –vcpus | Virtual CPU’s in numbers |
| –os-type | OS types like Linux, Windows, etc. |
| –os-variant | OS variant like RHEL 6, Solaris |
| –cdrom | Location of the ISO image |
| –network | Networking with Options |
| –graphics | Guest Console (VNC with port number) |
| –disk-path | Location of the disk (qcow2) with a size |
Once you have run the above command, it will create a virtual machine and starts the VNC viewer session for the graphical console.
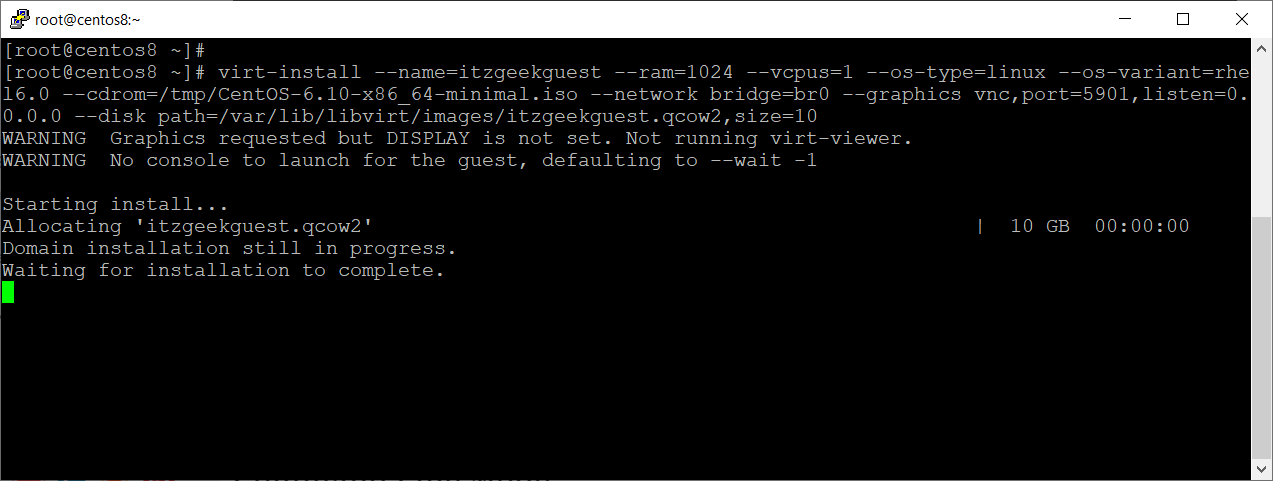
The virt-install command will not exit unless the os installation completes. So, open a new terminal and continue.
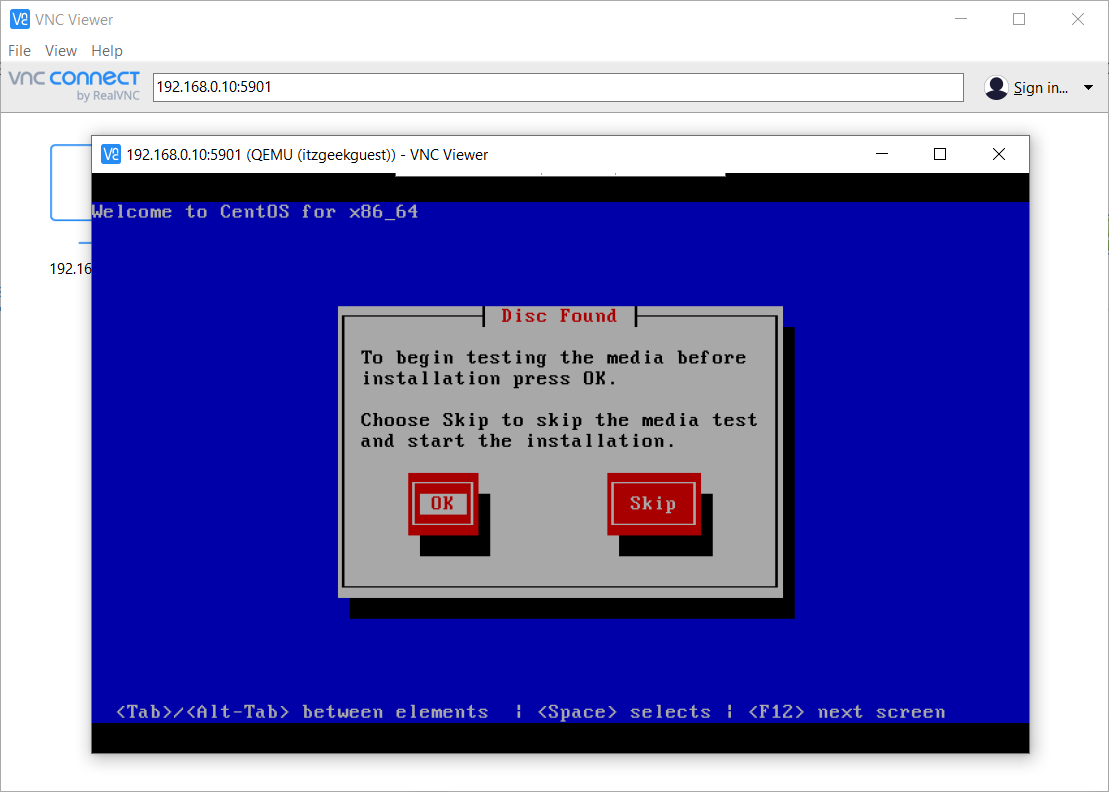
Allow the VNC connections in the firewall.
firewall-cmd --permanent --add-port=5901/tcp

firewall-cmd --reload
Open a VNC viewer and access the VM console.
Few important commands to manage virtual machines.
List all virtual machines:
virsh list --all
Start a virtual machine:
virsh shutdown
Gracefully shutdown a virtual machine:
virsh shutdown
Restart a virtual machine:
virsh reset
Force stop a virtual machine:
virsh destroy
Delete a virtual machine along with its storage volumes:
virsh undefine --remove-all-storage
Graphical Mode
CentOS 8 /
RHEL 8 comes with
Cockpit, a web-based interface for managing local and remote Linux systems.
READ:
How To Install Cockpit on CentOS 8 / RHEL 8
The Cockpit provides additional add-ons to manage virtual machines from its console.
dnf install -y cockpit-machines
After the installation, restart the Cockpit service.
systemctl restart cockpit.socket
Access the Cockpit and go to the Virtual Machines page. You should see all your existing virtual machines.
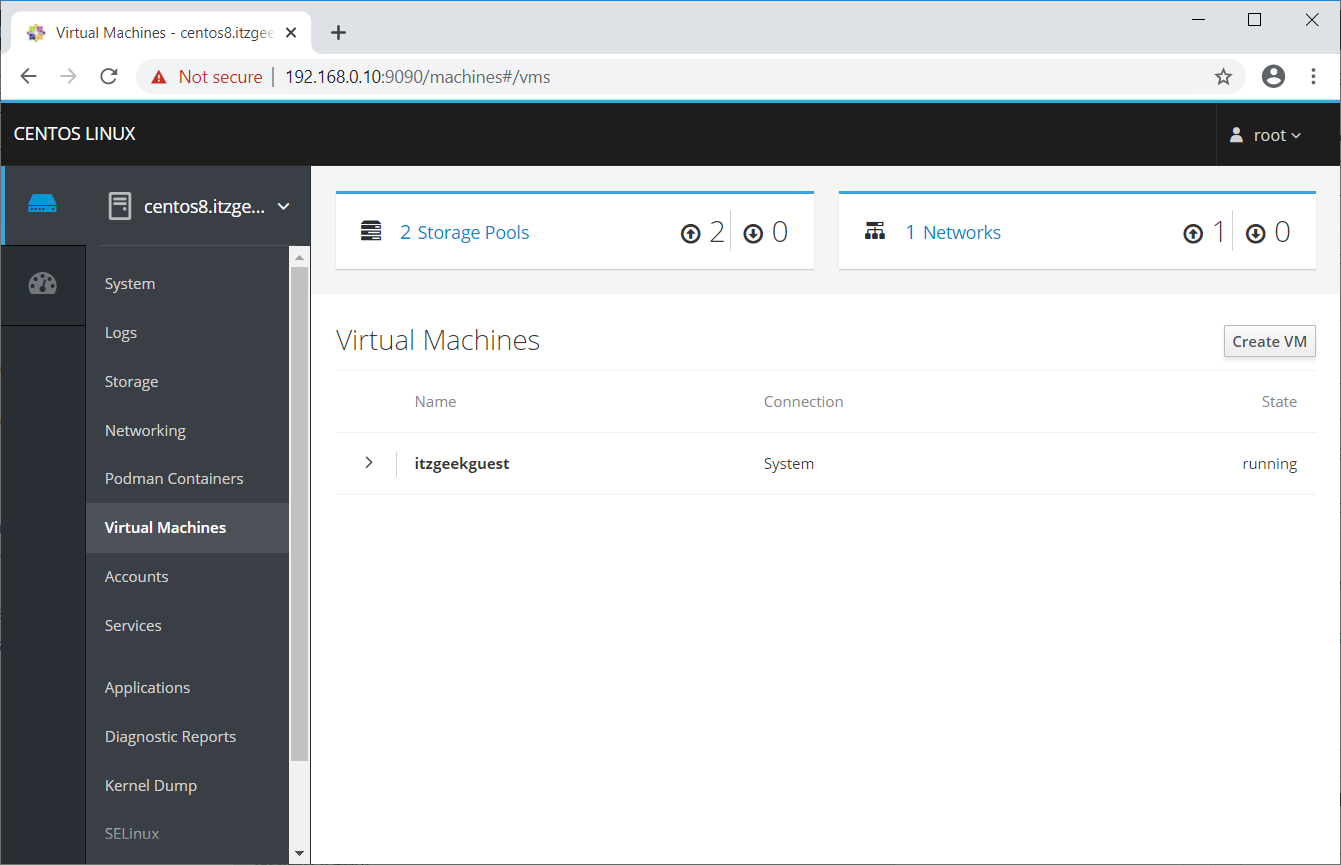
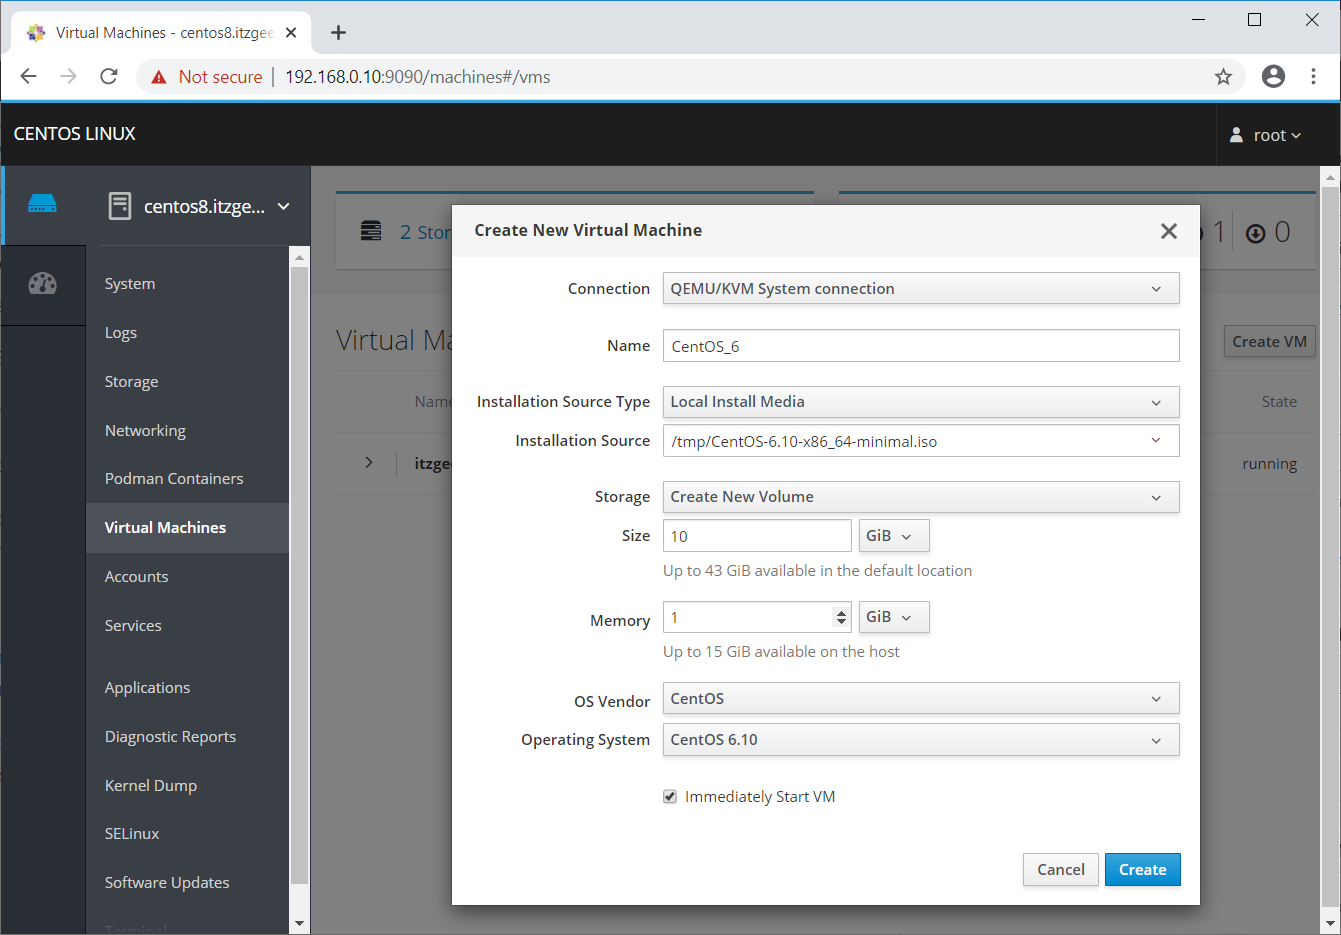
If you don’t have any virtual machines, go ahead and create a new VM by clicking on Create VM. Fillup the Create New Virtual Machine form and click on Create.
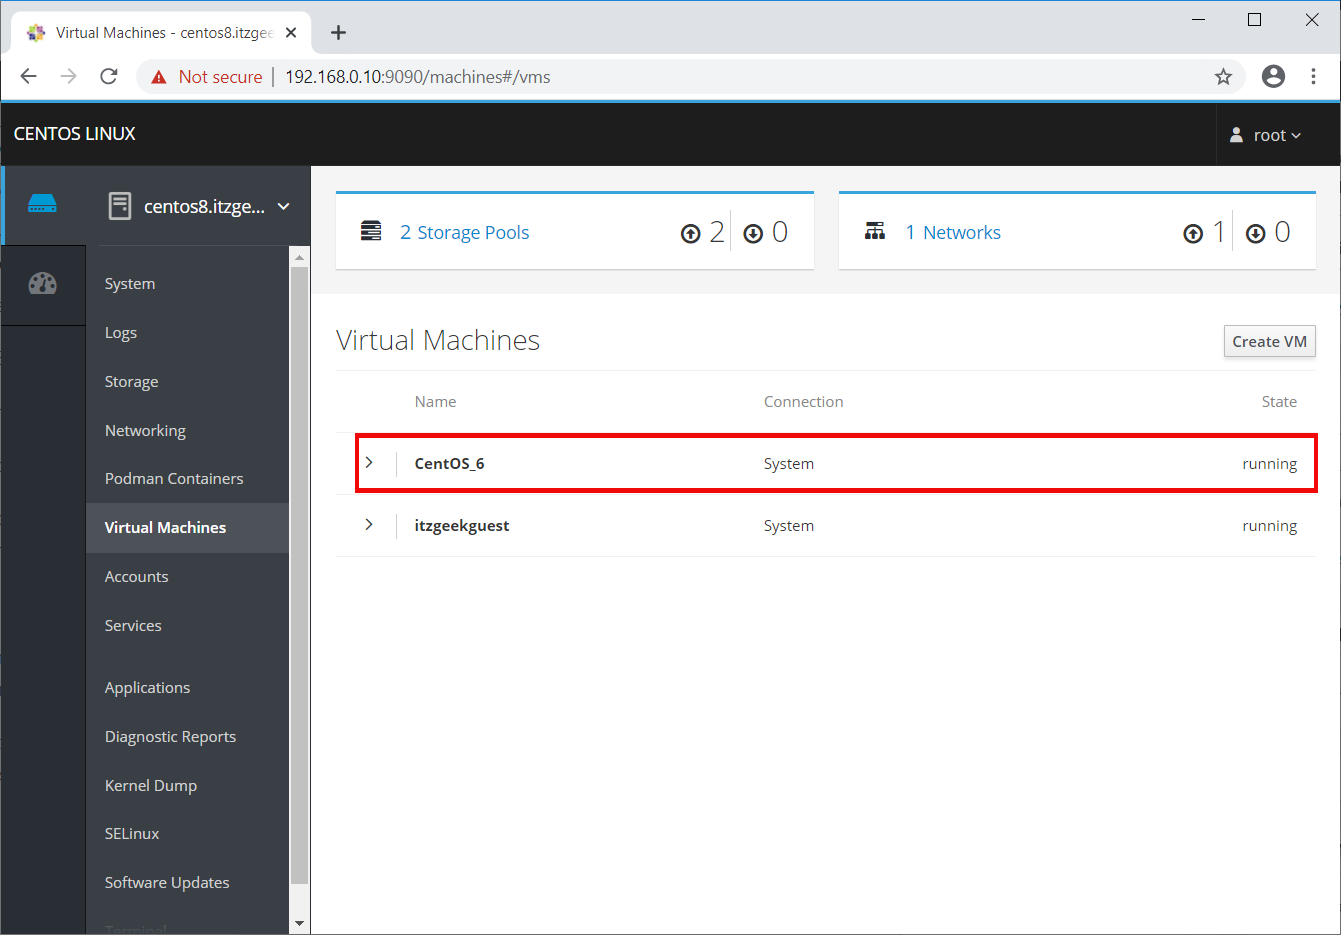
In a few seconds, you should see the newly created VM.
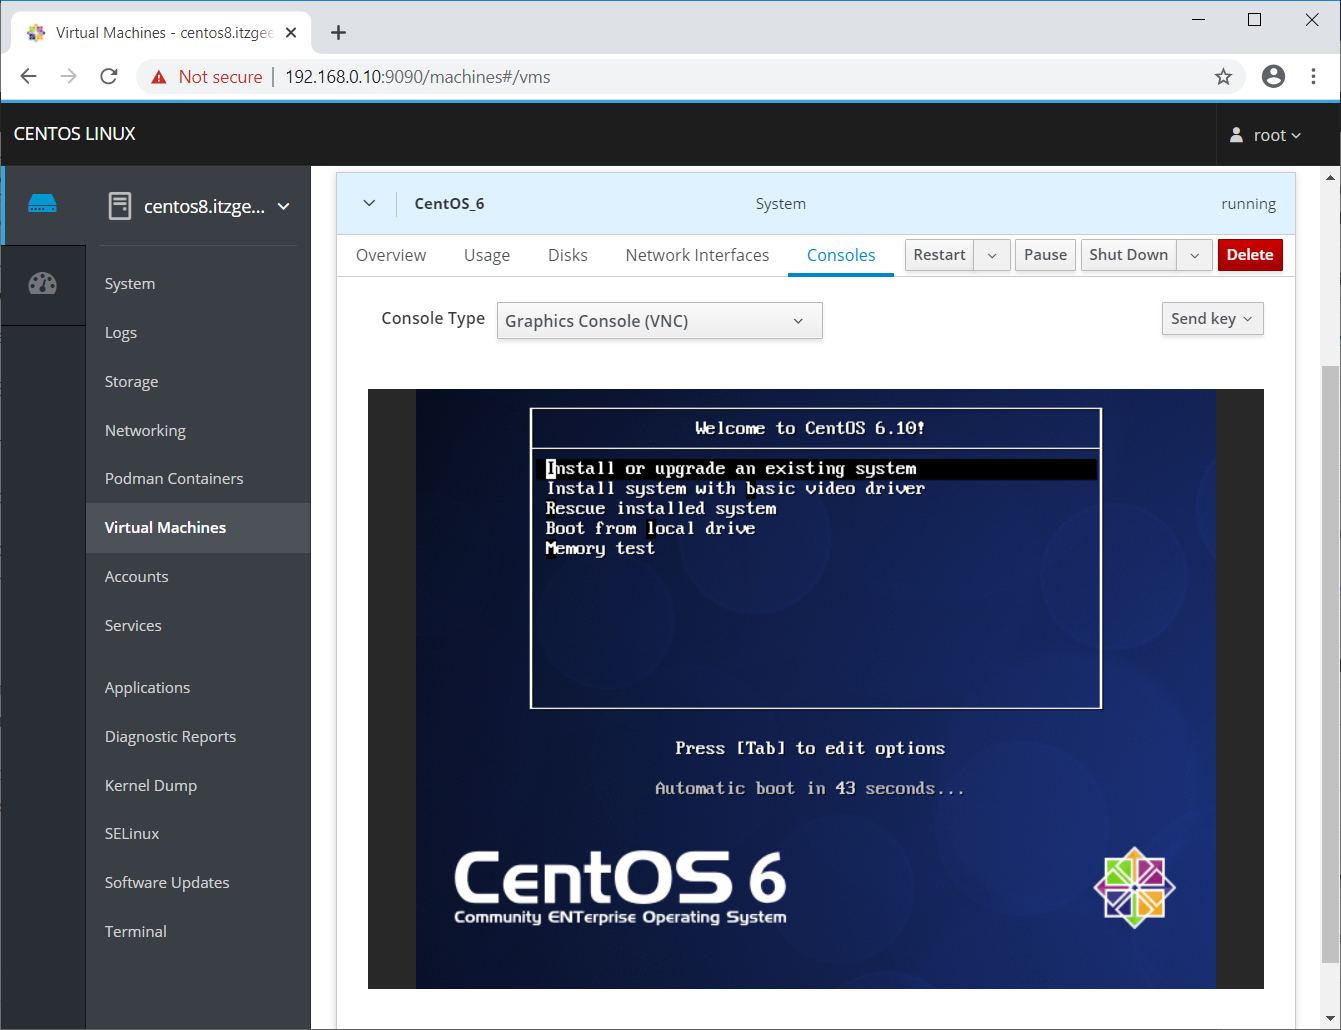
Click on the VM and go to the Console tab. You will see the installation screen of
CentOS 6.
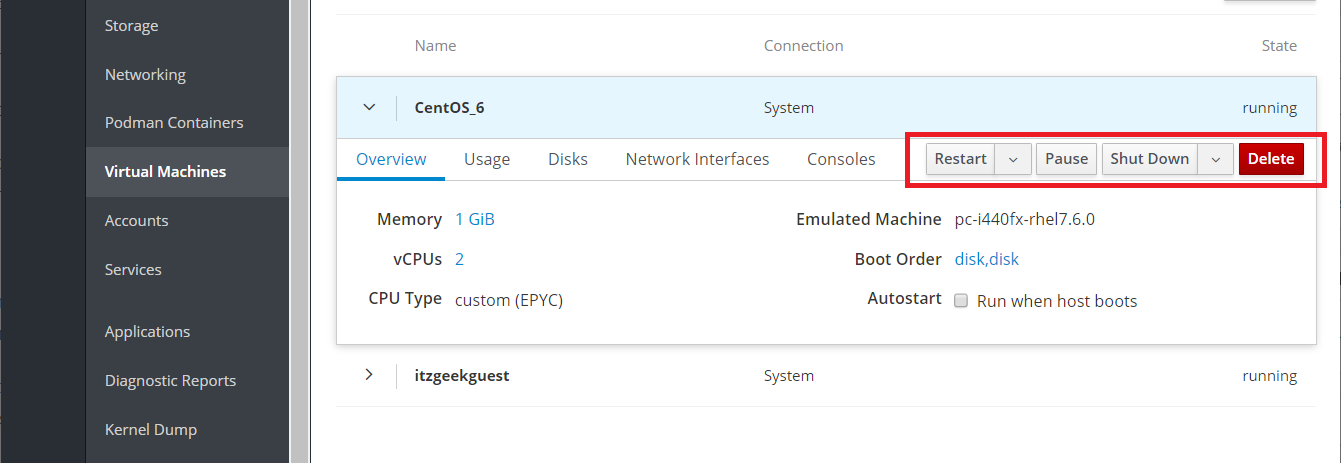
You can perform VM’s power cycle actions such as start, shutdown, restart, pause the selected virtual machine.
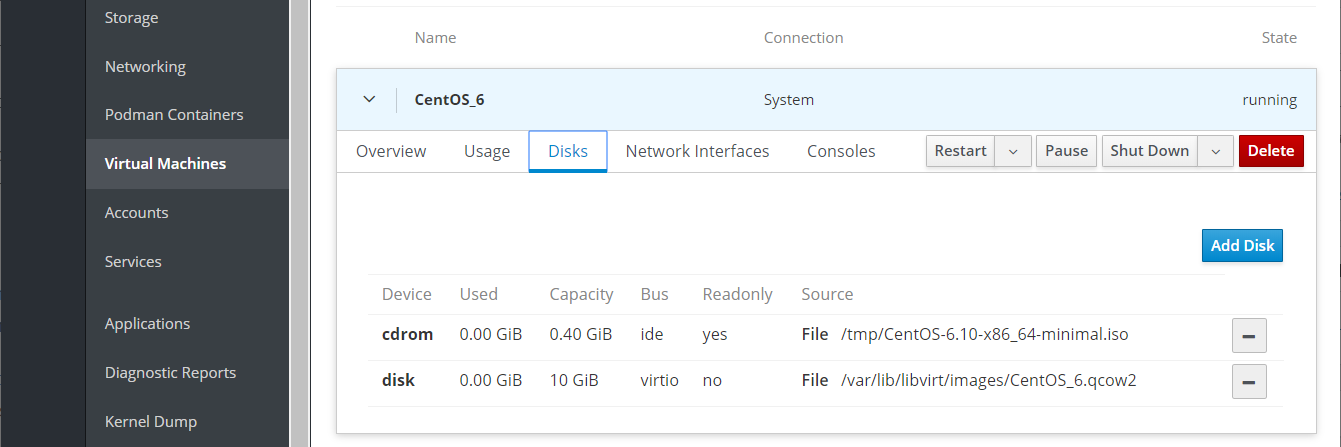
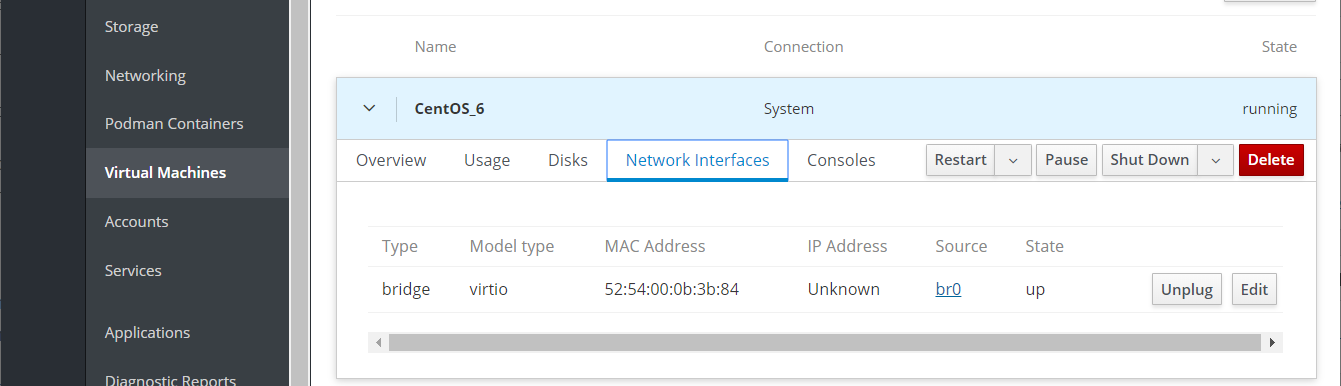
You can manage the virtual machine by going to the Disks and Networks tab. There you can add, modify, and remove disk/network devices.
Disks:
Networks:
Conclusion
That’s All. I hope you learned how to install
KVM on
CentOS 8 /
RHEL 8 and
create virtual machines.