phpMyAdmin is a unfastened and open-source, web-based device for managing the MySQL and MariaDB servers. It is broadly used to control the database via cyber web webhosting corporations and directors who’re new to the database.
phpMyAdmin is helping the device administrator to accomplish databases actions similar to developing, deleting, querying, database, tables, columns, and so on.
In this publish, we will be able to see how you can set up phpMyAdmin with Nginx on Debian 11 / Debian 10.
Prerequisites
Install MariaDB / MySQL Server
To set up phpMyAdmin, your device will have to have a database example working and an Nginx cyber web server.
Standalone Database
Follow the under tutorials and get ready your device for putting in phpMyAdmin.
Step 1: How To Install MariaDB on Debian 10 / How To Install MariaDB on Debian 11 / How To Install MySQL 8.0/5.7 on Debian 11/10
Then,
Step 2: How To Install LEMP Stack on Debian 10 / How To Install LEMP Stack on Debian 11
You can skip the database section in Step 2 – LEMP stack educational if in case you have adopted Step 1 – MariaDB set up.
Install PHP extensions for phpMyAdmin to connect to the database.
sudo apt set up -y php-json php-mbstring php-xml
LEMP Stack
READ: How To Install LEMP Stack on Debian 10 / How To Install LEMP Stack on Debian 11
Install PHP extensions for phpMyAdmin to connect to the database.
sudo apt set up -y php-json php-mbstring php-xml
Install phpMyAdmin
The phpMyAdmin bundle is now to be had within the Debian repository. But, we don’t use it right here since it’s an older model. So, we will be able to obtain the newest model from the legit web site.
wget https://information.phpmyadmin.web/phpMyAdmin/5.1.1/phpMyAdmin-5.1.1-all-languages.tar.gz
Extract phpMyAdmin the usage of the tar command.
tar -zxvf phpMyAdmin-5.1.1-all-languages.tar.gz
Move the phpMyAdmin for your desired location.
sudo mv phpMyAdmin-5.1.1-all-languages /usr/percentage/phpMyAdmin
Configure phpMyAdmin
Copy the pattern configuration record.
sudo cp -pr /usr/percentage/phpMyAdmin/config.pattern.inc.php /usr/percentage/phpMyAdmin/config.inc.php
Edit the configuration record.
sudo nano /usr/percentage/phpMyAdmin/config.inc.php
Generate a blowfish secret and replace the name of the game within the configuration record.
$cfg['blowfish_secret'] = 'CfX1la/aG83gx1{7rADus,iqz8RzeV8x'; /* YOU MUST FILL IN THIS FOR COOKIE AUTH! */
Also, uncomment the phpMyAdmin garage settings.
/**
 * phpMyAdmin configuration garage settings.
 */

/* User used to govern with garage */
$cfg['Servers'][$i]['controlhost'] = 'localhost';
// $cfg['Servers'][$i]['controlport'] = '';
$cfg['Servers'][$i]['controluser'] = 'pma';
$cfg['Servers'][$i]['controlpass'] = 'pmapass';

/* Storage database and tables */
$cfg['Servers'][$i]['pmadb'] = 'phpmyadmin';
$cfg['Servers'][$i]['bookmarktable'] = 'pma__bookmark';
$cfg['Servers'][$i]['relation'] = 'pma__relation';
$cfg['Servers'][$i]['table_info'] = 'pma__table_info';
$cfg['Servers'][$i]['table_coords'] = 'pma__table_coords';
$cfg['Servers'][$i]['pdf_pages'] = 'pma__pdf_pages';
$cfg['Servers'][$i]['column_info'] = 'pma__column_info';
$cfg['Servers'][$i]['history'] = 'pma__history';
$cfg['Servers'][$i]['table_uiprefs'] = 'pma__table_uiprefs';
$cfg['Servers'][$i]['tracking'] = 'pma__tracking';
$cfg['Servers'][$i]['userconfig'] = 'pma__userconfig';
$cfg['Servers'][$i]['recent'] = 'pma__recent';
$cfg['Servers'][$i]['favorite'] = 'pma__favorite';
$cfg['Servers'][$i]['users'] = 'pma__users';
$cfg['Servers'][$i]['usergroups'] = 'pma__usergroups';
$cfg['Servers'][$i]['navigationhiding'] = 'pma__navigationhiding';
$cfg['Servers'][$i]['savedsearches'] = 'pma__savedsearches';
$cfg['Servers'][$i]['central_columns'] = 'pma__central_columns';
$cfg['Servers'][$i]['designer_settings'] = 'pma__designer_settings';
$cfg['Servers'][$i]['export_templates'] = 'pma__export_templates';
Credit: TECHIES WORLD
Import the create_tables.sql to create tables for phpMyAdmin.
sudo mysql < /usr/percentage/phpMyAdmin/sql/create_tables.sql -u root -p
Login to MariaDB.
sudo mysql -u root -p
Add the person and grant permission to phpMyAdmin’s database.
CREATE USER 'pma'@'localhost' IDENTIFIED BY 'pmapass';

GRANT ALL PRIVILEGES ON phpmyadmin.* TO 'pma'@'localhost' WITH GRANT OPTION;

FLUSH PRIVILEGES;

EXIT;
Create a digital host configuration record for phpMyAdmin (Ex. phpMyAdmin.conf) below the /and so on/nginx/conf.d listing.
sudo nano /and so on/nginx/conf.d/phpMyAdmin.conf
Use the next data to create a digital host for phpMyAdmin. Change the area call (server_name) as in keeping with your requirement.
server {
   pay attention 80;
   server_name pma.holhol24.native;
   root /usr/percentage/phpMyAdmin;

   location / {
      index index.php;
   }

## Images and static content material is handled other
   location ~* ^.+.(jpg|jpeg|gif|css|png|js|ico|xml)$ {
      access_log off;
      expires 30d;
   }

   location ~ /.ht {
      deny all;
   }

   location ~ /(libraries|setup/frames|setup/libs) {
      deny all;
      go back 404;
   }

   location ~ .php$ {
      come with /and so on/nginx/fastcgi_params;
      fastcgi_pass unix:/run/php/php7.4-fpm.sock;
      fastcgi_index index.php;
      fastcgi_param SCRIPT_FILENAME /usr/percentage/phpMyAdmin$fastcgi_script_name;
   }
}
Create a tmp listing for phpMyAdmin after which exchange the permission.
sudo mkdir /usr/percentage/phpMyAdmin/tmp

sudo chmod 777 /usr/percentage/phpMyAdmin/tmp
Set the possession of the phpMyAdmin listing.
sudo chown -R www-data:www-data /usr/percentage/phpMyAdmin
Restart the products and services.
sudo systemctl restart nginx

sudo systemctl restart php7.4-fpm
Create DB & User
By default, the MariaDB root person is permitted to log in in the community by means of Unix socket (MariaDB v10.4 and under). So, we will be able to create a database person and login to phpMyAdmin with that person.
CREATE DATABASE app_db;

CREATE USER 'app_user'@'localhost' IDENTIFIED BY 'password';

GRANT ALL PRIVILEGES ON app_db.* TO 'app_user'@'localhost' WITH GRANT OPTION;

FLUSH PRIVILEGES;

EXIT;
If required, you'll be able to disable Unix socket authentication and permit local password login.
Access phpMyAdmin
Access the phpMyAdmin the usage of the browser via going to the under URL.
http://your-fully-qualified-domain-name
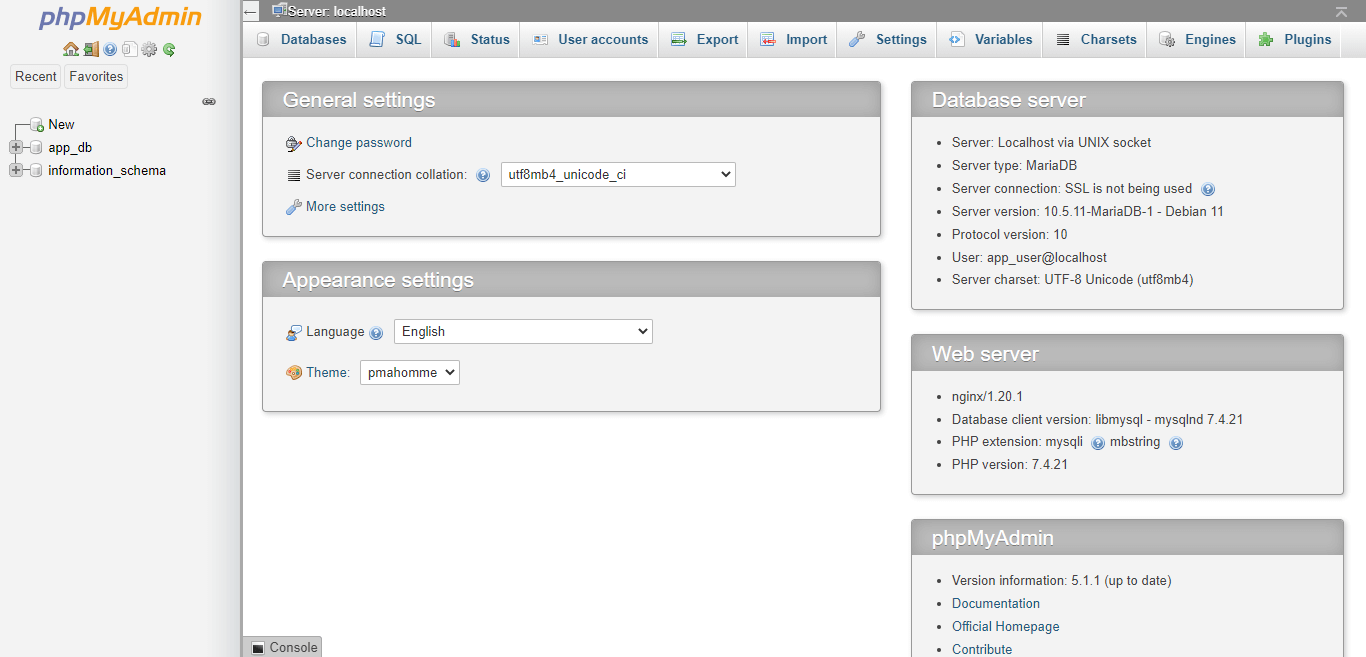
Log in with the database person we simply created within the earlier step.
You gets the house web page the place you'll be able to arrange databases.
Conclusion
I am hoping this publish helped you put in phpMyAdmin with Nginx on Debian 11 / Debian 10. Please percentage your comments within the feedback segment.